Simple USB Midi Foot Switch
thingiverse
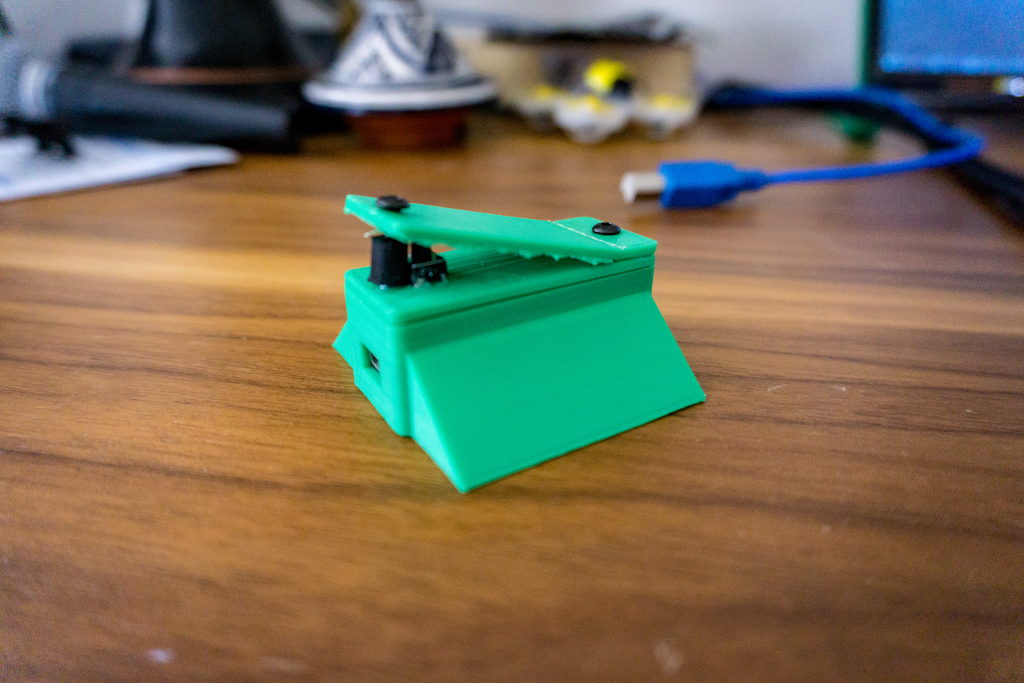
Basic USB Midi Footswitch. ### Parts * 1x Atmega32U4 Based Arduino or Clone (mini form factor) * I used https://www.amazon.com/gp/product/B01MTU9GOB * 1x 10k ohm resistor * Some Wire * 1x 6mm Button * I used https://www.amazon.com/microtivity-IM206-6x6x6mm-Tact-Switch/dp/B004RXKWI6 * 1x soft mount standoff (optional but makes the whole thing more solid) * I used https://www.amazon.com/NIDICI-Anti-Vibration-Mounting-Standoffs-Controller/dp/B071WBZC9K/ref=sr_1_1?crid=3BZ2VTU7F63UV * 2x M3 Screws * I used https://www.amazon.com/iExcell-Internal-Drives-Button-Socket/dp/B0716Y5WZZ ### Tools * Wire Strippers * Hex Driver * Super Glue * Hole Punch (Used for expanding screw holes and punching holes for button, you can probably use something else) * https://www.amazon.com/gp/product/B073WY2HR1 ### Assembly * Punch button holes in case top * Expand screw holes to grip M3 Screws * Attach wire leads to button feet * Run button leads through case top * Wire the Arduino the way they do in the simple button example * https://www.arduino.cc/en/tutorial/button * [Optional] Glue Ardunio in case * Close the case lid and screw the front of the lid in with soft mount standoff or M3 Screw * Screw in switch plate * Test Button action, if you press and the button stays down, file a bit off of the nub on the switch plate. When the switch plate can depress the button and release easily it is at the correct height. * If using rubber standoff, screw m3 screw through the front of the switch plate and into the rubber standoff * Flash arduino with provided code, right now it just outputs middle C, you can modify it to output whatever you want.
With this file you will be able to print Simple USB Midi Foot Switch with your 3D printer. Click on the button and save the file on your computer to work, edit or customize your design. You can also find more 3D designs for printers on Simple USB Midi Foot Switch.