Simplified LED bridge lamp
thingiverse
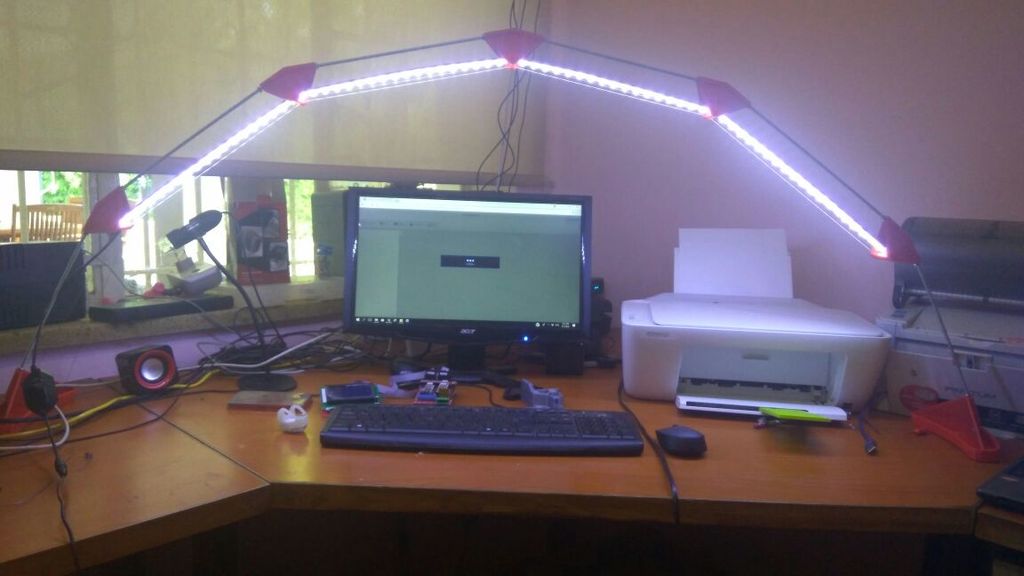
This is an engineer's redesign of the LED Bridge lamp by Opossums, requiring only five connectors and two bridge bases to be printed. The remainder of the parts can be sourced from your local hardware store. The bridge design is scalable by increasing the length of the threaded rod sections, allowing for adjustments in height by simply extending the lower two threaded rods. Components required for a standard 1500mm x 600mm height: - Six 5mm x 300mm threaded rods - Four meters of 0.5mm plastic-coated steel cable - Twelve 5mm nuts - Five meters of LED strip kit - Four 300mm x 20mm Correx or aluminum strips - One cable clamp Once printed, the structure must be threaded together on its side. To insert the threaded rod, it may be helpful to tap the holes first with an M5 tap. Align all connectors and secure them by tightening the M5 nut onto each connector. Thread the cable through the holes without cutting it, instead passing it continuously from one base to the other to ensure equal tension on both sides. Tighten the cable sufficiently to maintain parallel bases and lock the tension with a cable clamp. The bridge can now be lifted into an upright position. To complete the lamp, cut and mount the LED strip onto the 20mm wide Correx or aluminum strips. The number of LEDs required depends on the wattage, and a dimmer is essential for varying light or mood settings.
With this file you will be able to print Simplified LED bridge lamp with your 3D printer. Click on the button and save the file on your computer to work, edit or customize your design. You can also find more 3D designs for printers on Simplified LED bridge lamp.