Sinclair ZX Spectrum Microdrive Connector Block
thingiverse
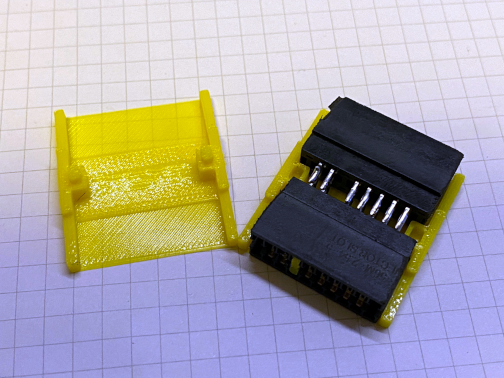
Replica connector block for the ZX Microdrive. The block is 10.4mm longer than the original as it uses off the shelf parts which need to be cut to size and specific pins removed. I've included a printable pin which slots into the removed pin to create the correct 2 & 5 pin combination. You will need 2x 20pin (10pins on each side) 2.54mm pitch Edge Card Connector Sockets with Straight pins for mounting on a PCB. These are the ones I get https://www.aliexpress.com/item/1005004450793404.html. You only need 16pins but getting the 16pin ones makes it harder to cut. The original connector is actually a 24pin socket with the outer 2 pin rows removed. Remove one row of pins from each side (you need to push from the pin side) leaving the 16pins in the middle. Now with a hacksaw carefully cut the sides off the connectors just before the slot of the outer row of pins you just removed. Do this on both sides and for both connectors. You should now have a connector with one row of empty slots, eight rows of pins and another row of empty slots. This should be approximately 27mm wide and you may need to file/sand down the sides to get it to <27mm so it fits the 3D printed bracket. Try not to cut too close to the first row, it is best to cut away from it and file/sand down to size. Now you need to remove the 3rd pin in on both sides so you have the following configuration: top: space, pin, pin, space, pin, pin, pin, pin, pin, space bottom: space, pin, pin, space, pin, pin, pin, pin, pin, space Now print the bracket and the pin replacement and after it has printed place both connectors in the bottom part of the case as shown in the photo. Adjust the legs so they all align and touch and use some bluetac or tape to secure both connectors in place. Solder the legs together and then turn over and do the other side. You can now pop the 3d printed pin replacement into the empty row after the first 2 pins, I recommend using a tiny dot of superglue to secure in place. You can now click the case together and I recommend you pop a small amount of superglue in the securing hole to make sure it doesn't come apart.
With this file you will be able to print Sinclair ZX Spectrum Microdrive Connector Block with your 3D printer. Click on the button and save the file on your computer to work, edit or customize your design. You can also find more 3D designs for printers on Sinclair ZX Spectrum Microdrive Connector Block.