Singer875 replacement Press Foot Lever
prusaprinters
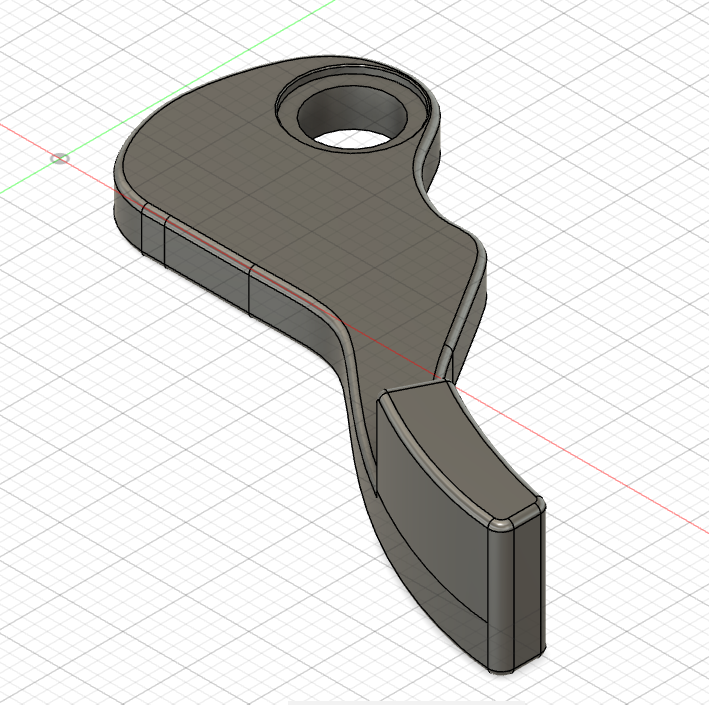
<p>Replacement press-foot lifter lever for Singer type 875 sewing machine. (Beware, the Singer 875 sold in Middle-Europe seems different from Singer 875 sold elsewhere. In German speaking areas it is sold also as Singer "extra 155")</p><h3>Print Settings</h3><p><strong>Printer Brand: </strong>Creality</p><p><strong>Printer: </strong>Ender 3 Pro V2</p><p><strong>Rafts: </strong>No</p><p><strong>Supports: </strong>No</p><p><strong>Resolution: </strong>0.16mm</p><p><strong>Infill: </strong>40%</p><p><strong>Filament: </strong>[noname PLA ](http://www.amazon.com/s?url=search-alias&field-keywords=noname+PLA&tag=thingiverse09-20) White <br/> </p><p><strong>Notes: </strong></p><p>I recommend to use at least 4 perimeter layers for each types of perimeter in order to get sufficient sturdiness.</p><h3>How I Designed This</h3><p>I originally saw the brilliant idea to use <a href="https://youtu.be/5pioFLkESD8">2D scanning to make 3D objects</a> from <a href="https://www.youtube.com/user/beginnerelectronics">Chuck Hellebuyck (CHEP)</a>.</p><p>First I have photographed the broken lever</p><ol><li>I have measured some important data with my caliper, such as the holes' dimensions and some major dimension of the lever (depth and width of the piece across its pivot-hole)</li><li>Created a measurement-line Fusion360 sketch editor and set it to the width of the broken original lever in order to have a reference for photo scaling</li><li>Imported the photo made in step 1. into the Fusion360 sketch editor as a canvas, then positioned and scaled the photo to fit the meas. line made in step 3, hence I got scaled it to true size.</li><li>Traced the curvy outline of the photographed broken original lever via multi-point fitted spline. Drawed the missing parts using additional splines and lines. Finished sketch</li><li>Extruded the sketch as needed, then exported to STL</li><li>Printed the piece then tried to fit the mounting screw and learned that either my cheap caliper or my measurement ability lacks precision, or maybe my design competence lacks. :P The v1 hole was way too tight.</li><li>Increased the hole in Fusion360 and reprinted. Now v2 fit, but barely, so I had to file it a little with a curved file to make the tightness of the hole just right. I use that version, my wife is happy now. :)</li><li>Before publication I further increased the hole tolerance with an additional 0.2mm, making it v3. I have not reprinted it though, so you might want to tweak the hole size, too. I've added the CAD files, too, so you can tweak as you want (but pls. honor the licence).</li></ol><p> </p><p>Category: Replacement Parts</p>
With this file you will be able to print Singer875 replacement Press Foot Lever with your 3D printer. Click on the button and save the file on your computer to work, edit or customize your design. You can also find more 3D designs for printers on Singer875 replacement Press Foot Lever.