single internal battery housing for OneTäpic NVG monocular
thingiverse
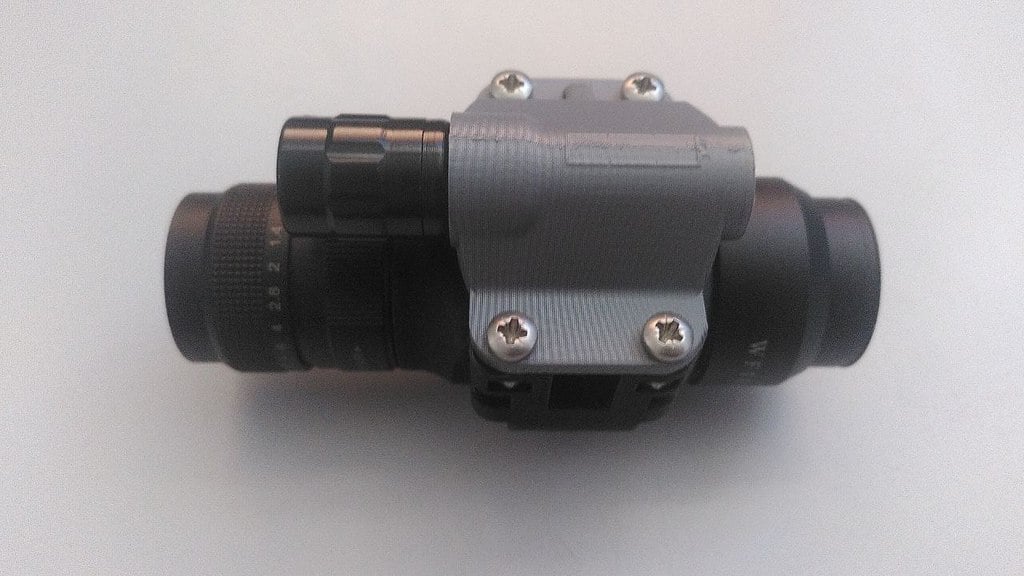
**This is my single battery housing for the [One Täpik NVG Monocular](https://onetapik.com) design.** It replaces the original lid and battery box with cable. **Update: Improved Version 2 uploaded** - more internal space for easier assembly - added lanyard loop - added improved mounting point, to best correct the mounting angle for simultaneous use with a PVS14 or similar device The original extremely low profile file is also still available, marked as V1. Print settings shouldn't be that important, as long as the printer is well calibrated and the dimensions are accurate. **Additional things required for assembly** [3V DC boost converter](aliexpress.com/item/1005004152718516.html) [mini AA battery LED flashlight](aliexpress.com/item/1005003084243369.html) [(alternative source)](https://www.aliexpress.com/item/1005005393188377.html) you just need the rear half optional: [1/4" to 3/8" screw insert](aliexpress.com/item/32835746671.html) **Assembly** free your print of any support structure (Cura tree supports works quite well for this) and saw off the lamp to the rear of the thicker middle part. Before final assembly make sure your wire fits through the wire channels and the battery goes in and comes out easily. Wire it up, paying attention to the correct polarity. The plus pole of the battery is at the bottom of the housing, as indicated by the battery position on the outside. Feed a wire through the channel, remove the isolation and put one or two knots in it to give it a bit more thickness (keeping the wire quite long is really helpful here). You can use a bit of glue or slightly melt and press in the print with a soldering iron where the wire comes out if it's moving too much and not staying where it should. For the minus pole stick the wire with removed insulation through the hole, sand the rear part of the flashlight a bit where it contacts it to remove the anodization, and then press the flashlight part in. **New mounting point** If you want the improved mounting point, you can choose between a file with modelled threads to just screw in the thread insert (if your printer is accurate enough, for me it worked flawlessly) or a file without the threads, to melt it in. The screw in worked great for me and it's the way I would recommend it, but if you're doing it the second way, carefully melt in the insert while screwing it in and try not to completely bend the part in the process. No matter which file you use, you **need to shave a little bit from the original housing** to complete the V-notch, otherwise the V of the arm pushes the lid up and it breaks when you try to tighten the J Arm screw. You can glue in the battery cap and the two parts together, however at least with my settings this was not required and it held together quite well just by the press fit itself. Once it's assembled it can't separate anyway. If you like my work you can tip me on [ko-fi](https://ko-fi.com/knegex) or [PayPal](https://paypal.me/knegex)
With this file you will be able to print single internal battery housing for OneTäpic NVG monocular with your 3D printer. Click on the button and save the file on your computer to work, edit or customize your design. You can also find more 3D designs for printers on single internal battery housing for OneTäpic NVG monocular.