SKR 1.3 or 1.4 & MKS SGEN L Board Setup Tutorial with TMC2208 UART
thingiverse
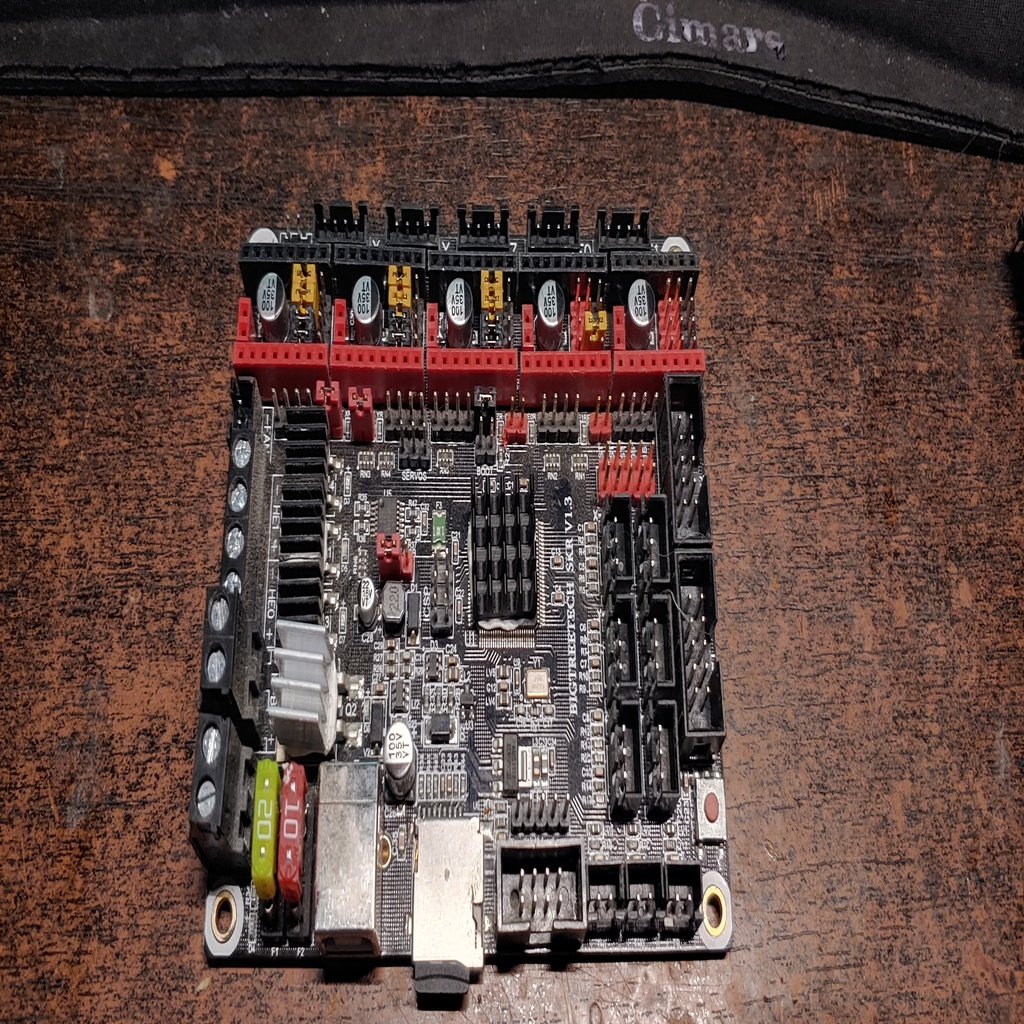
It seems like you've provided a tutorial on setting up an SKR board for 3D printing, including flashing the firmware and installing stepper drivers, endstops, thermal sensors, and BLTouch. Here's a summary of the steps: 1. Flashing the Firmware: * Install PlatformIO IDE * Create a new project with the correct platform (e.g., LPC1768) * Copy the firmware.bin file to the micro SD card * Insert the micro SD card into the board and power it up 2. Installing Stepper Drivers: * Identify the stepper driver slots on the SKR board * Set the jumpers according to the type of stepper drivers used (UART or SPI) * Install the stepper drivers, ensuring correct polarity and matching colors 3. Attaching Power and Heater Wires: * Mark the polarity of the pins * Attach the power wires carefully, paying attention to the polarity 4. Endstops and Thermal Sensors: * Identify the endstop connections on the board * Connect the thermals and LCD AUX as required 5. BLTouch Wiring: * Use a separate header for the servo signal * Hook up the 3-pin BLTouch connector if used If you're new to 3D printing or setting up an SKR board, this tutorial should be helpful in getting your printer up and running!
With this file you will be able to print SKR 1.3 or 1.4 & MKS SGEN L Board Setup Tutorial with TMC2208 UART with your 3D printer. Click on the button and save the file on your computer to work, edit or customize your design. You can also find more 3D designs for printers on SKR 1.3 or 1.4 & MKS SGEN L Board Setup Tutorial with TMC2208 UART.