Sliding-Rod Marble Maze
prusaprinters
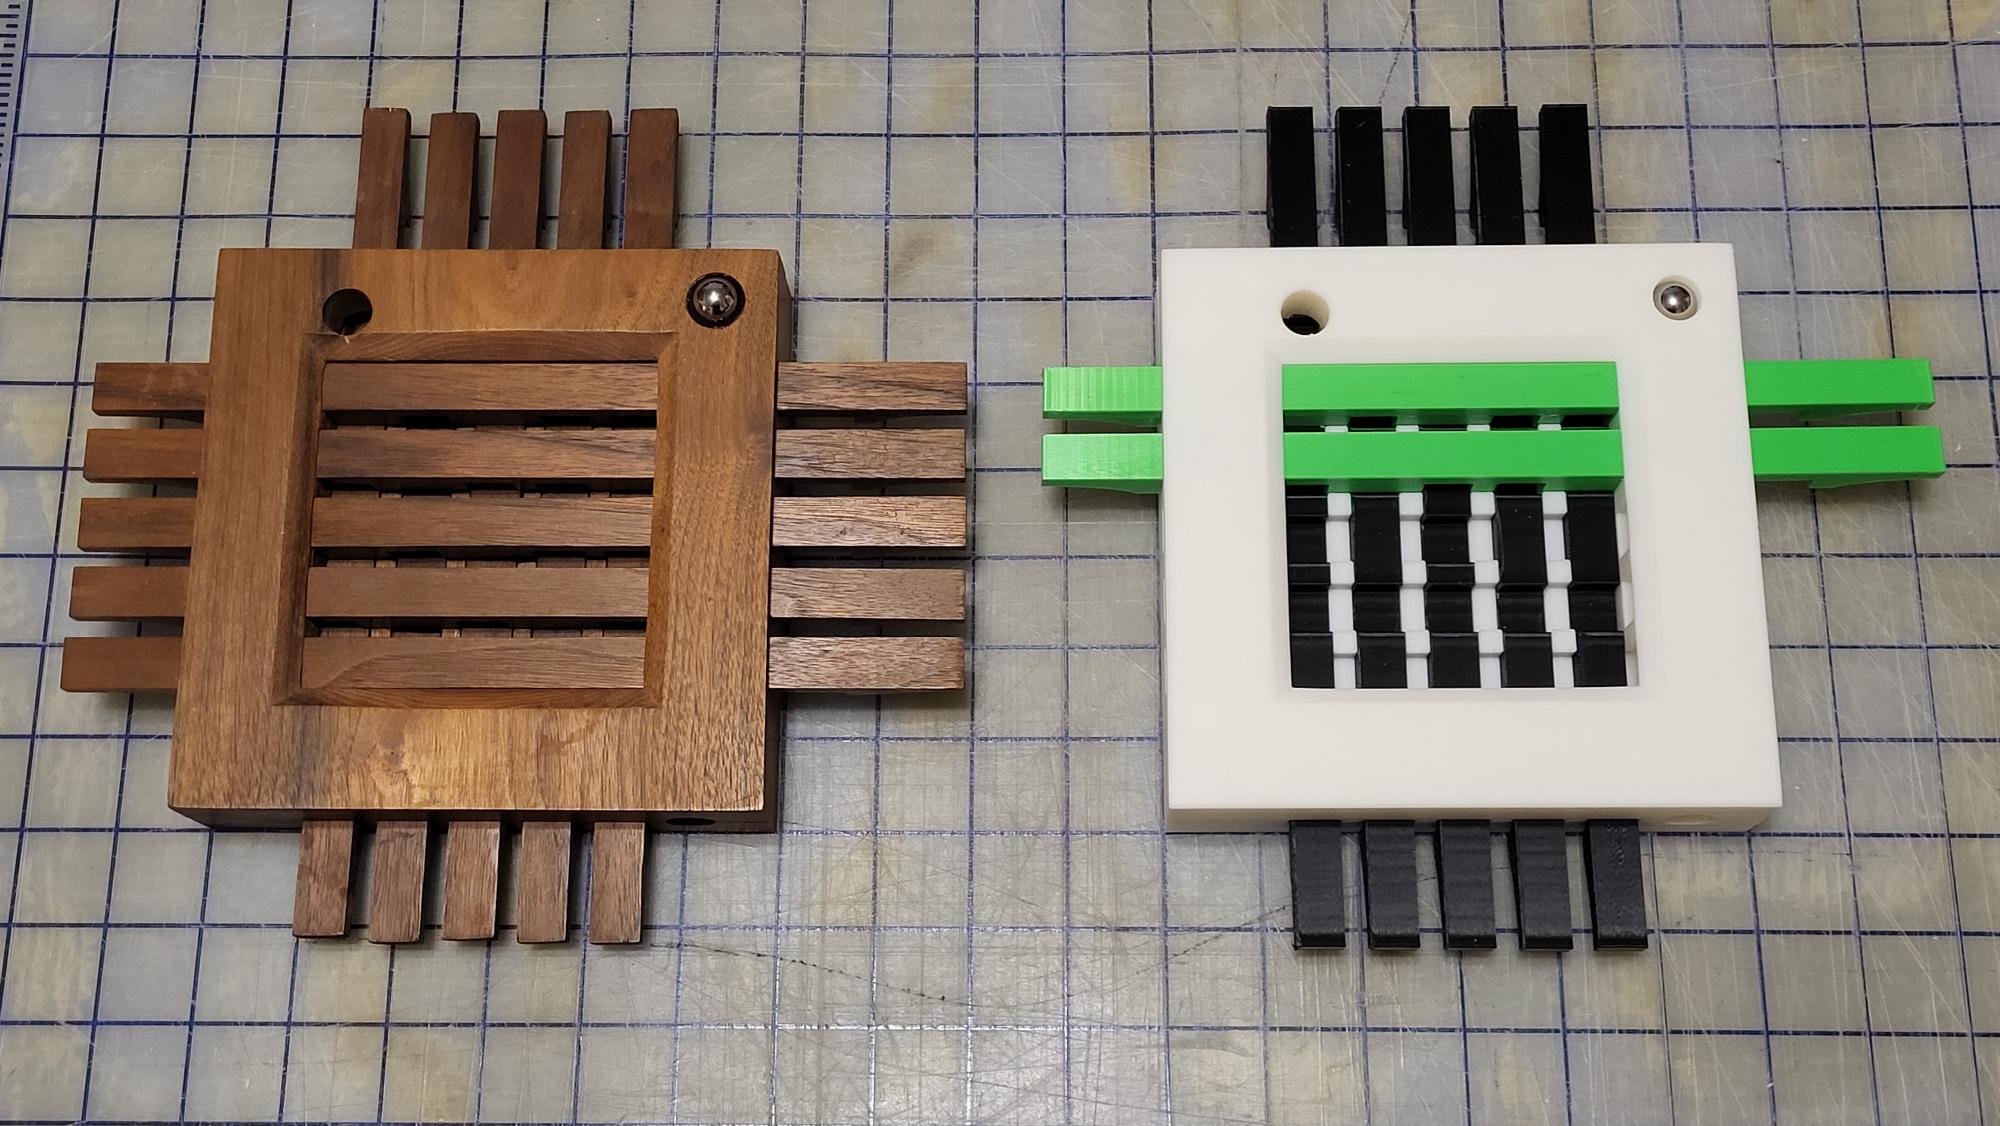
<p>Drop a marble into the entrance at the upper left and use the sliders to move the marble through the maze of notches, visible by peering between the sliders, to the exit in the lower left.</p><h4>History of the Puzzle</h4><p>I had the idea for this maze a number of years ago and came home and improvised it in walnut, with each part's dimensions hand-fitted to previous dimensions as I went. The version here is my first digital capture and publication of the maze.</p><p>We'll pretend that I left out sliders 3-5 to show the inside of the maze rather than because they were still printing when I took the photo.</p><h4>Required Components</h4><ul><li>printed parts (base top and bottom, A-E vertical sliders, 1-5 horizontal sliders)</li><li>7 pan-head sheet-metal screws (for Imperial, #6 x 1"; for metric, M3 x 25)</li><li>marble (for Imperial, 0.5" ball bearing; for metric, 12-mm ball bearing)</li></ul><h4>Printing</h4><p>You can print with any perimeters and infill you like; but my prototype with 15% infill felt lightweight and cheap. I ended up with 3 perimeters and 30% grid infill, which has a nice heft.</p><p>The dimensions of the sliders are critical for them to move smoothly but not sloppily – it's important for the layer heights to add up to the slider thickness exactly. To get a thickness of 12.70 mm, I used a layer height of 0.16 mm and a first-layer height of 0.22 mm. But … print one slider first, test it, and scale down its width if it's too tight.</p><p>I printed the sliders laying on their sides. Pay attention to sliders 1 and 4 to avoid a print orientation that requires bridging.</p><h4>Assembly</h4><ol><li>Use a screw or pick to poke out the membranes in the base's screw holes.</li><li>Insert sliders A-E into their labeled positions in the base.</li><li>Set sliders 1-5 onto their labeled positions on the base.</li><li>Wiggle the top over sliders 1-5 and align the registration ridge.</li><li>Install and then torque the screws.</li></ol><h4>To Play</h4><p>Tip the marble out of the storage hole in the upper right and drop it into the entrance at the upper left. Slide the rods to move the marble toward the exit in the lower right.</p>
With this file you will be able to print Sliding-Rod Marble Maze with your 3D printer. Click on the button and save the file on your computer to work, edit or customize your design. You can also find more 3D designs for printers on Sliding-Rod Marble Maze.