Slingshot Band Tying Jig - 2 Clamps
thingiverse
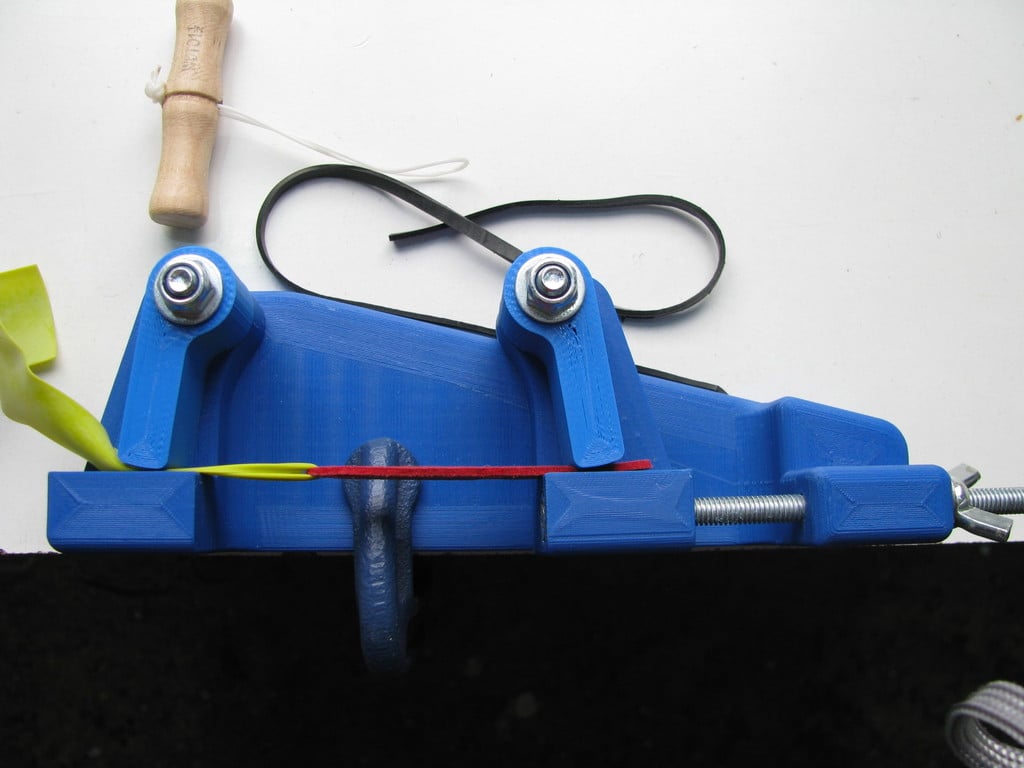
Support for tying the rubbers to the pouch of a slingshot - 2 clamps. <p>There is another <a href="http://www.thingiverse.com/thing:3415608/">simplified design</a> in which the mobile jaw is replaced by a hook.</p> This is a tool to tie the pouch to a cylindrical or flat band rubber. It consists of a body on which pivots an arm that acts as a fixed jaw to hold the rubber, and a mobile jaw adjustable in depth to keep the pouch stretched while it is tied. Necessary materials, in addition to the printed pieces: - 1 screw M6-40 mm. hexagonal head. - 2 M6 self-locking nuts. - 1 threaded rod M6-160 mm. - 1 screw M6-50 mm hexagonal head. - 1 screw M6-40 mm hexagonal head. - 1 M6 nut. - 3 M6 washers. - 1 M6 wing nut. Mounting - Attach an arm to the body with the 50 mm screw, nut and M6 washer, leaving a little clearance for the arm to rotate freely. - Fix the other arm to the movable clamp with the 40 mm screw, nut and M6 washer, leaving a little clearance for the arm to rotate freely. - Pass the threaded rod through the holes in the body and in the movable clamp, thread the normal M6 nut into the tip of the rod. - Put epoxy or cyanoacrylate glue on the side of the rod that will remain inside the mobile jaw and in the hole of the nut, as shown in the picture. - Pull the threaded rod until the tip nut fits into the hexagonal hole of the moving jaw. - Place a washer and wing nut on the other end of the threaded rod. Use: - The tool can be attached to the edge of a table with a small jack. - Pass the rubber through the hole in the pouch. - Fold the fixed clamp to hold the loop that makes the rubber. - Pull out the pouch and secure it with the mobile clamp. The stretching can be adjusted with the wing nut. - Proceed to tie the rubber close to the pouch. ---------------------------------------------------------------------------------------------------------------------------------------------------- Soporte para atar las gomas a la badana de un tirachinas - 2 mordazas. <p>Hay otro <a href="http://www.thingiverse.com/thing:3415608/">diseño simplificado</a> en el que la mordaza móvil se ha reeplazado por un gancho.</p> Se trata de una herramienta para fijar la badana a las gomas, cilindricas o planas. Hay otro diseño simplificado en el que la mordaza móvil se reemplaza por un gancho. Consta de un cuerpo sobre el que pivota un brazo que hace de mordaza fija para sujetar la goma, y una mordaza móvil regulable en profundidad para mantener la badana estirada mientras se ata. Materiales necesarios, además de las piezas impresas: - 1 tornillo M6-40 mm. de cabeza hexagonal. - 2 tuercas autoblocantes M6. - 1 varilla roscada M6-160 mm. - 1 tornillo M6-50 mm de cabeza hexagonal. - 1 tornillo M6-40 mm de cabeza hexagonal. - 1 tuerca M6. - 3 arandelas M6. - 1 tuerca de mariposa M6. Montaje: - Fijar un brazo al cuerpo con el tornillo de 50 mm, tuerca y arandela de M6, dejando un poco de holgura para que el brazo gire libremente. - Fijar el otro brazo a la mordaza móvil con el tornillo de 40 mm, tuerca y arandela de M6, dejando un poco de holgura para que el brazo gire libremente. - Pasar la varilla roscada por los agujeros del cuerpo y de la mordaza móvil, roscar la tuerca M6 normal en la punta de la varilla. - Poner pegamento epoxi o cianocrilato en la paarte de la varilla que quedará en el interior de la mordaza móvil y en el hueco de la tuerca, tal como se muestra en la fotografía. - Tirar de la varilla roscada hasta que la tuerca de la punta encaje en el hueco hexagonal de la mordaza móvil. - Poner una arandela y la tuerca de mariposa en el otro extremo de la varilla roscada. Uso: - La herramienta se puede sujetar al borde de una mesa con un pequeño gato. - Pasar la goma por el agujero de la badana. - Abatir la mordaza fija para sujetar el bucle que hace la goma. - Estirar de la badana y sujetarla con la mordaza móvil. El estiramiento de puede regular con la tuerca de mariposa. - Proceder a atar la goma, cerca de la badana.
With this file you will be able to print Slingshot Band Tying Jig - 2 Clamps with your 3D printer. Click on the button and save the file on your computer to work, edit or customize your design. You can also find more 3D designs for printers on Slingshot Band Tying Jig - 2 Clamps.