Slug - fully articulated Print-in-Place
prusaprinters
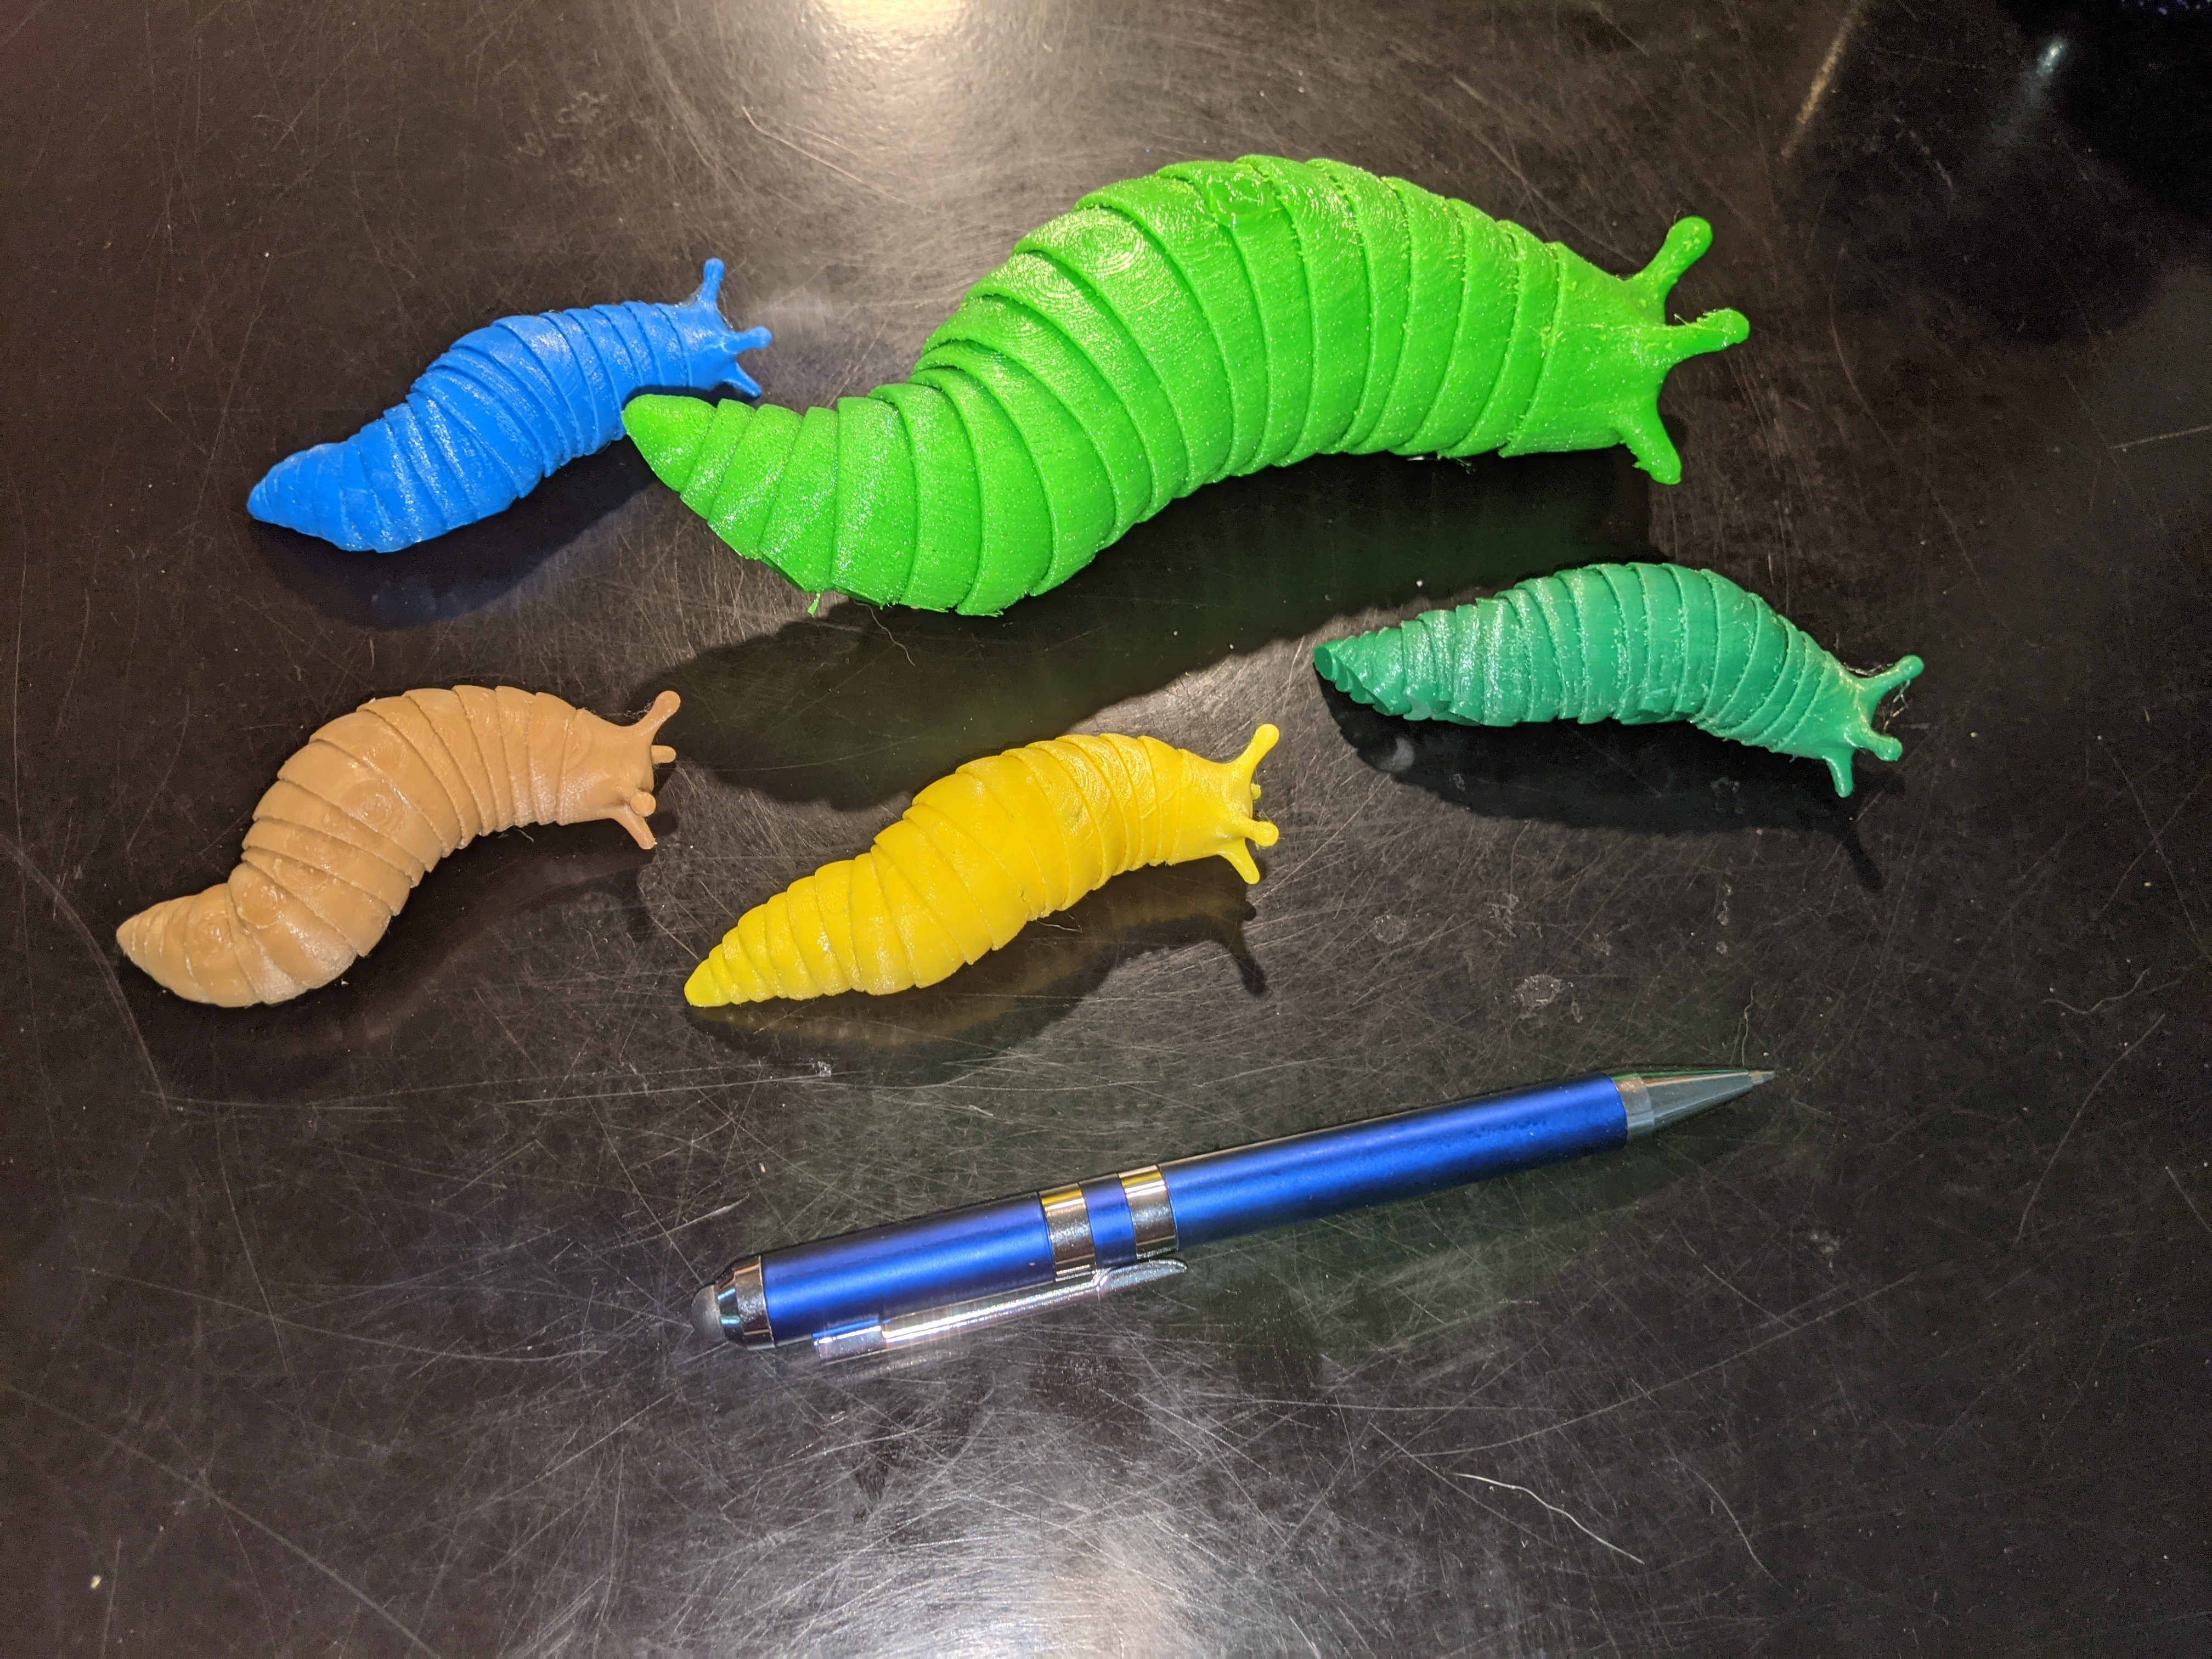
<p>As noted in the Summary, this is a print of a design by Isaiah Steckling from here:</p><p> <a href="https://www.thingiverse.com/thing:4727448">https://www.thingiverse.com/thing:4727448</a></p><p>The design is very clever, but it is difficult to print correctly as the clearances are very small. Essentially the design is a bunch of interconnected segments; each segment is free to rotate from side to side and up and down (within limits).</p><p>Even when I got it to print well, I still had to free up the segments by careful work with a razor knife. I do this by sliding the tip of the razor knife between two segments, and moving it carefully around the entire circumference. Typically I start at the side of a segment and work down to the bottom, then repeat for the other side, and then finish with the top of the section. This only takes a few minutes, and once the segments are freed up they move very well.</p><p>As can be seen from the photos, I made several of these in different colors of PLA. The photos give some idea of how the slugs can be manipulated into various positions.</p><p>I also did a print using FLEX, at 200% scale. This again required extensive modification of the default parameters.</p><h4>Printing</h4><p> </p><p>I have included the two STL files provided by Isaiah Steckling, and in addition a third STL “test” file made by deleting all but a few of the segments. The test file can be used to test your print parameters without having to waste time and filament printing the entire slug. I recommend looking at the link to the original to see Isaiah's recommendations on printing.</p><p>I printed in both PLA at 100% scale, and FLEX at 200% scale. </p><p>I have provided 3mf files which include all the print parameter changes I made. These work for me, but no doubt there is still room for improvement. I would also note that when I tried printing in PLA (.2mm layer height) with the default parameters, I was not able to free up the segments. Even when using the “best” print parameters I could come up with, I still had to (carefully!) use a small razor knife between each set of segments to get them to articulate freely. As per Isaiah's recommendation I started at the tail end and freed each segment one by one.</p><p>Finally, note that one of the two STL files has brims under the antennae - this is the STL file that I used. Aside from that, a brim is not necessary.</p><p><strong>[Update Feb. 11, 2022]</strong></p><p>Gcode and 3mf files for the 100% size have been added for both 0.1mm and 0.2mm layer height. I thought the 0.1mm layer height would provide a cleaner separation between the segments, but I saw little or no improvement. In both cases I still got some sticking between segments that I had to loosen up with a razor knife. So while I can say that these settings worked for me, they were not perfect. </p><p>In any case, I offer these files as something that “worked for me” and as a possible starting point for further improvements.</p>
With this file you will be able to print Slug - fully articulated Print-in-Place with your 3D printer. Click on the button and save the file on your computer to work, edit or customize your design. You can also find more 3D designs for printers on Slug - fully articulated Print-in-Place.