Smart Christmas Light Arch
thingiverse
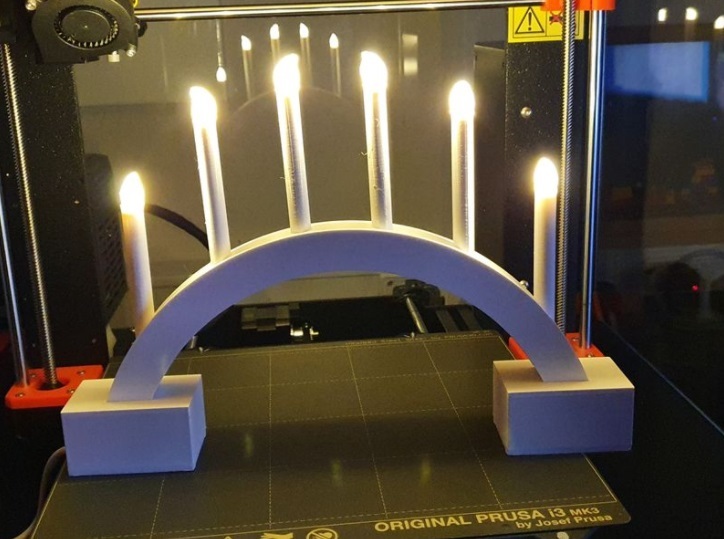
This is a more detailed description of my smart christmas light arch. This time with a different led cover which is more dezent (original from https://www.thingiverse.com/thing:1188098) Material required: 6 * 5mm warm white leds About 8m wires in two different colors A mini power supply module from mains to 5V 6 * 180 Ohm resistors if you connect the Leds to 5V or 6 * 27 Ohm resistors if youconnect the Leds to an esp8266 for example. 8 * 3x20mm Wood screws 1 * Wemos D1 Mini Microcontroller board Instructions: First you glue the bow onto the sockets, and the candles with the bigger round whole into bow (so that the sunken part is on top). It is made to carry the led with the whole for the pins. Meanwhile you can solder the wires to the leds inserting a resistor in one of the wires. I isolated the connection between the red cable with the longer pin (anode) and connected the resistor to that pin. If you don't use home automation you can connect all leds to the power supply module. The power supply module should be placed into the socket with a small opening on one side which is for the power cable. After a short test of each led I fix each with a drop of super glue. The Leds are connected to the pins D1, D2, D3, D5, D6 and D7 with a corresponding firmware and home automation system you can now control each single Led (I used Esp-Home and Home-Assistant).
With this file you will be able to print Smart Christmas Light Arch with your 3D printer. Click on the button and save the file on your computer to work, edit or customize your design. You can also find more 3D designs for printers on Smart Christmas Light Arch.