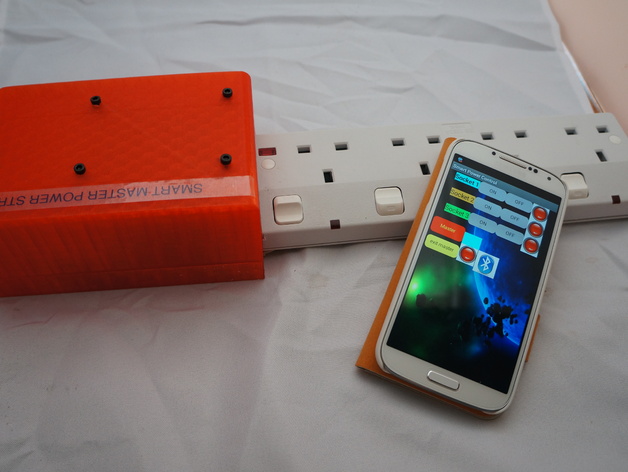
Smart Power Strip with master-slave mode
thingiverse
Modern world most families has lot of electrical appliance. For your convenience purpose, the manufacturers usually added a “Stand-By” function. like TV, HIFI, Game Machine,….etc However, you might not know that western countries has a statistic survey, every family each year need to pay extra 400kW power fee. This is almost HKD 500 for a year. (eq a general family 10% of total power consumed in a year. check out the chart for details) Reference link or you may check out from WiKihttp://www.cnet.com/news/power-consumption-how-much-are-your-gadgets-costing-you/ If we overcome this matter, this will definitely help to reduce a lot of carbon emission, power saving etc, However “Stand-By” this function really provide much convinence to users. This product particular focus this advantage and let the user avoid wasting the energy as well as saving money. But they can still enjoy the convenience. When your main equipment turned on, another socket will be triggered at the same moment. And both socket will turned off when your main equipment turned off. Because no “standby” for individual equipment, then the wasted power is much more less. Also, this power bar can be controlled by your android phone, If you choose the independant mode, you need not knee down anymore to seeking the power bar and switching on or off. You only sit down and control the power bar by your phone. This let you step by step going to realize the Intelligent home automation. This product's related video link as followshttp://youtu.be/PB0EiHZixbc Instructions Disclaimer Before you decide to make this, I assumed you have your knowledge and know how to handle and manage the following. I would not responsible or any liability, money lost or money claim request because of this product or this product due Also, the power strip has live electric and may cause serious lethal electric shock accident. Please make sure everytime the power must be disconnected unless you make sure no potential risk for your own.during testing or operation. 1) The following is a on-line store reference. you can seeking those parts at your local WEB store. Basically i beleived those parts is the same from China. 4X Relay boardhttp://www.ebay.com/itm/4-Channel-5V-Relay-Module-Expansion-Board-Way-PIC-Arduino-AVR-Raspberry-PI-/200982993687?pt=UK_Computing_Other_Computing_Networking&hash=item2ecb851b17 5A current sensor board (hall effect)http://www.ebay.com/itm/1pcs-30A-New-Range-Current-Sensor-Module-Board-For-ACS712-UK-SELLER-/261470382663?pt=UK_BOI_Electrical_Components_Supplies_ET&hash=item3ce0d96a47 Bluetooth modulehttp://www.ebay.com/itm/HC-06-Wireless-Bluetooth-Transceiver-RF-Main-Module-Serial-For-Arduino-USA-BASED-/261491111317?pt=LH_DefaultDomain_0&hash=item3ce215b595 Arduino nanohttp://www.ebay.com/itm/Arduino-Compatible-Nano-V3-0-ATmega328-5V-Micro-controller-Board-Mini-USB-/331178319577?pt=LH_DefaultDomain_0&hash=item4d1bc41ed9 600mA Switching modulehttp://www.ebay.com/itm/5V-600mA-switching-power-supply-board-power-supply-module-3W-LED-board-power-/221292586014?pt=Altro_Elettronica_e_Elettricit%C3%A0&hash=item338610e41e (you may dis-assembled the old power adaptor for this purpose) 4 ways Power strip If you need use my housing design, you need found a power strip which has a chamber on the switch side. otherwise you may need make your own housing by yourself. But frankly this is not a rocket science. easy for you. My design already reserved 4 mounting holes for relay board. For the cable bushing, I used a cable tie to avoid the cable easily pulled out. 2) when everything are ready, and the housing was printed out. you can starting to connect the circuitry as per attached diagram. Please make sure the coinnection is correct before you put through the live electric supply. 3) I didn't reserved the mount for the boards except relay board. so you use your own way to fixed those board inside the housing. I used a isolation tape covered the tiny boards and fixed those on the bottom by double side adhesive tape. Not bad. 4) Program the Arduino NANO and install the APK on your smart phone. my example using Samsung S3. Any question about programming arduino please visit www.arduino.cc 5) Now you can run the program. firstly connected the correct bluetooth, then try to exit the master mode (default). and use the buttons switching on / off the slave socket. you can see the same as my video show. The I would congratulation you are success. Finally, you you use a larger output switching power supply board, you can even connected with 2 USB socket as a USB charger or supply too. How big you can made just limited by your imagination. cheers!
With this file you will be able to print Smart Power Strip with master-slave mode with your 3D printer. Click on the button and save the file on your computer to work, edit or customize your design. You can also find more 3D designs for printers on Smart Power Strip with master-slave mode.