Smarthome Multi-Sensor Enclosure
thingiverse
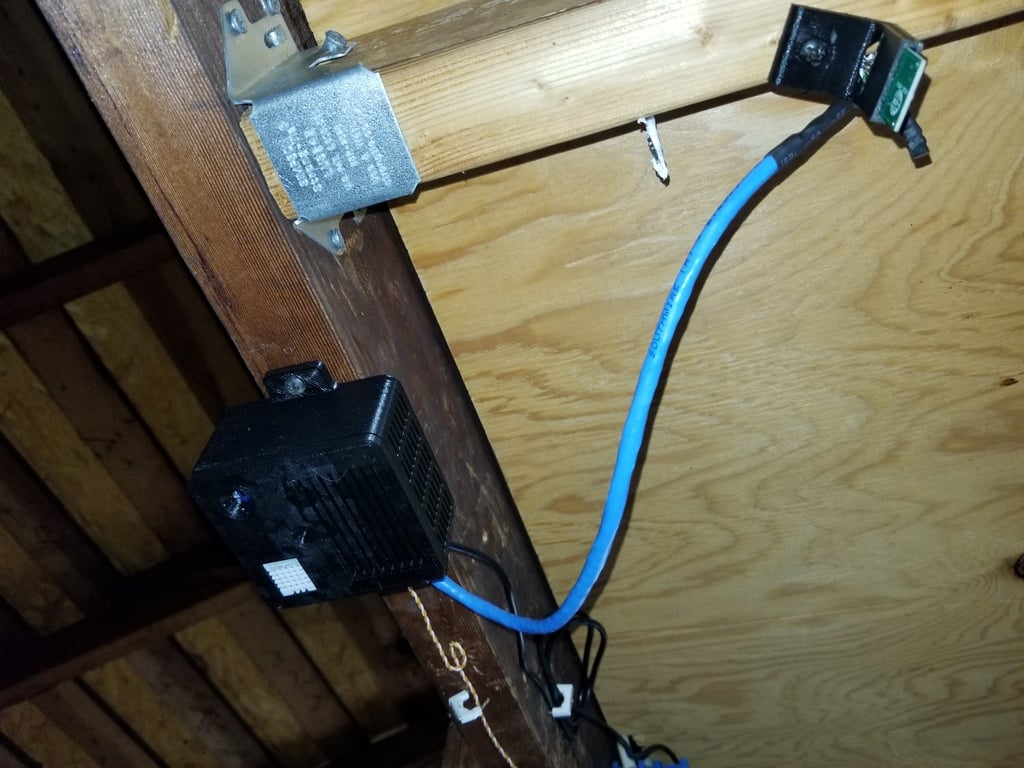
Looking to DIY an ESP8266 powered smart home device that reads temperature, humidity, luminance, microwave motion, and outputs to a relay and a beeper? You've found a great place to start or finish it. I designed this enclosure for a smart home project using a Wemos D1 Mini, BH1750 luminance sensor, relay, AMS1117, and MT3608 break out boards, a standalone DHT22 sensor, and a 12mm piezo buzzer. There are many flavors and sizes of these breakout boards available online; this enclosure will fit these specific parts: Wemos D1 Mini: https://www.amazon.com/gp/product/B081PX9YFV/ref=ppx_yo_dt_b_asin_title_o06_s00?ie=UTF8&psc=1 12mm 5V buzzer (requires NPN transistor to drive off the 3v3 output): https://www.amazon.com/gp/product/B01N7NHSY6/ref=ppx_yo_dt_b_asin_title_o01_s00?ie=UTF8&psc=1 5V isolated relay breakout: https://www.amazon.com/gp/product/B07M88JRFY/ref=ppx_yo_dt_b_asin_title_o02_s00?ie=UTF8&psc=1 AMS1117 3v3 breakout: https://www.amazon.com/gp/product/B0778KR6FZ/ref=ppx_yo_dt_b_asin_title_o03_s01?ie=UTF8&psc=1 MT3608 DC-DC breakout: https://www.amazon.com/gp/product/B081JJDD7J/ref=ppx_yo_dt_b_asin_title_o06_s00?ie=UTF8&psc=1 No supports are needed anywhere. The DHT, beeper, and BH1750 mount in the lid, while the rest mount in the main box. The relay and BH1750 boards are secured with melt-down pins. Press the boards onto the pins, heat a bolt or screwdriver, and melt the pins down against the board to fix them permanently. The Wemos, AMS1117, and MT3608 boards get pressed into their slots, then a hot bolt/screwdriver is used to melt 2-4 spots on the edges of each board to fix them permanently in place. Note that it's always easier to solder your wires first, before permanently mounting them in place. The beeper and DHT are simply pressed into place with a friction fit. You can also use the melt-down method to secure the DHT or beeper better if your mounting location will experience excessive vibrations. The lid is simply snapped onto the base with 2 tabs. I used wire nuts to terminate my ground, 3v3, and 5V busses after soldering leads to all devices. You might use solder instead if vibrations are a big concern. I provided strain relief on the wires entering the enclosure using some zip ties inside the case (hot glue zip ties to the sides if vibrations are big). The Wemos, relay, 3v3, and DC-DC converter are powered directly off of a common 5V-2A wallwart. The sensors and beeper are powered off of the 3v3 regulator. The step-up DC-DC converter is used to power the DHT22 sensor. Incidentally, I also ran a wire out of the main case to a Dallas temp sensor for better temperature readings than you get from the DHT. This is outside the scope of this project since it's just a wire going out one of the holes; I wanted to mention it since it's visibly dangling there near the RCWL in the first pic. I'm using ESPHome software with Home Assistant on the Wemos, but of course, there are other options for software. The device sends temperature, humidity, luminance, and motion status to the HA server. The server can send beep commands to activate the beeper as needed. The relay NO contacts are used to control a garage door opener (ESPHome is programmed to turn off 0.5 sec after turning the relay on, which triggers the standard door opener to open/close). Of course, the relay can be used for anything else you might use a relay to control. Sensing the door position is done by a separate Z-Wave door sensor. Side note: I have several devices on my home automation network that are very similar but don't need the relay. I plan on designing custom enclosures for those as well... stay posted if that sounds interesting to you.
With this file you will be able to print Smarthome Multi-Sensor Enclosure with your 3D printer. Click on the button and save the file on your computer to work, edit or customize your design. You can also find more 3D designs for printers on Smarthome Multi-Sensor Enclosure.