Smooth Roller for Mk3s (updated)
prusaprinters
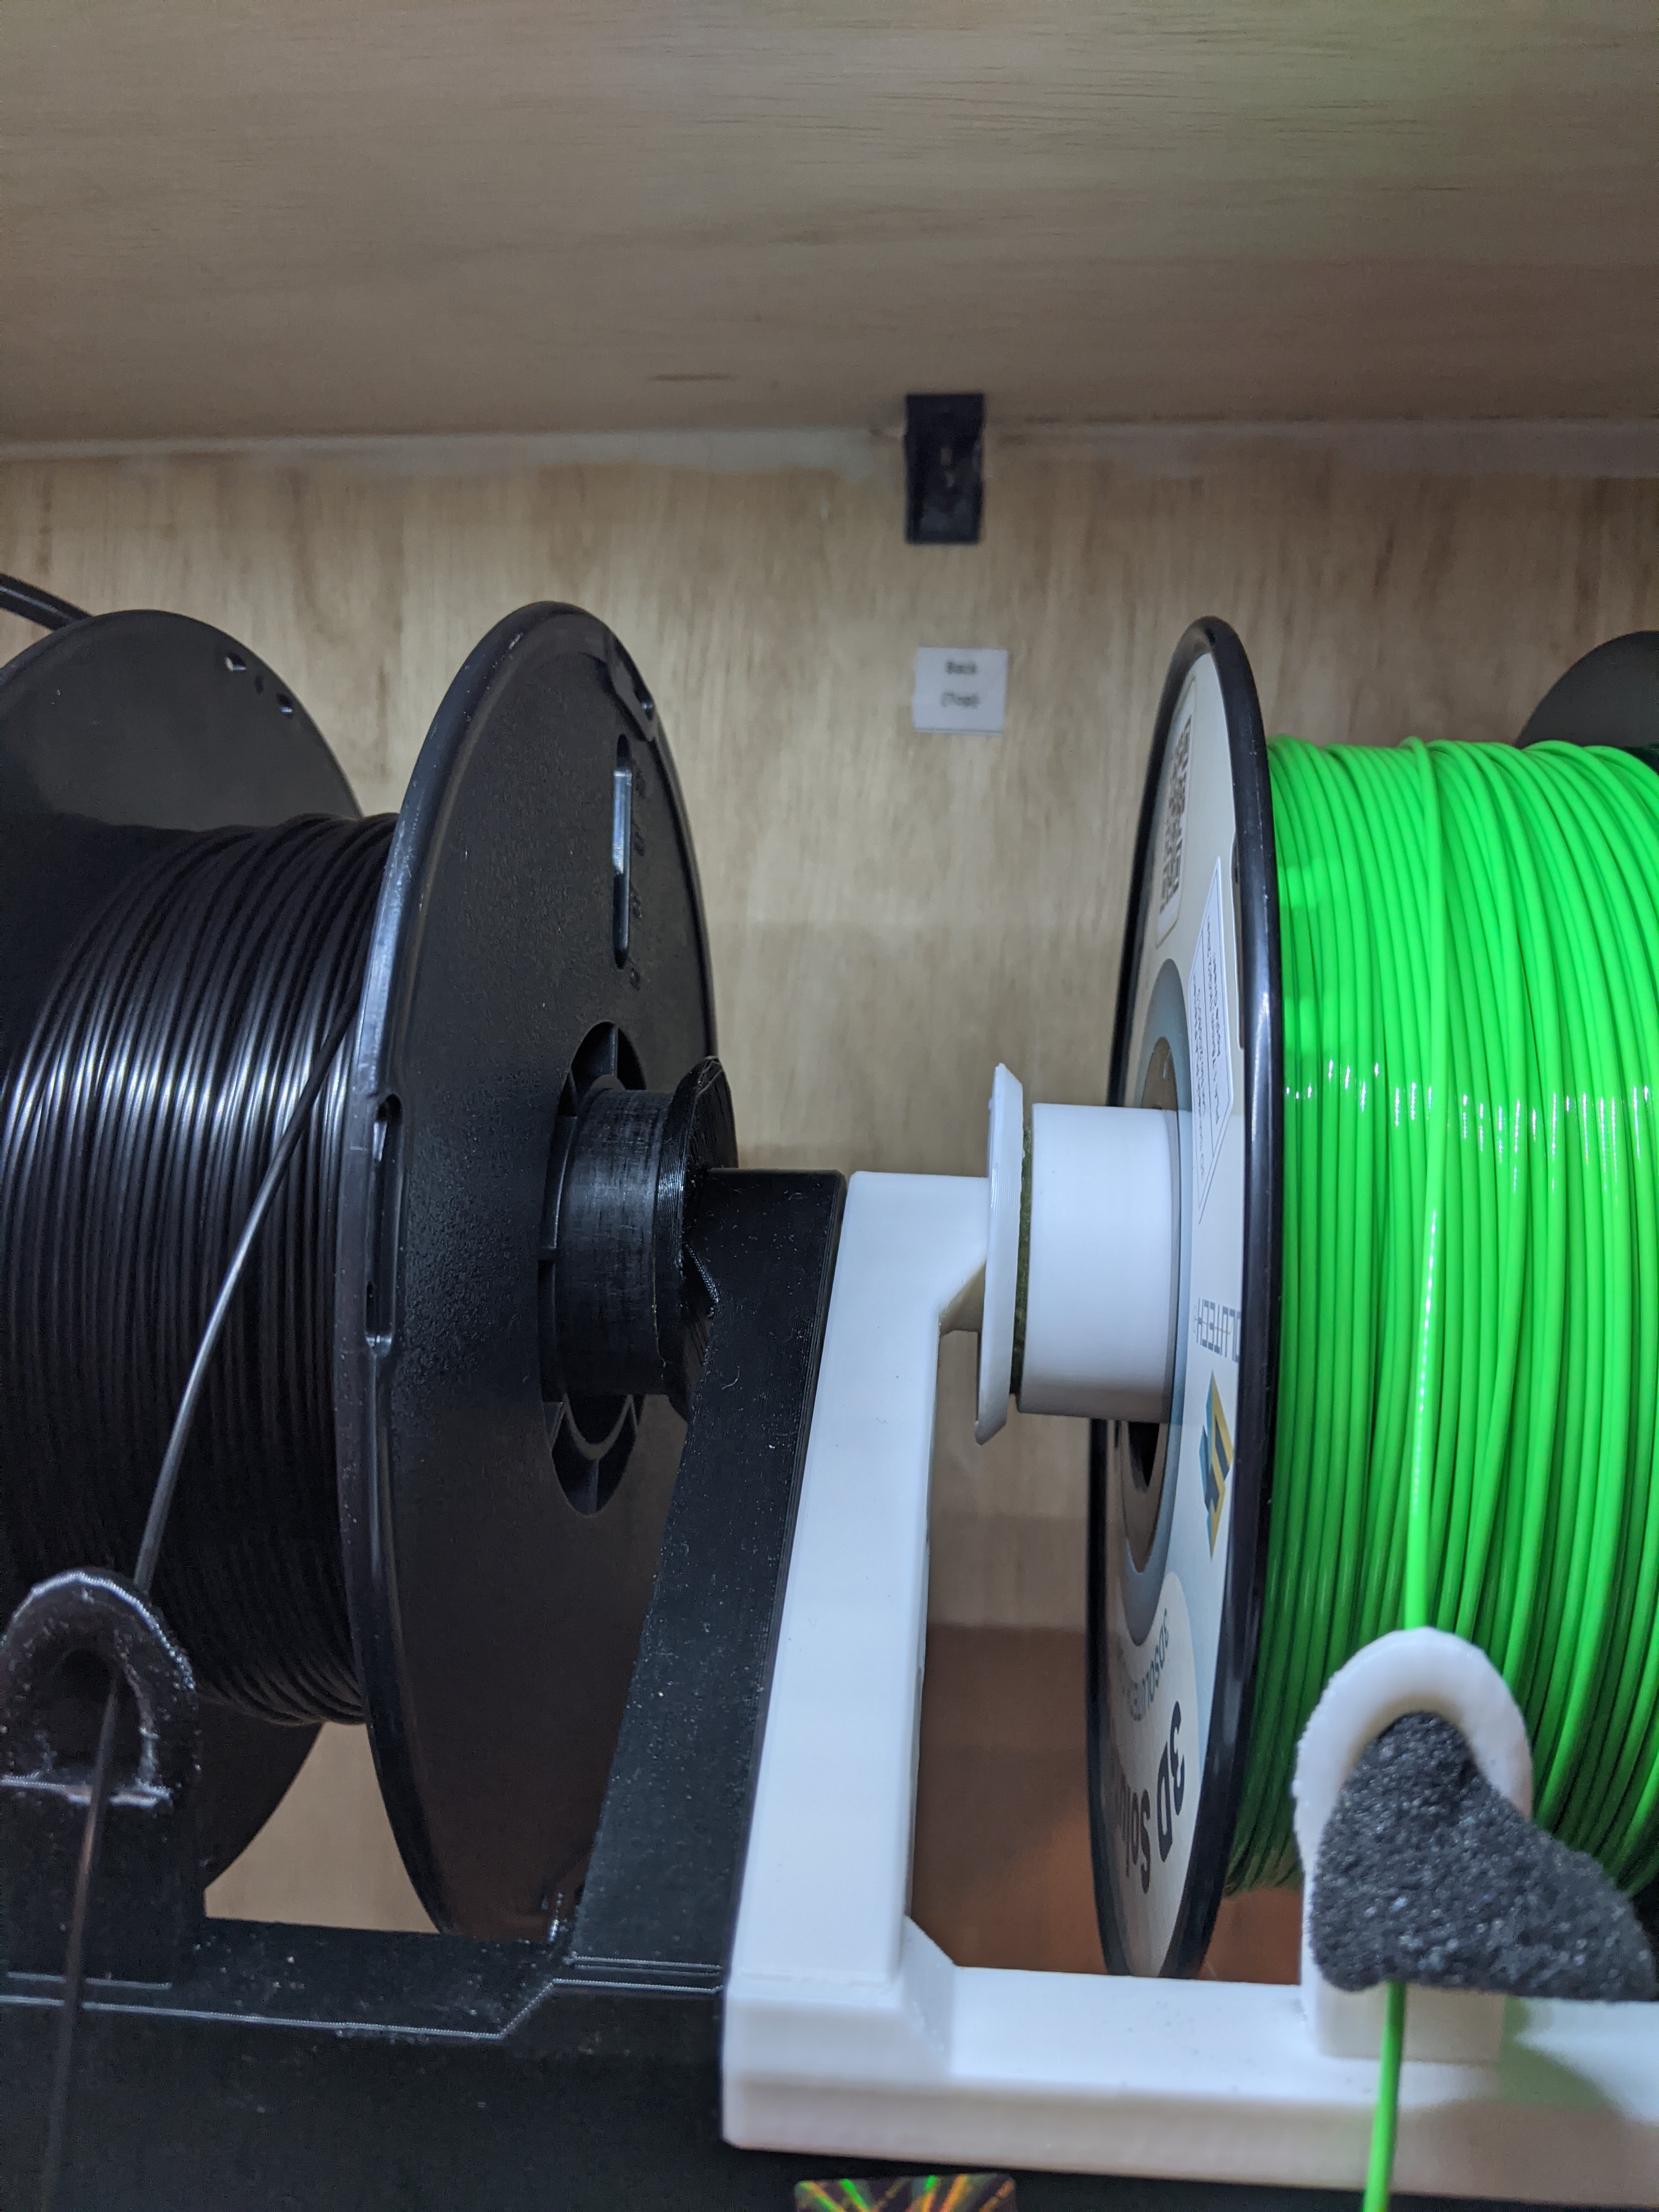
<p>UPDATED Feb 2021 - See update in print instructions.</p> <p>After an enclosure, and switching to low profile spool holders (found on this site), I started wondering if I could make the roller spin smoothly inside of the filament drum - I wanted a rolling action with a low profile, and I wanted to not move to an external solution. I like the top bar inside the enclosure - gets a dry box advantage.</p> <p>After a few sketches, I came up with this internal roller design. Advantages - spools simply fit over the end of the roller - nothing to unclamp. Smooth rolling action, no more sliding. Felt washers and built in clutch ends tame any over-run or backlash. And the whole thing looks great in the end.</p> <h3>Print instructions</h3><p>Update - February 2021 - Added new files for the remix that I posted on this one to combine the left and right arms into a single piece that is compatible with the Prusa spool holder arm bayonet ends. I am adding the new center post here - you should print two of them instead of the left and right arm originally posted with this print, and still use the roller design from this print in either case.</p> <p>If you have already printed the smooth roller and want to simplify a little bit print the combined center arm (follow the reprints of this design) and print the "center axel and cap" file from this update for each arm you are replacing. The new center-post will fit any prusa-compatible spool holder.</p> <p>If you like the roller concept and just don't want to replace your original spool holder from Prusa, print the roller and center-axel and cap files here, and follow the roller instructions. The new center axel will let you adapt the roller to your original spool holder.</p> <p>New center-post print settings:<br/> Recommend 0.2mm layer height<br/> Perimeters: 6<br/> Infill 30% Honeycomb or Grid<br/> No support</p> <h3>Resume old print instructions - Roller instructions DO READ</h3> <p>For the arms (left and right, which are remixes to fit the internal dogs within the roller), print with support on bed, 3mm draft.</p> <p>For the spools, print with full supports, .2 or .15 mm layers. To print two spools you will need 20 bearings. I failed through several versions due to poor quality bearings, but found these on amazon that work great and don't need a lot of pre-use prep. <a href="https://www.amazon.com/gp/product/B075CM3FG3/ref=ppx_yo_dt_b_asin_title_o00_s00?ie=UTF8&psc=1">https://www.amazon.com/gp/product/B075CM3FG3/ref=ppx_yo_dt_b_asin_title_o00_s00?ie=UTF8&psc=1</a></p> <p>If you don't want to use bearings, plastic spacers are printed for you with the roller. They work pretty well.</p> <p>Once you break out the roller parts from the supports (highly recommended) you need to do some sanding. Keep your bearings far away from where you sand anything. Grit is bad for bearings. You'll want to sand the far inside corner of each "cup" to get any rough spots smoothed down. Use a few grades, finger pressure is all you need, and you'll have a smooth outer race surface in no time. When done sanding WIPE any grit out of the cups with a tack cloth.</p> <p>Next comes roller assembly. The bearings should fit snugly on the posts on both ends of the captive internal roller. If they go on hard, use a file - and again keep the grit away from any bearings. Once all of the bearings are in place, its time for roller assembly. Solvent based glue, used sparingly, does a great job. Don't glob the glue or it'll get stuck on the internal roller and you will not be happy with that. The most important part of assembly is getting the two cups very well aligned. Four finger method works great.</p> <p>After the glue sets (ten minutes or twenty) - tape the ends of the roller with painters tape - you need to sand the glue seam smooth, and you don't want to get grit in the now installed bearings. After smooth, wipe any grit or dust off outside of roller with tack cloth.</p> <p>After you print both arms (these snap on in place of original prusa spool holder) cut out some felt washers in the outer diameter of the spool, and inner diameter of the posts on the brackets. These felt washers are a critical part - they form a clutch for the roller. Without the felt washers, the spool now will run like a fidget spinner for filament spools. This can cause overrun and tangles as you print - which is bad. An old fashioned felt clutch is the answer. The outer caps (which print with the brackets) form your adjustable clutch. Play with # of felt washers on both sides of the roller, and the tightness of the outer cap - get the roll to spin the roller when it is feeding filament, but not so easy to roll that it just keeps spinning. It's a easy clutch adjustment.</p> <p>All prints shown in PLA - nothing here requires high temp resistance. For the set, you'll need to print two of the roller assemblies, and the bearing pack referenced is enough bearings for two roller spools.</p>
With this file you will be able to print Smooth Roller for Mk3s (updated) with your 3D printer. Click on the button and save the file on your computer to work, edit or customize your design. You can also find more 3D designs for printers on Smooth Roller for Mk3s (updated).