SnapMaker 2.0 1600mW Engraving Test
thingiverse
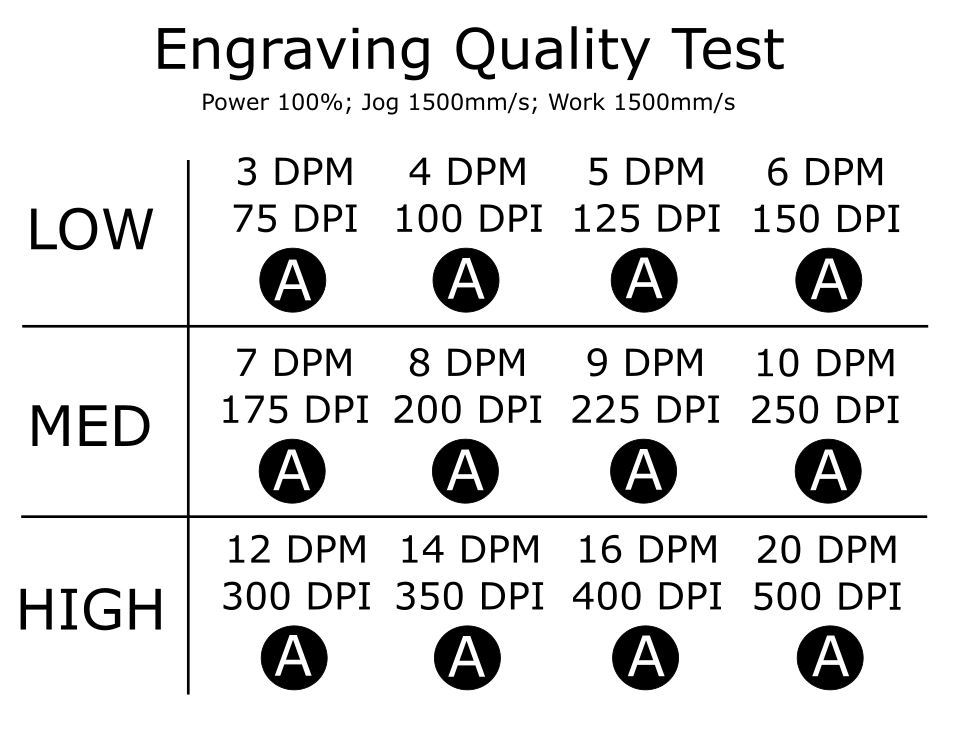
Hi Everyone! First Post. I just recently purchased the SnapMaker 2.0 A350 and wanted to run a few test to optimize some engraving settings before diving into any long intricate projects. I decided to run some tests on the dot density setting first, my goal is to use the smallest Dots Per mm(DPM) without sacrificing quality. Here was my procedure: 1) Created a test file in Inkscape. 2) Separated each dot section onto its own layer. 3) Export each layer to a different PNG file. 4) Imported each PNG file into SnapMaker and scaled to size. Here were my Laser settings: Material: 1.5mm Plywood Engraving: B&W Power: 100% Jog Speed: 1500 mm/min Work Speed: 1500 mm/min NOTE: Just realizing I wrote mm/s in my test text :) I tested almost every density from 3 Dots per mm to 20 Dots per mm. In my opinion, the quality doesn't get much better after 8 Dots. 8+ all looks the same to me, has anyone needed more than an 8 dot density? I then compared 6, 7 & 8 closely. 6 dots has visible stepping on the circle, 8 dots has visible charring around the "A". I ultimately decided on 7 dots per mm. Now I'm working on creating another file to test power vs work speed. Hope you all found this useful.
With this file you will be able to print SnapMaker 2.0 1600mW Engraving Test with your 3D printer. Click on the button and save the file on your computer to work, edit or customize your design. You can also find more 3D designs for printers on SnapMaker 2.0 1600mW Engraving Test.