Snapmaker-2 A350 X-Axis & Head Cable Adapters & Cable Management
thingiverse
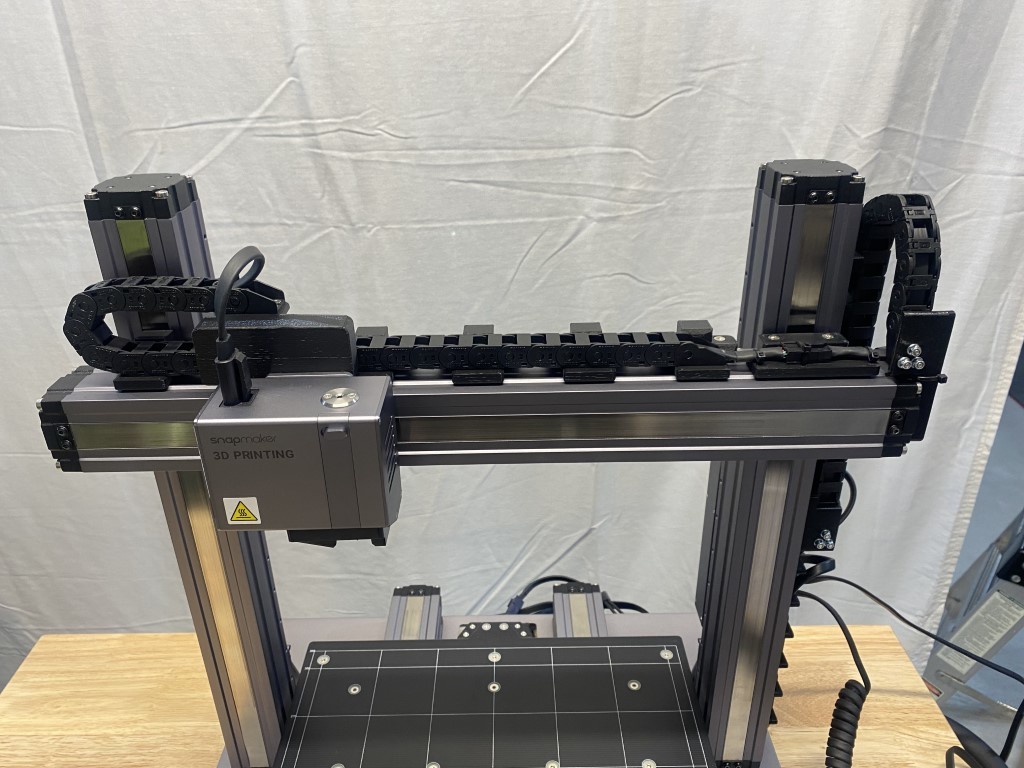
CAUTION: Advanced makers as you will be cutting/soldering wires and changing plug ends !!!! Use at your own will and use caution. Not responsible for mis-wiring or damage to your machine. Also you will need to tap the x-axis upper carriage holes with an M5 tap to use the adapter. This is my cable adapter using chain guides up the z-axis for both the x-axis rail and also the head wiring. Most of the prints are out of the box ready to be used and a couple need brass threaded inserts to be inserted to make them work. Also included is cable clamps for the side of the Z-axis. Need to Print: (2) 3 wire Cable Clamps (1) 2-3 wire Cable Clamps (3) XZ-Cable back supports (5) X-Cable back supports (1) X-Chain Adapter Head (1) X-Chain Adapter Control End (1) XZ-Chain Adapter Upper (1) XZ-Chain Adapter Lower (1) X-Cable Clamp MATERIALS: (1) Hilitchi 460 Pcs M2 M3 M4 M5 Female Thread Brass Knurled Threaded Insert Embedment Nuts Assortment Kit. https://www.amazon.com/gp/product/B07VFZWWXY/ref=ppx_yo_dt_b_search_asin_title?ie=UTF8&psc=1 (1) Molex Micro-Fit 3.0 Dual Row (8 Circuits) Male & Female Receptacle Plug https://www.amazon.com/gp/product/B07997NH2Q/ref=ppx_yo_dt_b_search_asin_title?ie=UTF8&psc=1 (1) Snapmaker Head Cable (email support and you can purchase extra cables). (2) Befenybay 10mm x 11mm Length 1Meter Black Plastic Open Type Cable Wire Carrier Drag Chain Towline R18 for 3D Printer and CNC Machines (10mmx11mm-Outside Open) https://www.amazon.com/gp/product/B07QLGWQ1L/ref=ppx_yo_dt_b_asin_title_o07_s00?ie=UTF8&psc=1 (28) M4 x 12mm Socket Head Cap Screws. or more (2) M5 x 12mm Socket Head Cap Screws. (9) M3 x 12mm Socket Head Countersunk Screws (9) M3 washer (9) M3 Nuts (plastic lock type) (3) M3x4x5mm brass threaded inserts. (3) M3 x 8mm Socket Head Countersunk Screws. (3) Mini black zip-ties to ties cable down. MISC: Shrink Teflon You will need to cut the ends off (2) Head Cables and install the Molex 8 pin connectors on each end. Make sure to keep colors aligned. Shorten the length of the cables to fit. There is a cable clamp on the top to lock the connectors down and to keep the cable from moving at the connectors. The x-axis cable is good to go with no changes. Tap the 2nd and 5th top row holes in the x-axis carriage with an M5 tap. You will not need to drill open the holes they are perfect for the M5 tap.
With this file you will be able to print Snapmaker-2 A350 X-Axis & Head Cable Adapters & Cable Management with your 3D printer. Click on the button and save the file on your computer to work, edit or customize your design. You can also find more 3D designs for printers on Snapmaker-2 A350 X-Axis & Head Cable Adapters & Cable Management.