Snapmaker Accessories Storage Box with Logo
thingiverse
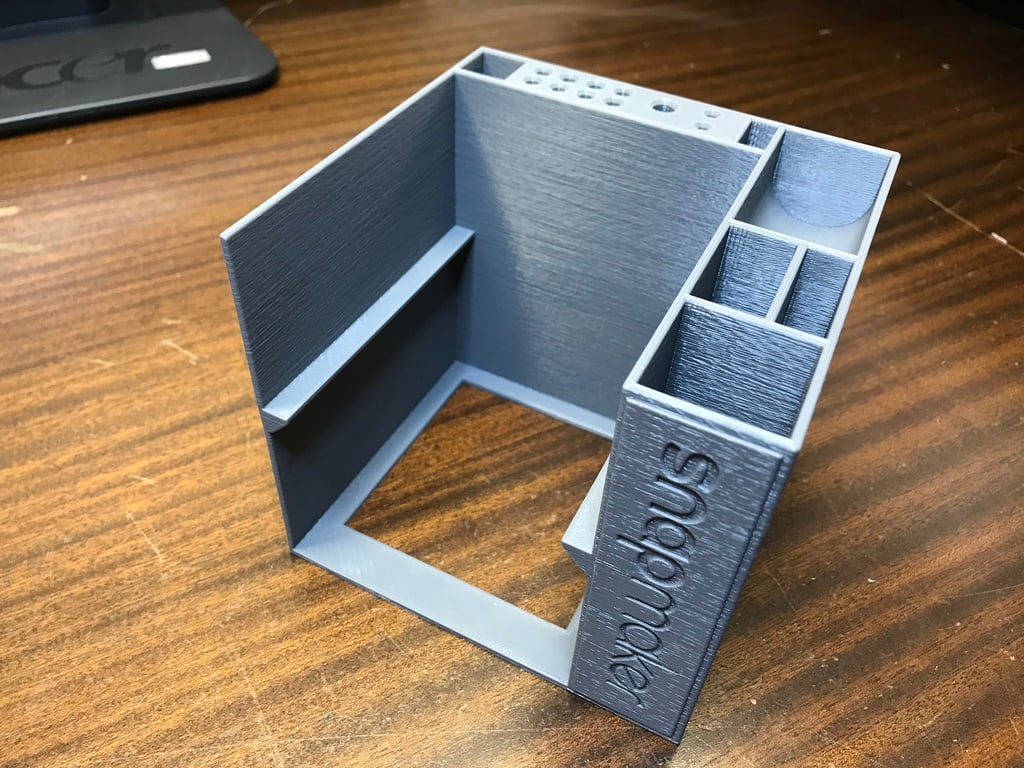
Dear Creator (PK), Thank you so much for this. I was eager to print your version 1.3, MyBox1.3, for a while now but it lacked some branding, which made me want to add the Snapmaker logo to it. To achieve this, I discovered and utilized a fantastic Display Mount on Thingiverse - https://www.thingiverse.com/thing:2763252 by Michael Paschek (royaljelly). Using MeshMixer, I carefully cut out the logo and attempted to apply it onto the Snapmaker Accessories Storage Box. I was able to move the four triangles (surfaces) on the right side backwards and place my new logo in that location. However, I struggled to get the Boolean Union to work as desired. Following Maker's Muse guidance in "Stitching meshes together using Meshmixer - 3D Printing 101" https://www.youtube.com/watch?v=rAqWkN85ZLo&t=337s, I increased the number of triangles. Unfortunately, this resulted in MeshMixer having issues with the Boolean Union, causing some adjoining surfaces to break and creating Non-Manifold Edges. Despite my efforts for hours with Meshmixer (an excellent tool), I was unable to resolve the problem. As noted by Maker's Muse in the video, Angus mentioned that Netfabb Cloud Service doesn't stitch in the free version - however, this has changed since 2016 and it does stitch now. So, I decided to subscribe to Netfabb just for stitching/unioning my two STLs. I discovered that the free version of Netfabb can indeed stitch, which made me very happy with my results. I utilized Simplify3D to slice it and print on my Snapmaker. The GCODE is included for those who wish to print the same on a Snapmaker.
With this file you will be able to print Snapmaker Accessories Storage Box with Logo with your 3D printer. Click on the button and save the file on your computer to work, edit or customize your design. You can also find more 3D designs for printers on Snapmaker Accessories Storage Box with Logo.