Snapmaker Rotary Attachment
thingiverse
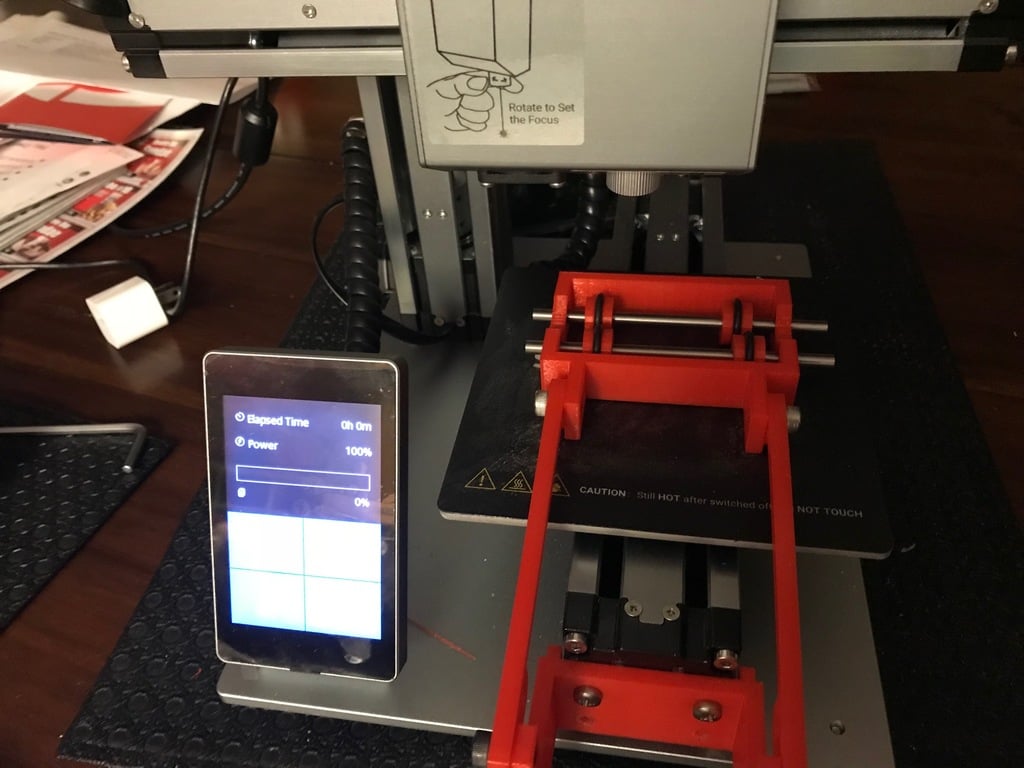
Rotary Axis for Snapmaker 3D Printer. For optimal results on all versions, perform laser burning in the X direction for best outcomes. Three additional STL files have been added: roller_base-1.stl, rods-1.stl, and wheel-1.stl. This setup provides greater stability. It utilizes R188 bearings, a 1/4 x 4-1/2 bolt for shafts, and rubber seals with dimensions of 1" OD X 3/4" ID X 1/8". A modified roller base (roller_base1) has been included. This version is the same as the original but without side cutouts to enhance strength. The project's total length must be less than 70mm. Print Requirements: * 4 rollers * 2 connector arms * 1 roller base * 1 support bracket Hardware Components: * 4 M5-8 screws * 4 M4-8 screws * 4 bearings (105zzz) with dimensions of 5mm ID, 10mm OD, and 4mm wide * 4 #10 o-rings with dimensions of 1/5" ID, 11/16" OD, and 3/32" wide * 2 rods with dimensions of 5mm x 100mm Assembly Instructions: Attach the support bracket to the Y-axis using 4 M4 screws. Place O-rings onto the rollers. Install two rollers on each shaft. Insert shafts into bearing holes within the roller base. Slide bearings onto shafts and press them into the roller base. If the roller base cracks at its thinnest spot, it is still functional (new design in development). Attach control arms as shown in the picture using 4 M5 screws. Ensure arm bolts are snug but moveable. The roller base features a small notch on each side to align with the laser. Verify that all rollers remain in contact with the base during operation.
With this file you will be able to print Snapmaker Rotary Attachment with your 3D printer. Click on the button and save the file on your computer to work, edit or customize your design. You can also find more 3D designs for printers on Snapmaker Rotary Attachment.