SNES controller
thingiverse
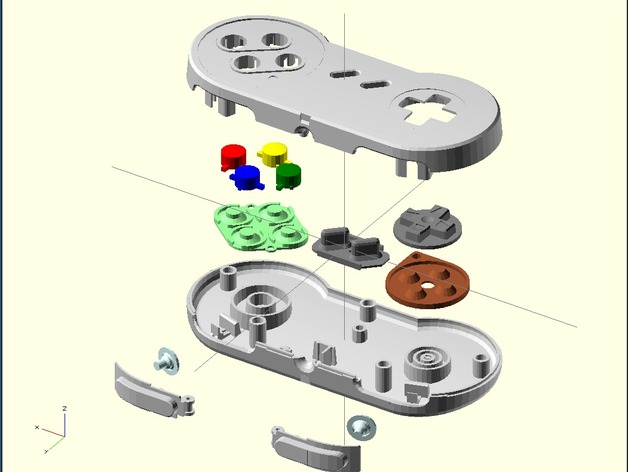
This replica SNES controller boasts a spectacularly useless design, lacking electronics and connector. The rubbers are quickly modeled but not printed or tested; they may be made using flexible filament. Once able to print circuit boards, the creator plans to recreate these components as well. Retro gaming is best experienced on original hardware, though combining this controller with a SNES emulator could be intriguing. It also serves as an engaging construction puzzle for kids. The model resembles previous controller creations for Suzo International Arcade Stick. An update includes electronics recreated based on Raphael Assenat's schematics, milled on a PCB Cyclone built with the creator's 3D printer. Resistor challenges were encountered, but all buttons now function correctly. Future updates will feature flexible rubbers, connectors, and small PCBs for L & R buttons. To print, individual parts require support; manual improvements to screw and pinholes may be necessary. Original pad components can be added temporarily. Post-print polishing and finishing options are provided. Challenge yourself to complete Super Mario World without releasing the 'run' button!
With this file you will be able to print SNES controller with your 3D printer. Click on the button and save the file on your computer to work, edit or customize your design. You can also find more 3D designs for printers on SNES controller.