Snoopy Sno Cone Machine Replacement Locking Cap
thingiverse
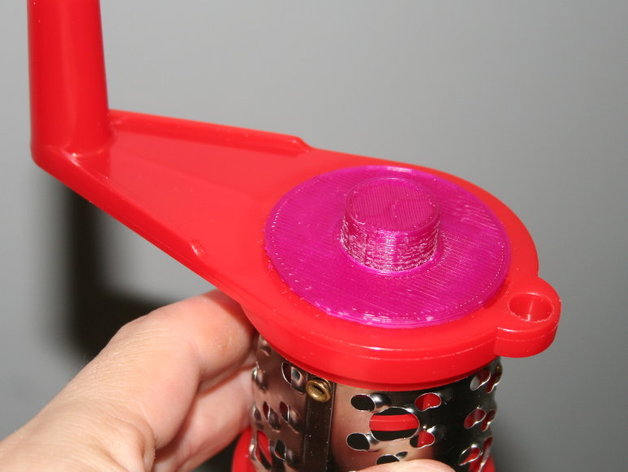
The children desired snow cones for dessert tonight, but we were taken aback by the lack of a vital component (the "Locking Cap") that connected the handle to the grater. Thus, I retrieved the calipers and used OpenSCAD to design a prompt replacement. Tomorrow, I will be hailed as a hero by my little ones. My design includes a knob that extends through the center to secure it in place. In the updated version, there's also a 3mm hole on the handle. Simply thread a piece of filament through it to keep the parts together and make turning easier. 1) Print the replacement part. 2) Assemble as illustrated in the photos. 3) Enjoy sno-cones without purchasing a new machine. 4) Embrace your delighted children and remind Mommy of the wise investment in the 3D printer.
With this file you will be able to print Snoopy Sno Cone Machine Replacement Locking Cap with your 3D printer. Click on the button and save the file on your computer to work, edit or customize your design. You can also find more 3D designs for printers on Snoopy Sno Cone Machine Replacement Locking Cap.