Snowboard Hanger, Adjustable, "Exhibit A"
pinshape
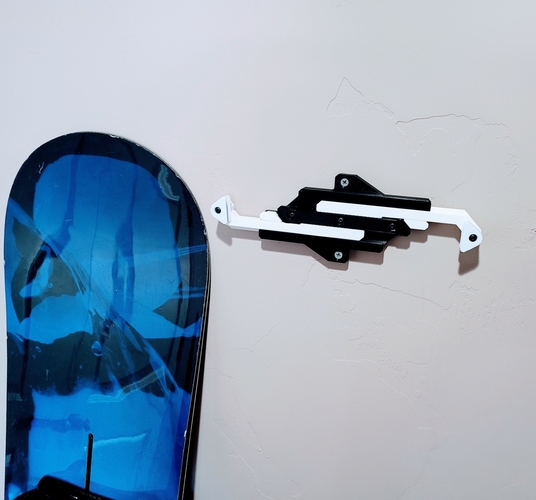
Watch the Demo Build here: Use this adjustable fixture to display your snowboard in the vertical position, nearly flat against the wall, bindings out. The adjustment allows you to fine tune the height of the board from the floor. Free for the first 50 downloads, please just post some photos. Both screws mount into the same stud in the wall, no drywall anchors. No measuring how far apart to hang two points, the width is adjustable and the Stoppers pivot to fit your boards edge angle. Adjust the width by inserting the Slide Arms into the base equally engaged in the Gear. Get it to the width you want then lock them down by inserting the Locking Plate between them and fastening it down with screws. The Locking Plate positively locks the arms into position. Is this overengineered? Maybe, but that's why I love it. HARDWARE: (Five) #8-32 hex jam nuts (1/8" thick x 11/32 across flats https://www.mcmaster.com/90480A009/ (Three) #8-32 Button Head Socket Cap Screws x 5/8" Long https://www.mcmaster.com/92949A196/ (Two) #8-32 Button Head Socket Head Cap Screws x 1" Long https://www.mcmaster.com/92949A199/ (Two) #10 Dry wall or wood panel screws, 2" Long (minimum), with conical shaped head. Https://www.mcmaster.com/90294A301/ Use stainless steel fasteners if you want to avoid moisture & corrosion, but I like the look of the Black Oxide steel fasteners because the heads blend in with the black print color. HEX NUT POCKETS: You have to press the nuts into the hex shaped pockets on the printed parts. If the hex nuts you use are 1/8" thick, and the width across flats is .337-.346, it will work just fine. The heads of the button head screws sit below the surface so they will NOT contact your beautiful board graphic ... unless you're a dink and you fail to fully seat the screws or you use the wrong screws. Don't be a dink, do it right. Mount your snowboard and post a photo so I can revel in the beauty of it too. Cheers, Mark Printing Tips: I used a Prusa i3-MK3s PLA: 0.15" layer height at least 30% infill, with a cubic fill pattern No supports needed Perimeter walls (vertical shells) at least 3 Horizontal shells: 5 at top and bottom Seam position Rear If you can turn on ironing, it looks fantastic on the final print layers. PRINTING THE BASE and ARMS: The base and arms take a little more care to print because of how long they are. The base is relatively thick at the ends (where arms slide in) and if the room is cold, the print will tend to curl off the plate. It takes 7+ hours to print, and I had to use textured sticker from BuildTak or Overture, print with PLA. Or just place the printer in a warm enclosure, this solved a host of issues I was seeing, now I'm a believer. If the arms don't slide cleanly into the Base, it's most likely because the ends curled off the bed on your print. They must remain firmly attached to the heated plate or the components won't slide together because the clearances are close by design. There is a clearance of .002" all around between the base and the arms - which the Prusa can handle comfortably, I can't speak for the other 3D printers. If the printer you have can't reliably hold an accuracy close to .002", this print may not work for you.
With this file you will be able to print Snowboard Hanger, Adjustable, "Exhibit A" with your 3D printer. Click on the button and save the file on your computer to work, edit or customize your design. You can also find more 3D designs for printers on Snowboard Hanger, Adjustable, "Exhibit A".