soap dish + diy Prusa soap mold
prusaprinters
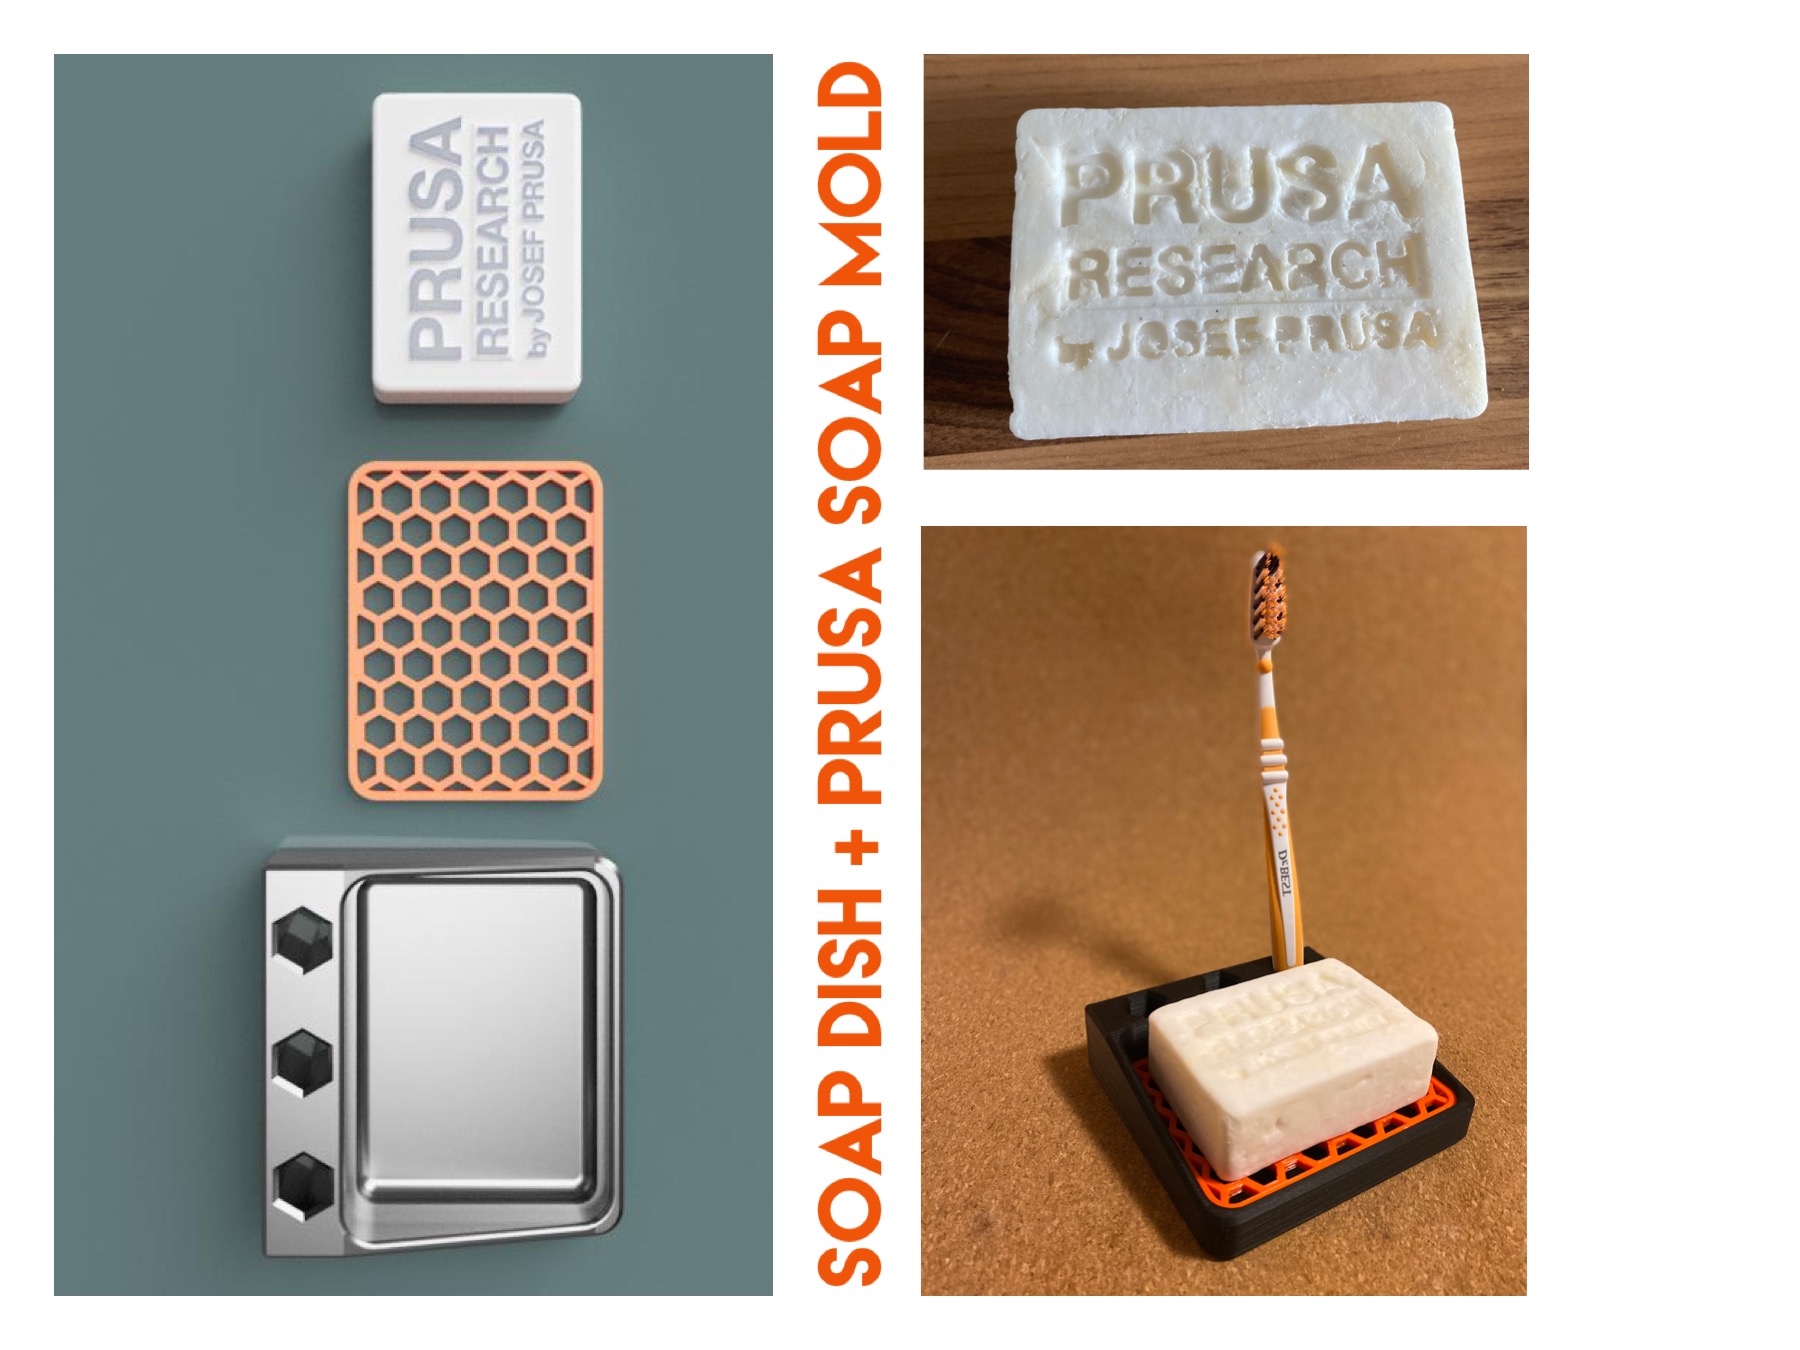
<p>Hey ther :)</p><p><br>I thought I'd take part in the soapdish contest and design a soapdish + a negative mold for pouring a Prusa soap. :D</p><p>I put 3 holes in the top of the soap container where you can store your toothbrush or similar bathroom items</p><p>I hope you enjoy the model and just try it out for yourself.</p><p>I have written a description of how to make the soap here, which should give you a little guide, but there are enough videos and blog entries on this topic on the Internet, so feel free to get inspiration there, the possibilities are great.</p><p>and I would be happy if you post your makes here.</p><p>happy making :D</p><p><br> </p><p><strong>You need:</strong></p><ul><li>Soap of your choice, preferably one made specifically for pouring, these are available at DIY stores or online. I have an Amazon link here that shows you a pouring soap.</li></ul><p> Commercial soaps should also work.</p><p> (no curd soap, this contains too little fat and does not melt)</p><p><a href="https://www.amazon.de/Rayher-34227000-hautneutral-Selbermachen-dermatologisch/dp/B01NCZREON/ref=sr_1_3_sspa?crid=130PAHSL95A3G&keywords=diy%2Bseife&qid=1653854081&sprefix=DIY%2Bseife%2Caps%2C90&sr=8-3-spons&spLa=ZW5jcnlwdGVkUXVhbGlmaWVyPUExUzM2MUdaMjA3NkxNJmVuY3J5cHRlZElkPUEwOTI5NDc4MTA0Q1haWkpOMlNITiZlbmNyeXB0ZWRBZElkPUEwMjQzNzg2M0pQWVFVUVM1MkU2NCZ3aWRnZXROYW1lPXNwX2F0ZiZhY3Rpb249Y2xpY2tSZWRpcmVjdCZkb05vdExvZ0NsaWNrPXRydWU&th=1">https://www.amazon.de/Rayher-34227000-hautneutral-Selbermachen-dermatologisch/dp/B01NCZREON/ref=sr_1_3_sspa?crid=130PAHSL95A3G&keywords=diy%2Bseife&qid=1653854081&sprefix=DIY%2Bseife%2Caps%2C90&sr=8-3-spons&spLa=ZW5jcnlwdGVkUXVhbGlmaWVyPUExUzM2MUdaMjA3NkxNJmVuY3J5cHRlZElkPUEwOTI5NDc4MTA0Q1haWkpOMlNITiZlbmNyeXB0ZWRBZElkPUEwMjQzNzg2M0pQWVFVUVM1MkU2NCZ3aWRnZXROYW1lPXNwX2F0ZiZhY3Rpb249Y2xpY2tSZWRpcmVjdCZkb05vdExvZ0NsaWNrPXRydWU&th=1</a></p><ul><li>printed Prusa soap mold with frame</li><li>Pot</li><li>Bowl</li><li>Water</li><li>something to stir</li><li>Oil to grease the mold</li></ul><p> </p><p><br><strong>Instructions:</strong></p><p> </p><ol><li>Take your soap and cut it into smal pieces </li></ol><figure class="image image-style-align-center image_resized" style="width:75%;"><img src="https://media.printables.com/media/prints/216371/rich_content/6912cde0-1569-431b-bc47-f98d3ed9b4e6/cdb3bc52-65cb-4db9-b107-b11be6b63c70.jpeg#%7B%22uuid%22%3A%22b6b1e2e9-ae8d-41a9-9930-de2834c0adff%22%2C%22w%22%3A4032%2C%22h%22%3A3024%7D"></figure><figure class="image image-style-align-center image_resized" style="width:75%;"><img src="https://media.printables.com/media/prints/216371/rich_content/81b2dd22-195f-4912-831b-6ee46d8918cb/e07f3553-f954-419c-ad9f-7585a90a0a2c.jpeg#%7B%22uuid%22%3A%2203a1d315-e2df-49e8-9b2a-6b698e1a151d%22%2C%22w%22%3A4032%2C%22h%22%3A3024%7D"></figure><p> </p><p> 2. Place the pieces in a heatproof bowl</p><figure class="image image_resized" style="width:75%;"><img src="https://media.printables.com/media/prints/216371/rich_content/4e21ef9c-c2c0-494a-9d69-4809ec70ce3e/07cc3553-a986-47bc-bf6a-3b251a3f86f3.jpeg#%7B%22uuid%22%3A%22cff10d2b-9554-4a75-83b6-ee0b4fb1fc12%22%2C%22w%22%3A4032%2C%22h%22%3A3024%7D"></figure><p> 3. Heat some water in a saucepan</p><p> 4. Place the bowl of soap bars in the pot of hot water</p><figure class="image image_resized" style="width:75%;"><img src="https://media.printables.com/media/prints/216371/rich_content/83a6bd18-eba4-480f-9c85-02174ad08eab/d972c546-1068-4a81-9b17-4369151aaa33.jpeg#%7B%22uuid%22%3A%2258ba6be9-47b2-425e-a138-7b03f4659db8%22%2C%22w%22%3A4032%2C%22h%22%3A3024%7D"></figure><p> 5. Stir occasionally with a spoon or stick. I also added about 50ml of water to the bowl with the soap pieces.</p><figure class="image image_resized" style="width:75%;"><img src="https://media.printables.com/media/prints/216371/rich_content/eddd399e-38db-44fd-b266-64993f5b7f44/be60dddc-d242-49fe-8215-9d8d6512117c.jpeg#%7B%22uuid%22%3A%226aa18e88-09bc-4424-89cc-239a179efcfe%22%2C%22w%22%3A4032%2C%22h%22%3A3024%7D"></figure><p> 6. When the soap has become creamy or runny, you can remove the bowl from the pot (caution hot ⚠️ !)</p><figure class="image image_resized" style="width:75%;"><img src="https://media.printables.com/media/prints/216371/rich_content/8a8f58ef-a21c-4acc-b1eb-58fc2857aafd/3b610c11-92db-4d31-92e6-b96683d38578.jpeg#%7B%22uuid%22%3A%227c3fa9b2-5422-4061-b59f-cad4932e81ae%22%2C%22w%22%3A4032%2C%22h%22%3A3024%7D"></figure><p> 7. Now put the mold together and grease it with some oil so that the soap can be removed later (I used some olive oil here)</p><figure class="image image_resized" style="width:75%;"><img src="https://media.printables.com/media/prints/216371/rich_content/058044ff-96f0-424a-9402-ed1e1f118809/f7bb35db-aece-44c2-bd34-2b76d9ea13b7.jpeg#%7B%22uuid%22%3A%22743ddbbd-940b-4402-b0c9-60330b6bf047%22%2C%22w%22%3A4032%2C%22h%22%3A3024%7D"></figure><figure class="image image_resized" style="width:75%;"><img src="https://media.printables.com/media/prints/216371/rich_content/f6f224f1-d149-4b18-9440-2e78e62af760/b5f59ea2-de2b-4372-8417-58f87ddf4a49.jpeg#%7B%22uuid%22%3A%22e1aaf20c-296b-4c9f-a3eb-7251d735adc1%22%2C%22w%22%3A4032%2C%22h%22%3A3024%7D"></figure><p> 8. Now fill the liquid soap halfway into the mold and then tap the mold several times on the table so that air bubbles can escape. If your soap has become completely liquid you can skip this step. (Caution ⚠️ if the soap is too hot let it cool down a bit so your mold doesn't melt)</p><figure class="image image_resized" style="width:75%;"><img src="https://media.printables.com/media/prints/216371/rich_content/400b13a5-808b-415c-9567-f68400610310/df99a37a-881c-454c-97e8-ecac741a0649.jpeg#%7B%22uuid%22%3A%225945c721-80c2-4a99-a11e-0d67e1e2087e%22%2C%22w%22%3A4032%2C%22h%22%3A3024%7D"></figure><figure class="image image-style-align-center image_resized" style="width:75%;"><img src="https://media.printables.com/media/prints/216371/rich_content/d6a639ad-f7c4-4a7c-a0ee-716b2a48eed8/7a123d24-d477-4bbe-bc91-d81adffce985.jpeg#%7B%22uuid%22%3A%226a7b5eb4-4b21-48d8-83e3-023175d5db86%22%2C%22w%22%3A4032%2C%22h%22%3A3024%7D"></figure><p><br> 9. Now you can set the mold aside and wait for it to set. You can also speed this up by putting the soap in the fridge.</p><p> 10. When the soap has set completely, you can push it out of the mold and carefully remove the Prusa stamp.</p><p> 11. Hooray now the soap is ready and you can wash your hands and put the soap on the soap dish :D</p><figure class="image image_resized" style="width:75%;"><img src="https://media.printables.com/media/prints/216371/rich_content/5abde662-8060-4d13-9de0-9cdb75b1d54c/171c226c-b7c9-4a5c-9a34-3e6ee125dfef.jpeg#%7B%22uuid%22%3A%22d2c966ad-816b-4165-a6f9-3c59588eea63%22%2C%22w%22%3A3024%2C%22h%22%3A4032%7D"></figure>
With this file you will be able to print soap dish + diy Prusa soap mold with your 3D printer. Click on the button and save the file on your computer to work, edit or customize your design. You can also find more 3D designs for printers on soap dish + diy Prusa soap mold.