Socket Organizer
thingiverse
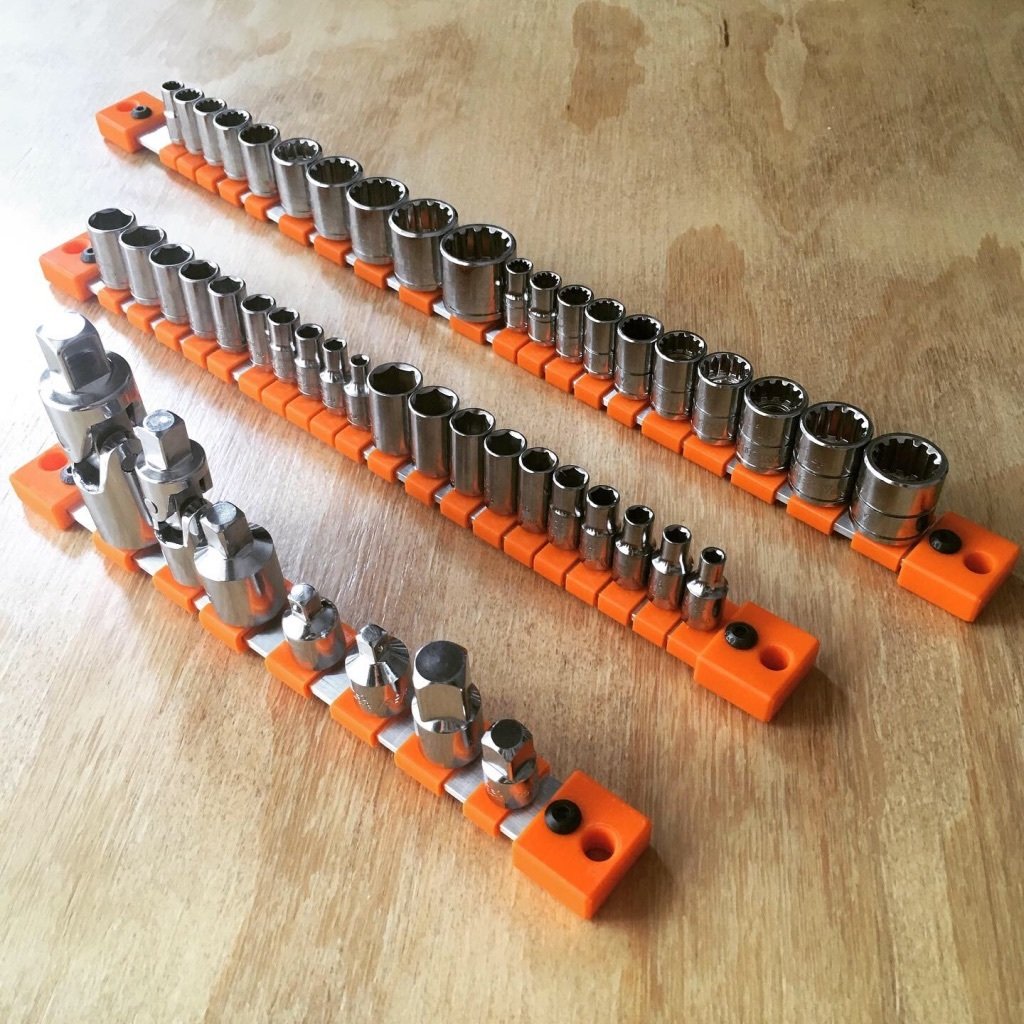
Here is a DIY customizable socket organizer. I was unhappy with the organizers I found at the big box stores and the prices were astronomical. This organizer uses off the shelf 3/4" x 1/8" aluminum bar that is cut to length so you can make a socket organizer that fits in your toolbox and have as many adapters in all the sizes you need. The adapters were designed to fit 1/4", 3/8", and 1/2" sockets. The ball detent was modeled as a solid and the square drive acts as a spring to securely hold the socket in place. Other socket organizers on thingiverse use an interference fit to hold to sockets on which would likely wear out after a few uses. I bought a single 36" strip of aluminum and made a 16", 12", and an 8" version and the whole project cost less that $8 to build for all 3. This comes out to about 1/3 the price of buying the organizer in store. ***Bill of Materials (per organizer)*** Printed Parts 1. end_cap / Qty: 2 2. quarter_inch_adapter / Qty: as needed 3. three_eights_adapter / Qty: as needed 4. half_inch_adapter / Qty: as needed COTS Parts 5. Aluminum strip - 3/4" x 1/8" x ## / Qty: one per assembly 6. M5 screw x 10mm thread length / Qty: 2 ***Instructions*** 1. Print all of your parts in PETG. PLA has a tendency to creep and would not be suitable for this build. I printed these parts with 0.2mm layer height / 15% infill / 3 perimeters and the parts came out quite robust. No support or brim needed 2. Cut the aluminum to length and place end caps on both sided. Mark the center of the mounting hole and remove the end caps. Drill a hole large enough for a clearance fit with the M5 bolt. Clean up all aluminum chips. I took emery cloth the the aluminum at this point to get the surface clean and shiny. 3. Place the end cap back on one end of the aluminum and thread in one M5 screw. The screw was enough interference to form thread without breaking the part in my experience. 4. Install all the square drive adapters with sockets and install the other end cap. Be sure to leave 1/2" of wiggle room between the sockets to make is easy to remove and reinstall.
With this file you will be able to print Socket Organizer with your 3D printer. Click on the button and save the file on your computer to work, edit or customize your design. You can also find more 3D designs for printers on Socket Organizer.