Solar Finder
thingiverse
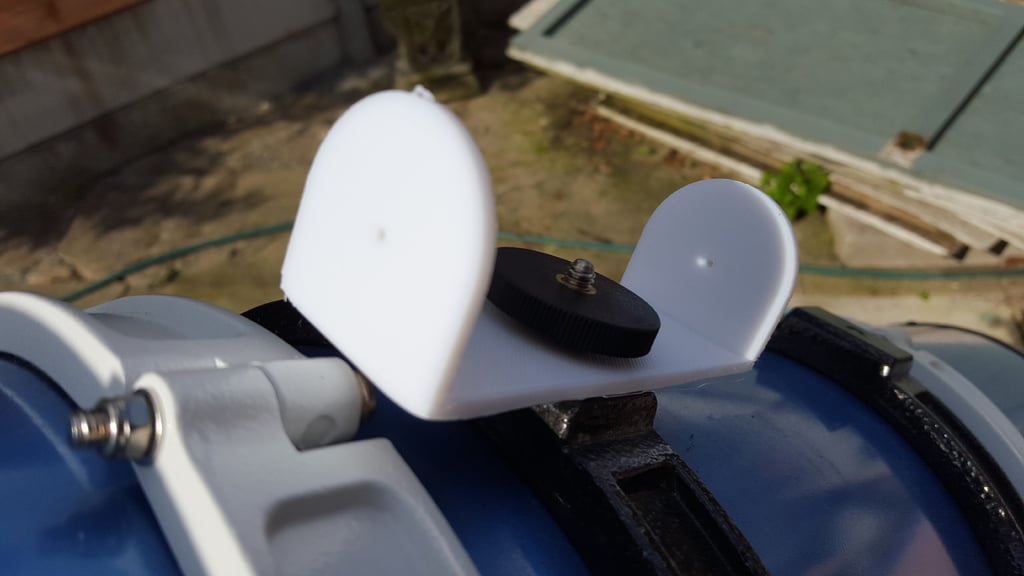
It can be surprisingly difficult to find the Sun through a telescope! The best way to find it is usually to minimise the shadow of the scope, but even so, it can be off by a few degrees. This is where a Solar finder helps. Note that the two holes are NOT designed for you to look through towards the Sun! The sunlight should go through the first hole and make a spot on the screen opposite. Move the telescope so the spot is on the second hole to align it with the Sun. Obviously, the finder must first be aligned with the telescope itself. It's why there are two holes. The holes are too small to see shapes, so you need a bright light on the opposite side of the garden. Point the telescope to the light, and adjust the finder until you see the light through the two holes. A second technique I've had success with is to move the telescope to a horizontal position using a bubble level (real or phone app) and then adjust the finder position so it is horizontal too. For the left-right adjustment, aligning the finder with the scope by eye is accurate enough. Note that the up-down adjustment is done by moving the clamp ring on which the finder is attached (see photo). You don't need great accuracy, so it's good enough.
With this file you will be able to print Solar Finder with your 3D printer. Click on the button and save the file on your computer to work, edit or customize your design. You can also find more 3D designs for printers on Solar Finder.