Soldering Fume Extractor/Absorber
prusaprinters
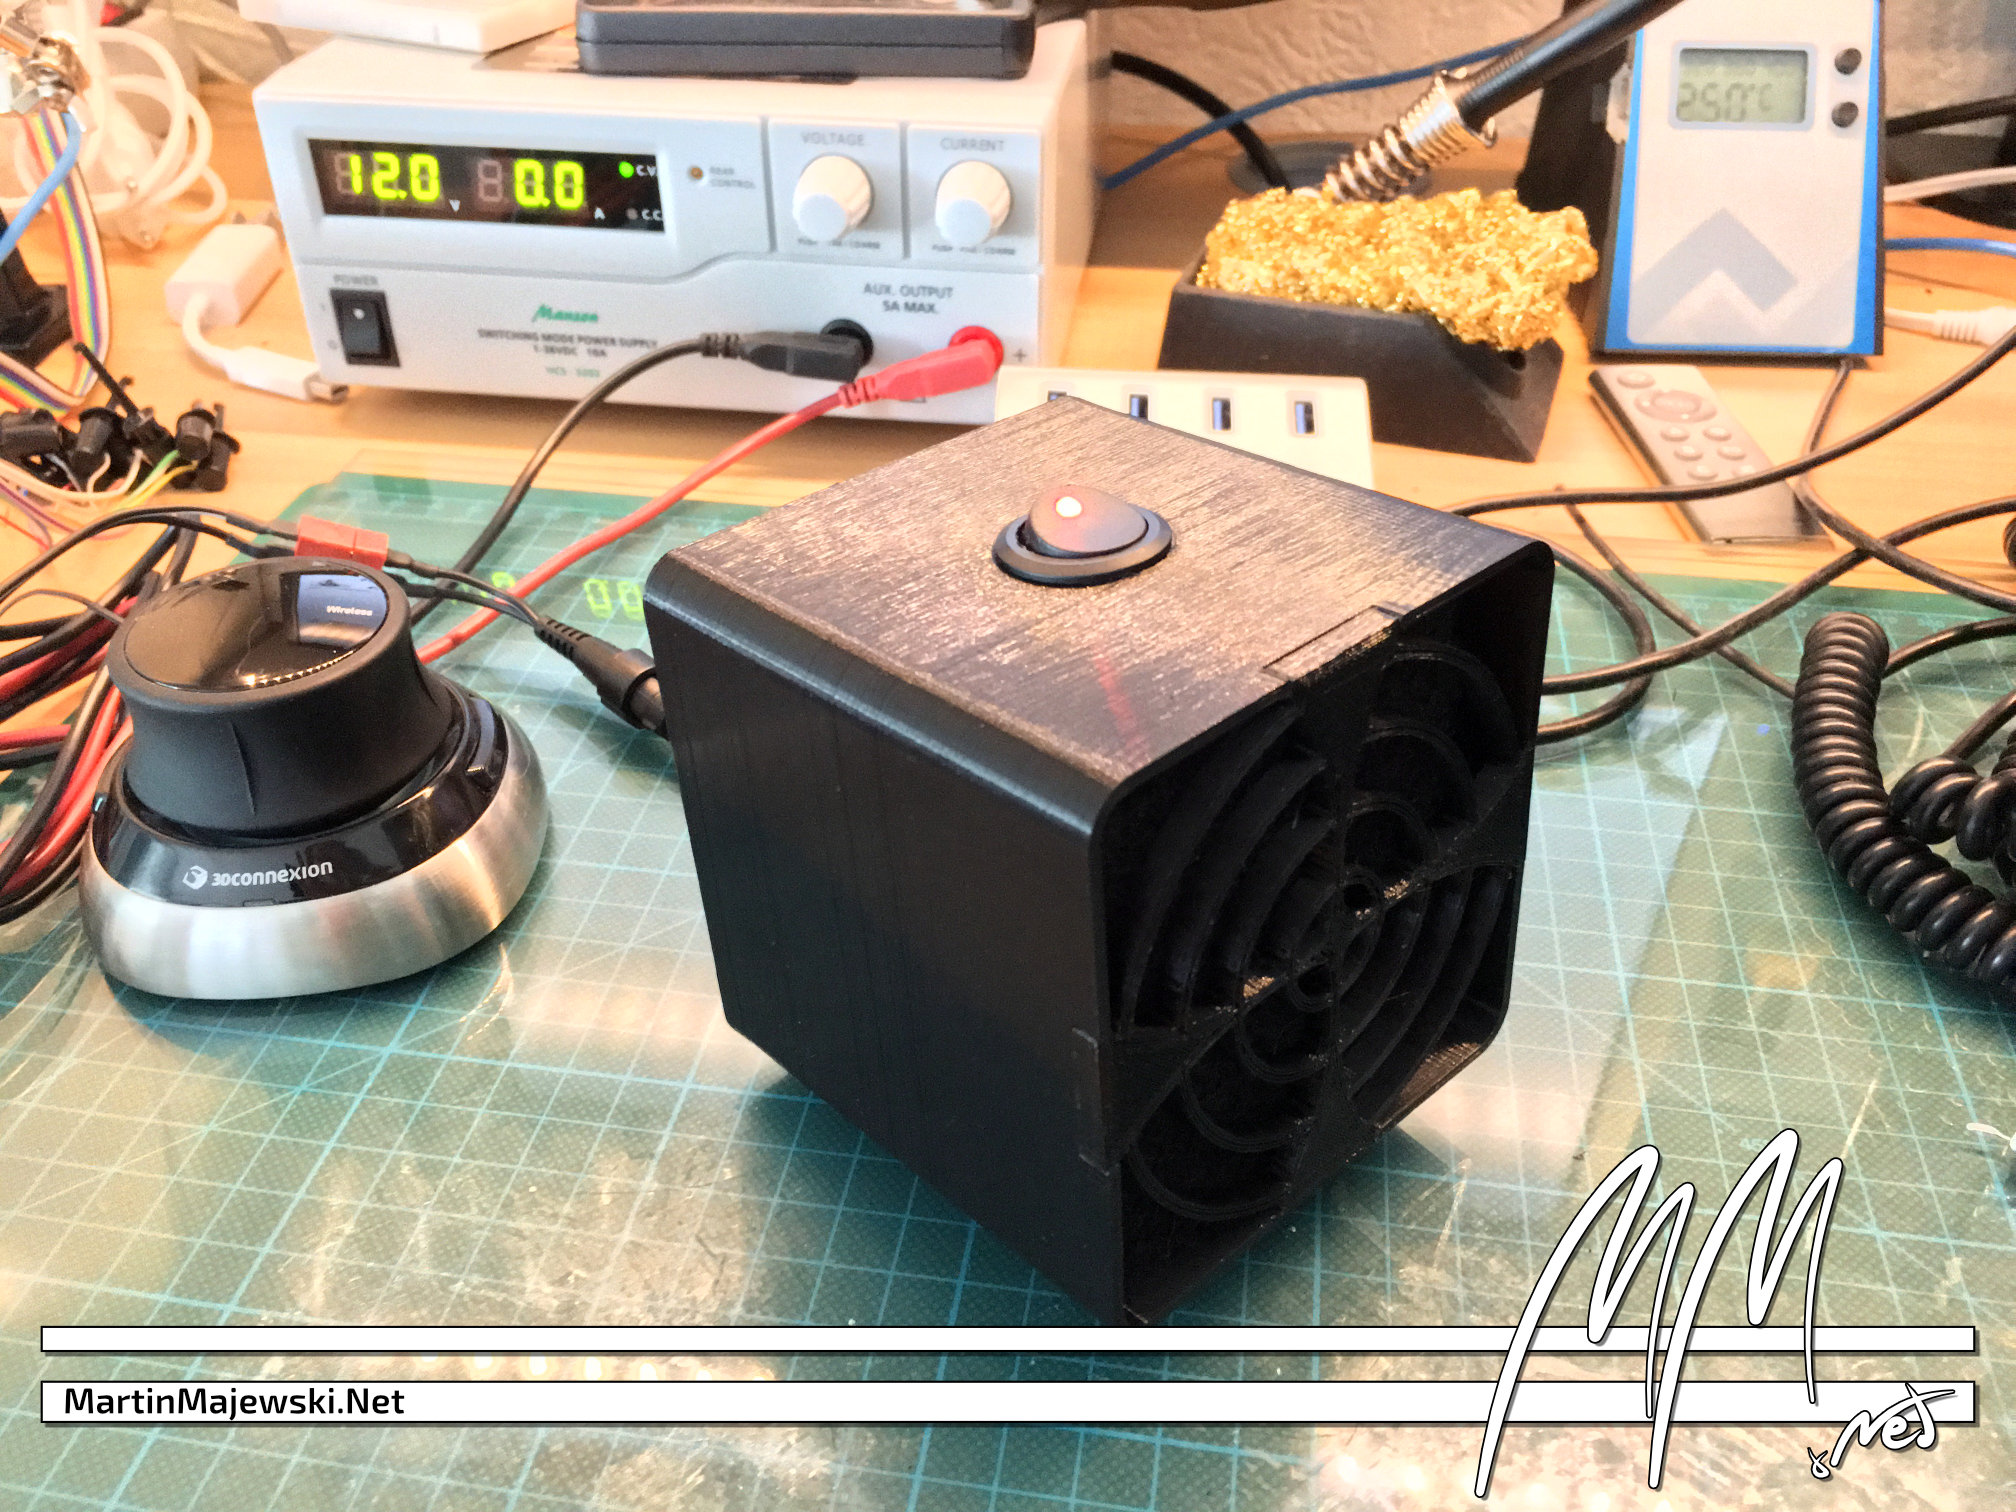
<p>I was looking for a commercial fume extractor but saw the price tag. So I searched for a DIY thing here at Thingiverse and found the fume extractors linked as remix sources. Though being nice, I thought of something more "complete," something with an on-off switch, something that one can quickly detach from a power supply.</p> <p>So this is the design I made from scratch.</p> <p>It features a switch on top with an LED indicator, has a metal fan grille on the back for safety reasons and a printed clip-in grille at the front to secure the activated carbon filter in place. Furthermore, it is a larger design: The 80mm 12V fan provides power to suck in all the bad things coming from the solder.</p> <p>Please also take a look at the print settings and post-processing section for more details.</p> <p>Some video footage of this fume absorber can be found at YouTube:</p> <p><a href="https://youtu.be/veo-UWyFcx8">https://youtu.be/veo-UWyFcx8</a><br/> <figure class="media"> <oembed url="https://www.youtube.com/watch?v=lA65kzdhVo8"></oembed> </figure> </p> <p>Please also take a look at my other designs, printer parts, and tools.</p> <p>If you like to support me and my work, please consider following me on.</p> <ul> <li><a href="https://www.martinmajewski.net">MartinMajewski.net</a></li> <li><a href="https://twitter.com/MMajewskiNet">Twitter</a></li> <li><a href="https://www.instagram.com/martinjmajewski">Instagram</a></li> <li><a href="https://goo.gl/QJTQKv">YouTube</a></li> </ul> <p>If you like to buy me a coffee to stay productive and creative, you can do so by sending a tip via Prusaprinters.org or PayPal...</p> <p><a href="paypal.me/martinmajewskinet">PayPal.Me</a></p> <p>... or by using one of the following affiliate links down below (without any additional costs for you!).</p> <h3>Gear that you need to build this fume extractor/absorber</h3> <ul> <li>12V, 80mm PC fan<br/> <a href="https://amzn.to/32oq1xY">Amazon.de</a><br/> <a href="https://amzn.to/31nwHLn">Amazon.co.uk</a></li> <li>Some screws for the fan<br/> <a href="https://amzn.to/2BlT9dd">Amazon.de</a><br/> <a href="https://amzn.to/2Mp2eIC">Amazon.co.uk</a></li> <li>80mm fan grid<br/> <a href="https://amzn.to/33LHhh5">Amazon.de</a><br/> <a href="https://amzn.to/31qsUgo">Amazon.co.uk</a></li> <li>12V Switch from Hotsystems<br/> <a href="http://amzn.to/2bSuaVg">Amazon.de</a><br/> <a href="http://amzn.to/2caVHxh">Amazon.co.uk</a></li> <li>2.1mm socket connector cable<br/> <a href="https://amzn.to/2pvAo4E">Amazon.de</a><br/> <a href="https://amzn.to/2BqcSZy">Amazon.co.uk</a></li> <li>black and red wires<br/> <a href="https://amzn.to/2Mt2oPp">Amazon.de</a><br/> <a href="https://amzn.to/2qiF8L9">Amazon.co.uk</a></li> <li>Shrink tubing<br/> <a href="https://amzn.to/2nWYuES">Amazon.de</a><br/> <a href="https://amzn.to/32Ez91q">Amazon.co.uk</a></li> <li>Universal activated carbon filter<br/> <a href="https://amzn.to/32nLZ4d">Amazon.de</a><br/> <a href="https://amzn.to/2VVuMNi">Amazon.co.uk</a></li> <li>I am using an ersa i-CON Pico station<br/> <a href="https://amzn.to/35Ly3Dm">Amazon.de</a><br/> <a href="https://amzn.to/31wJ881">Amazon.co.uk</a></li> </ul> <h3>Generic Affiliate Links</h3> <ul> <li><a href="https://amzn.to/2BppJuW">Amazon.de</a></li> <li><a href="https://amzn.to/2VUPlZS">Amazon.co.uk</a></li> <li><a href="https://rover.ebay.com/rover/1/707-53477-19255-0/1?mpre=https%3A%2F%2Fwww.ebay.de%2F&campid=5337986926&toolid=20008">eBay Germany</a></li> <li><a href="https://www.gearbest.com?lkid=13789568">GearBest.com</a></li> </ul> <p>Thank you very much and happy printing,<br/> Martin</p> <h3>Print instructions</h3><ul> <li>Printers used for this project: Prusa Research and MendelMax3 from Maker's Tool Works</li> <li>Rafts: No</li> <li>Supports: Not mandatory - depends on how well your printer can handle overhangs!</li> <li>Resolution: 0.20 mm</li> <li>Infill: 10% to 20%</li> <li>Filament: Das Filament PETG Black</li> </ul> <h3>Notes</h3> <p>I printed the body and the grille using a <strong>0.4mm</strong> nozzle and <strong>0.2mm</strong> layer height. There should be no infill needed for the body's walls. Just use enough perimeters. I used four. For the stand, I used a 20% rectangular infill, but much less should be also good enough to provide a sturdy build.</p> <p>The switch has a necessary hole diameter of <strong>2.1mm</strong> and so has the 3D model. If you want to use a switch with another diameter, please let me know in the comment section.</p> <h3>Post-Printing</h3> <p><strong>Required additional hardware</strong></p> <p>To build this extractor you need the gear that I linked to in the section above!</p>
With this file you will be able to print Soldering Fume Extractor/Absorber with your 3D printer. Click on the button and save the file on your computer to work, edit or customize your design. You can also find more 3D designs for printers on Soldering Fume Extractor/Absorber.