Soldering Helping Hands Remixed³
prusaprinters
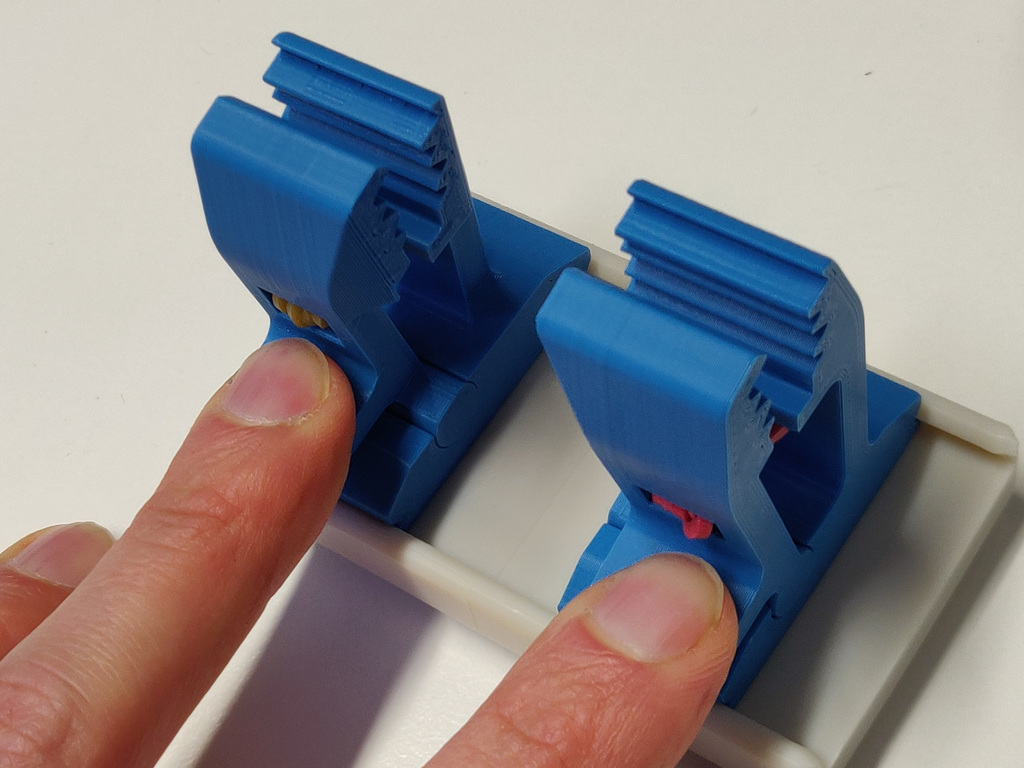
<h3>Soldering Helping hands, re-re-remixed</h3> <p>A further evolution of the <a href="https://www.thingiverse.com/thing:4029106">re-remix</a>, based on <a href="https://www.thingiverse.com/thing:3709969">this</a>, inspired by <a href="https://www.thingiverse.com/thing:2757071">this</a> which originated from <a href="https://www.thingiverse.com/thing:1635453">this</a>. Phew..</p> <p><strong>Third-hand designed to solder wires and/or component leads</strong>, featuring:</p> <ul> <li>Adjustable distance between the clamps</li> <li>Weighted support for stability (using 2x 40x80x2mm steel bars)</li> <li>Ample space around the soldering job</li> <li>Different clamp teeth for varying grip/hold</li> <li>Press-down to open for improved ergonomics</li> </ul> <h3>Printing</h3> <p>Optimized for a 0.4mm nozzle, 0.2mm layers, 3 perimeters, 15-20% infill. No supports required.</p> <p>Several printing options are available:</p> <p>hands_full_plate.stl contains all printable parts. You'll need two 40x80x2mm steel bars to be used as weight and two short elastic bands.</p> <p>hands_clamps_only.stl contains only the clamps. If you already printed the previous remix the base is compatible and can be reused (the new base differs just by slightly improved feet).</p> <p>hands_solid_base.stl contains the full base as a solid single piece. If you don't care about the weight, you can print this along with hands_clamps_only.stl. Printing vertical is recommended: some friction provided by layer lines is beneficial.</p> <p>hands_solid_core.stl can be used as a template for the weight size or printed in order to join the two hollow bases until you have the required hardware.</p> <h3>Assembly</h3> <p>Assembly is trivial. Fit two 40x80x2mm steel bars stacked on top of each other on one end of the base:</p> <p>If the fit is not tight, a dab of hot glue is recommended in order to keep the base steady. The base has four thin feet to avoid wobble, however adding adhesive rubber pads is still recommended to avoid sliding.</p> <p>Fitting the elastic on the clamps is more annoying. Use some packing wire and wrap a short elastic around it, making as many turns as required (more turns = stiffer clamp):</p> <p>Bend the wire into an U shape, then insert the wire into one hole of the clamp:</p> <p>Insert the pin between the elastic loops (hold it from both sides using your fingertips), then pull the wire to drag it fully into the slot:</p> <p>Join the articulated lever, then repeat:</p> <p>Pull on the wire to make space for the second pin into the elastic, then release.</p> <p>Open and close the clamp a few times to test it. If it's too hard, remove one loop from the elastic. If it's too soft, add a loop instead. Remove the packing wire when satisfied.</p> Category: Electronics
With this file you will be able to print Soldering Helping Hands Remixed³ with your 3D printer. Click on the button and save the file on your computer to work, edit or customize your design. You can also find more 3D designs for printers on Soldering Helping Hands Remixed³.