Sonar with Arduino and Processing
thingiverse
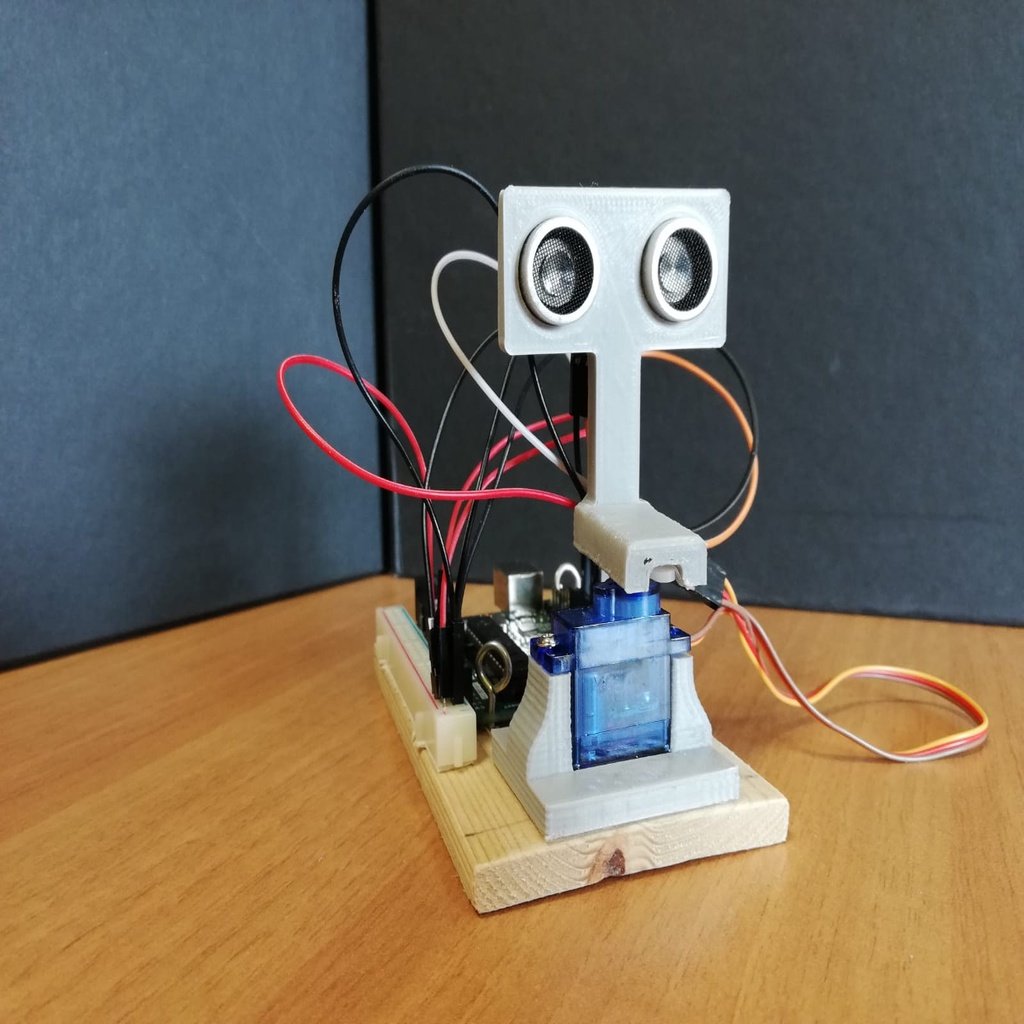
This is a compact sonar made with Arduino and Processing. It's an excellent educational project for combining design and programming expertise. The structure of the Sonar consists of two main components: A servo holder, an ultrasonic holder, and a wooden base measuring about 120 x 70 mm. Both components were printed using a Geeetech printer. The circuit board is constructed with: An Arduino Uno board, a SG 90 servomotor (available at https://amzn.to/37CAvgk), an HC-SR 04 ultrasonic sensor (available at https://amzn.to/2qHNjBn), and a breadboard. Other tools used include: A hot glue gun, screws, and a screwdriver. To display the sonar's readings, follow these steps: Open the Arduino sketch called Arduino_radar (located inside the Things File); check the COM port; open the Processing sketch called sonar_con_processing_ink (also located inside the Things File). Important: If the program doesn't work, ensure that you've changed the value of the COM port to match the one in the Arduino sketch (indicated by a red rectangle in the image). If Processing encounters an error related to font loading (denoted by a blue rectangle), follow these steps: Open the tool from within Processing; click on 'create font'; insert the correct OCRAExtended font in the window that appears. To adjust the screen resolution size, modify the size values indicated by a green rectangle. Enjoy!
With this file you will be able to print Sonar with Arduino and Processing with your 3D printer. Click on the button and save the file on your computer to work, edit or customize your design. You can also find more 3D designs for printers on Sonar with Arduino and Processing.