Sonoff S26 v2.6 Tasmotizer jig
prusaprinters
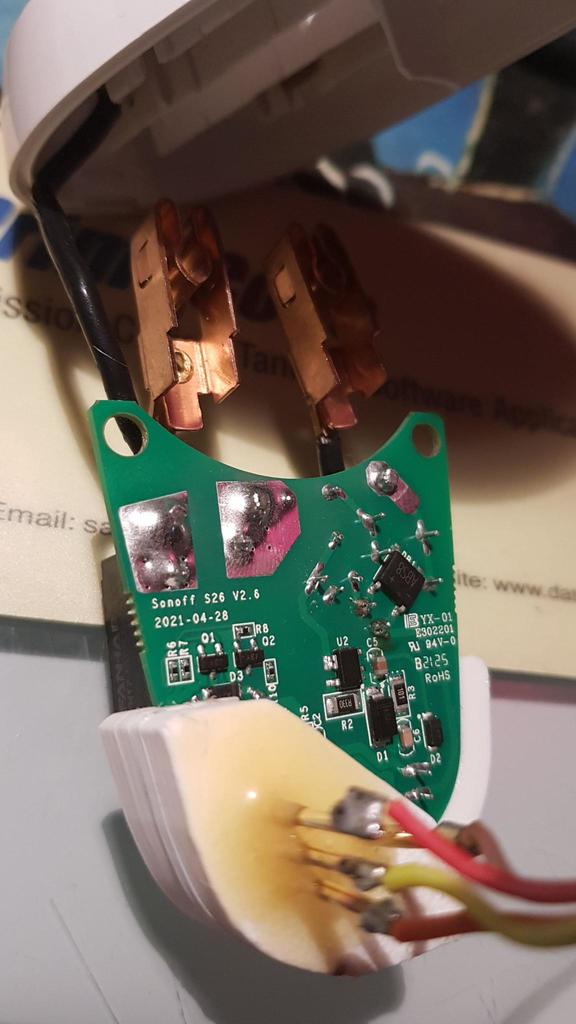
<p>Many jigs exist for the Sonoff S26. I could not find one that fitted the new PCB layout as in version 2.6. For convenient tasmotizing and backup I constructed this jig. Use long pogo pins. Glue them into the "top" and next glue the bottom and top together. The edge of the PCB fits exactly the jig. I reflashed two "new" Sonoffs S26, alignment was perfect.</p> <h3>Print Settings</h3> <p><strong>Printer Brand:</strong></p> <p>Prusa</p> <p class="detail-setting printer"><strong>Printer: </strong> <div><p>I3 MK3S</p></div> <p><strong>Rafts:</strong></p> <p>No</p> <p class="detail-setting supports"><strong>Supports: </strong> <div><p>No</p></div> <p><strong>Resolution:</strong></p> <p>0.2</p> <p class="detail-setting infill"><strong>Infill: </strong> <div><p>20</p></div> <p><strong>Filament:</strong> Herz PLA doesn't matter</p> <p><br/> <p class="detail-setting notes"><strong>Notes: </strong></p> </p><div><p>Use epoxy to glue the pogo pins to the top frame. Increase holes in bottom frame if necessary, so that pogo pins move freely. Finally glue top/bottom together with any glue you use for PLA.</p></div> </p></p></p> Category: Electronics
With this file you will be able to print Sonoff S26 v2.6 Tasmotizer jig with your 3D printer. Click on the button and save the file on your computer to work, edit or customize your design. You can also find more 3D designs for printers on Sonoff S26 v2.6 Tasmotizer jig.