Sonoff Zigbee Bridge No-Soldering Flashing Jig
prusaprinters
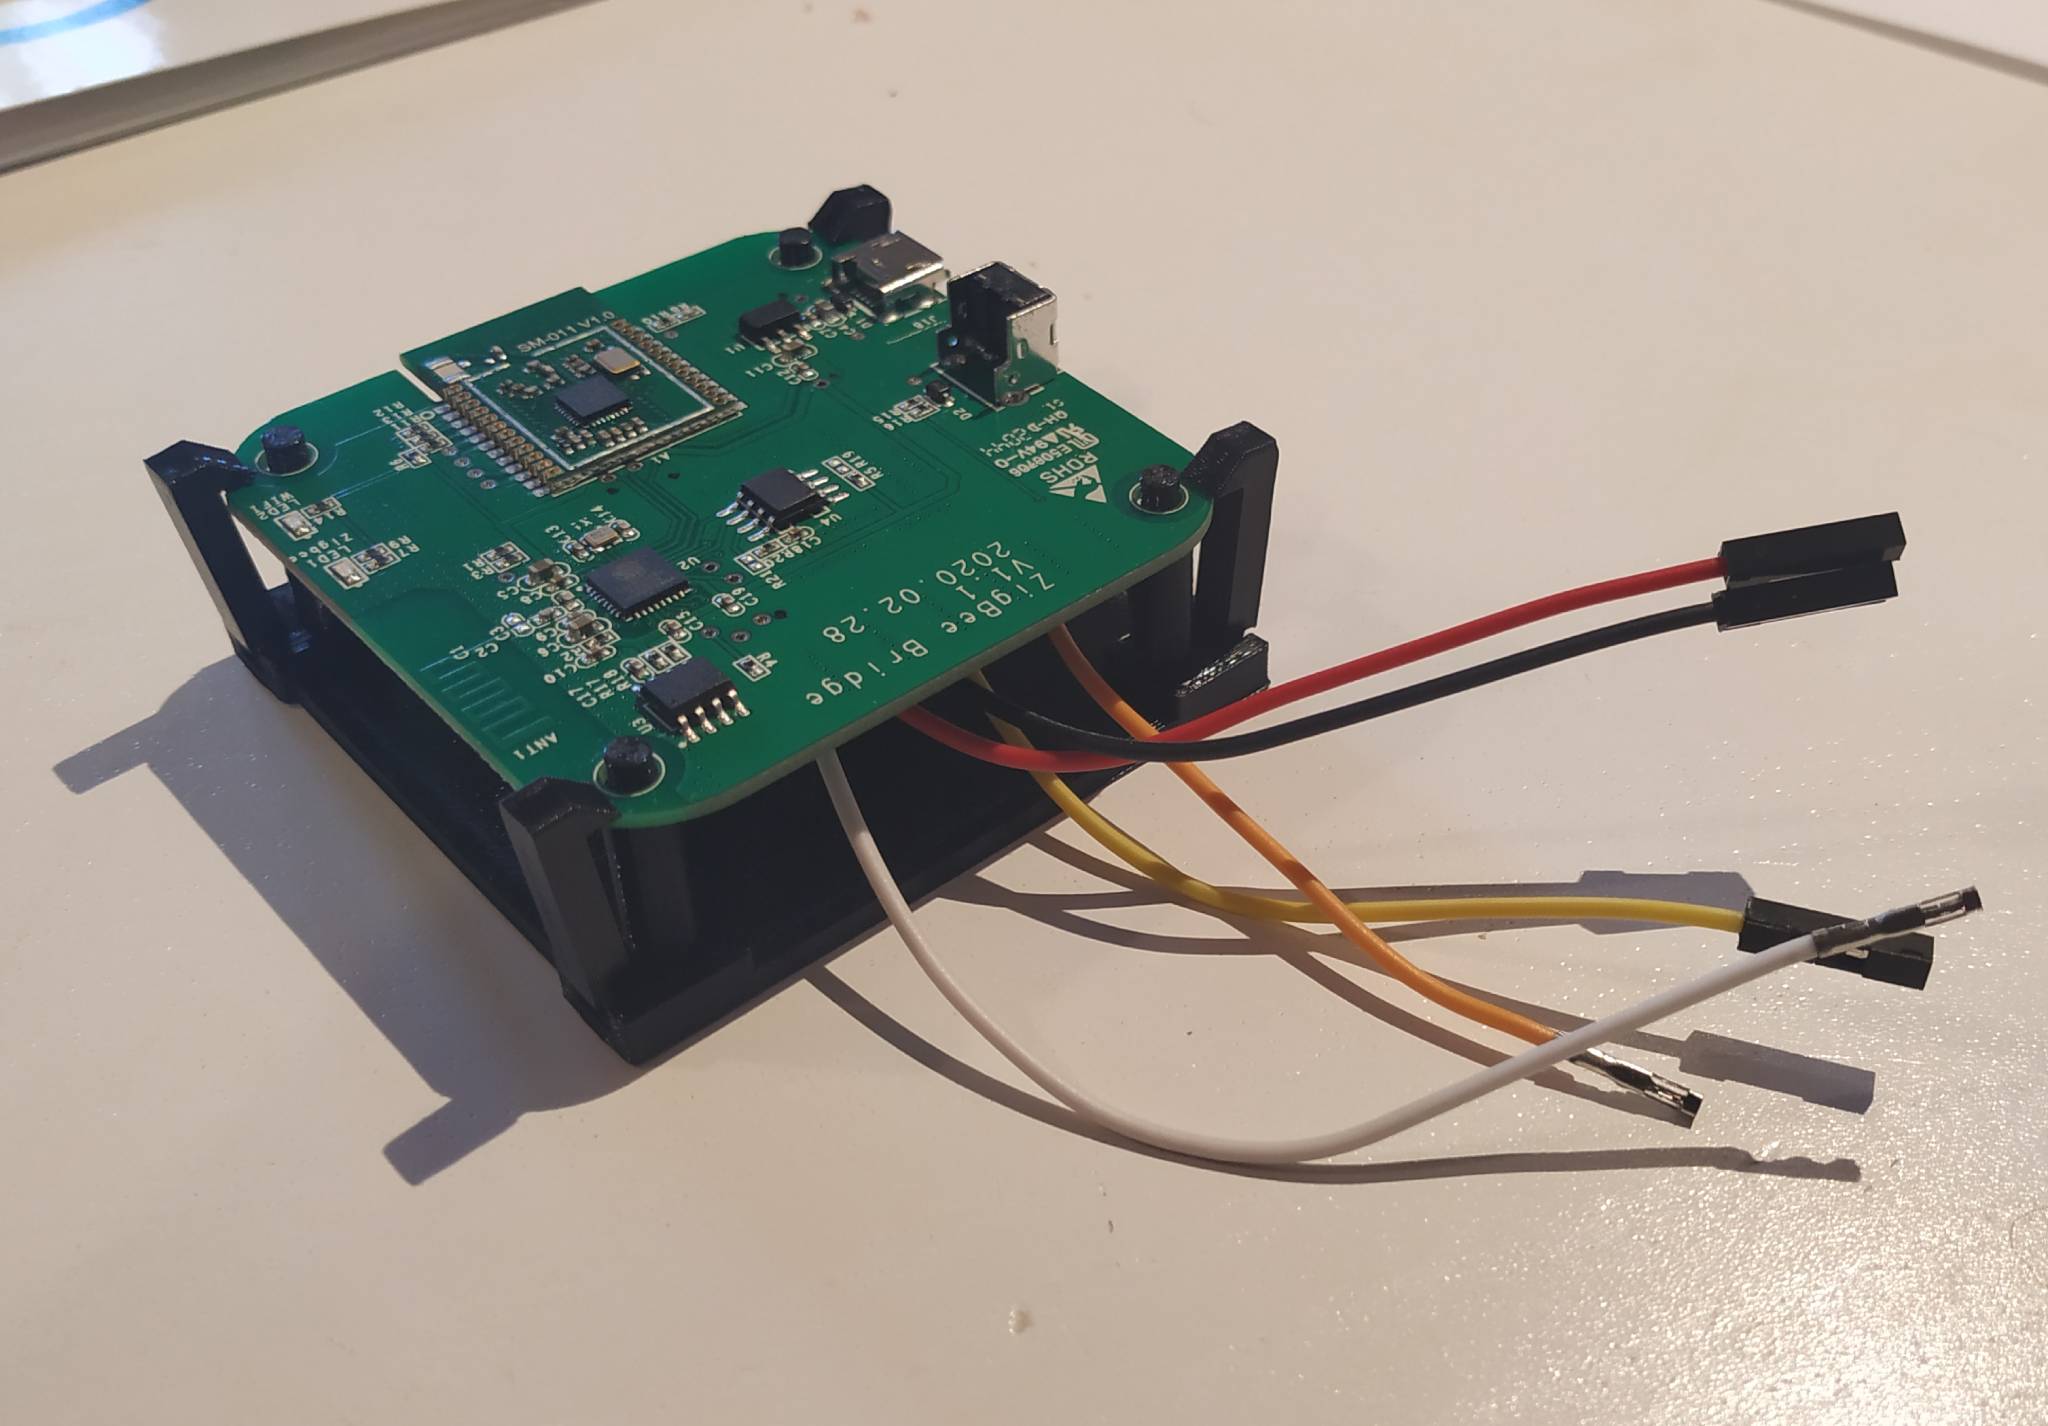
<h3>Sonoff Zigbee Bridge No-Soldering Flashing Jig</h3><p> </p><p>…with print in place hinges of locking mechanism.</p><p> </p><h4>TL;DR / Print settings</h4><p> </p><p>0.4 nozzle </p><p>0.2 layer height</p><p>No support</p><p> </p><p>Hinges have clearance of 0.2mm so properly set up printer should handle that.</p><p> </p><h4>Additional material needed</h4><p> </p><ul><li>spring/pogo pins 1.02mm diameter, 16.54mm length (P75-E2)</li><li>female Dupont breadboard wires</li><li>usb2ttl i.e. FT232RL</li></ul><p> </p><h4>Assembly</h4><p> </p><ul><li>print</li><li>carefully ‘release/break’ hinge in each corner which holds the locking mechanism</li><li>cut 5 dupond female wires in half and strip like 1cm</li><li>put each stripped wire to the hole in the columns </li><li>insert the pogo pin to the holes in columns</li><li>connect other end of the wire to usb2ttl </li><li>flash</li></ul><p> </p><h4>Story behind</h4><p> </p><p>I was just lazy to solder wires needed for flashing Tasmota to Sonoff Zigbee Bridge and wanted to practice small “print in place” hinge design. </p><p> </p><p>Created in Tinkercad and printed on Sovol SV01 with Black PM PETG.</p><p> </p><p>This design prototype is good enough to do the flashing, but there are things to improve, like better cable management, adding header for direct FT232RL connection and adding place for grounding the ESP pin to enable flashing mode. Maybe one day…</p>
With this file you will be able to print Sonoff Zigbee Bridge No-Soldering Flashing Jig with your 3D printer. Click on the button and save the file on your computer to work, edit or customize your design. You can also find more 3D designs for printers on Sonoff Zigbee Bridge No-Soldering Flashing Jig.