Sony MDR-ZX770BN headphones hinge fix
prusaprinters
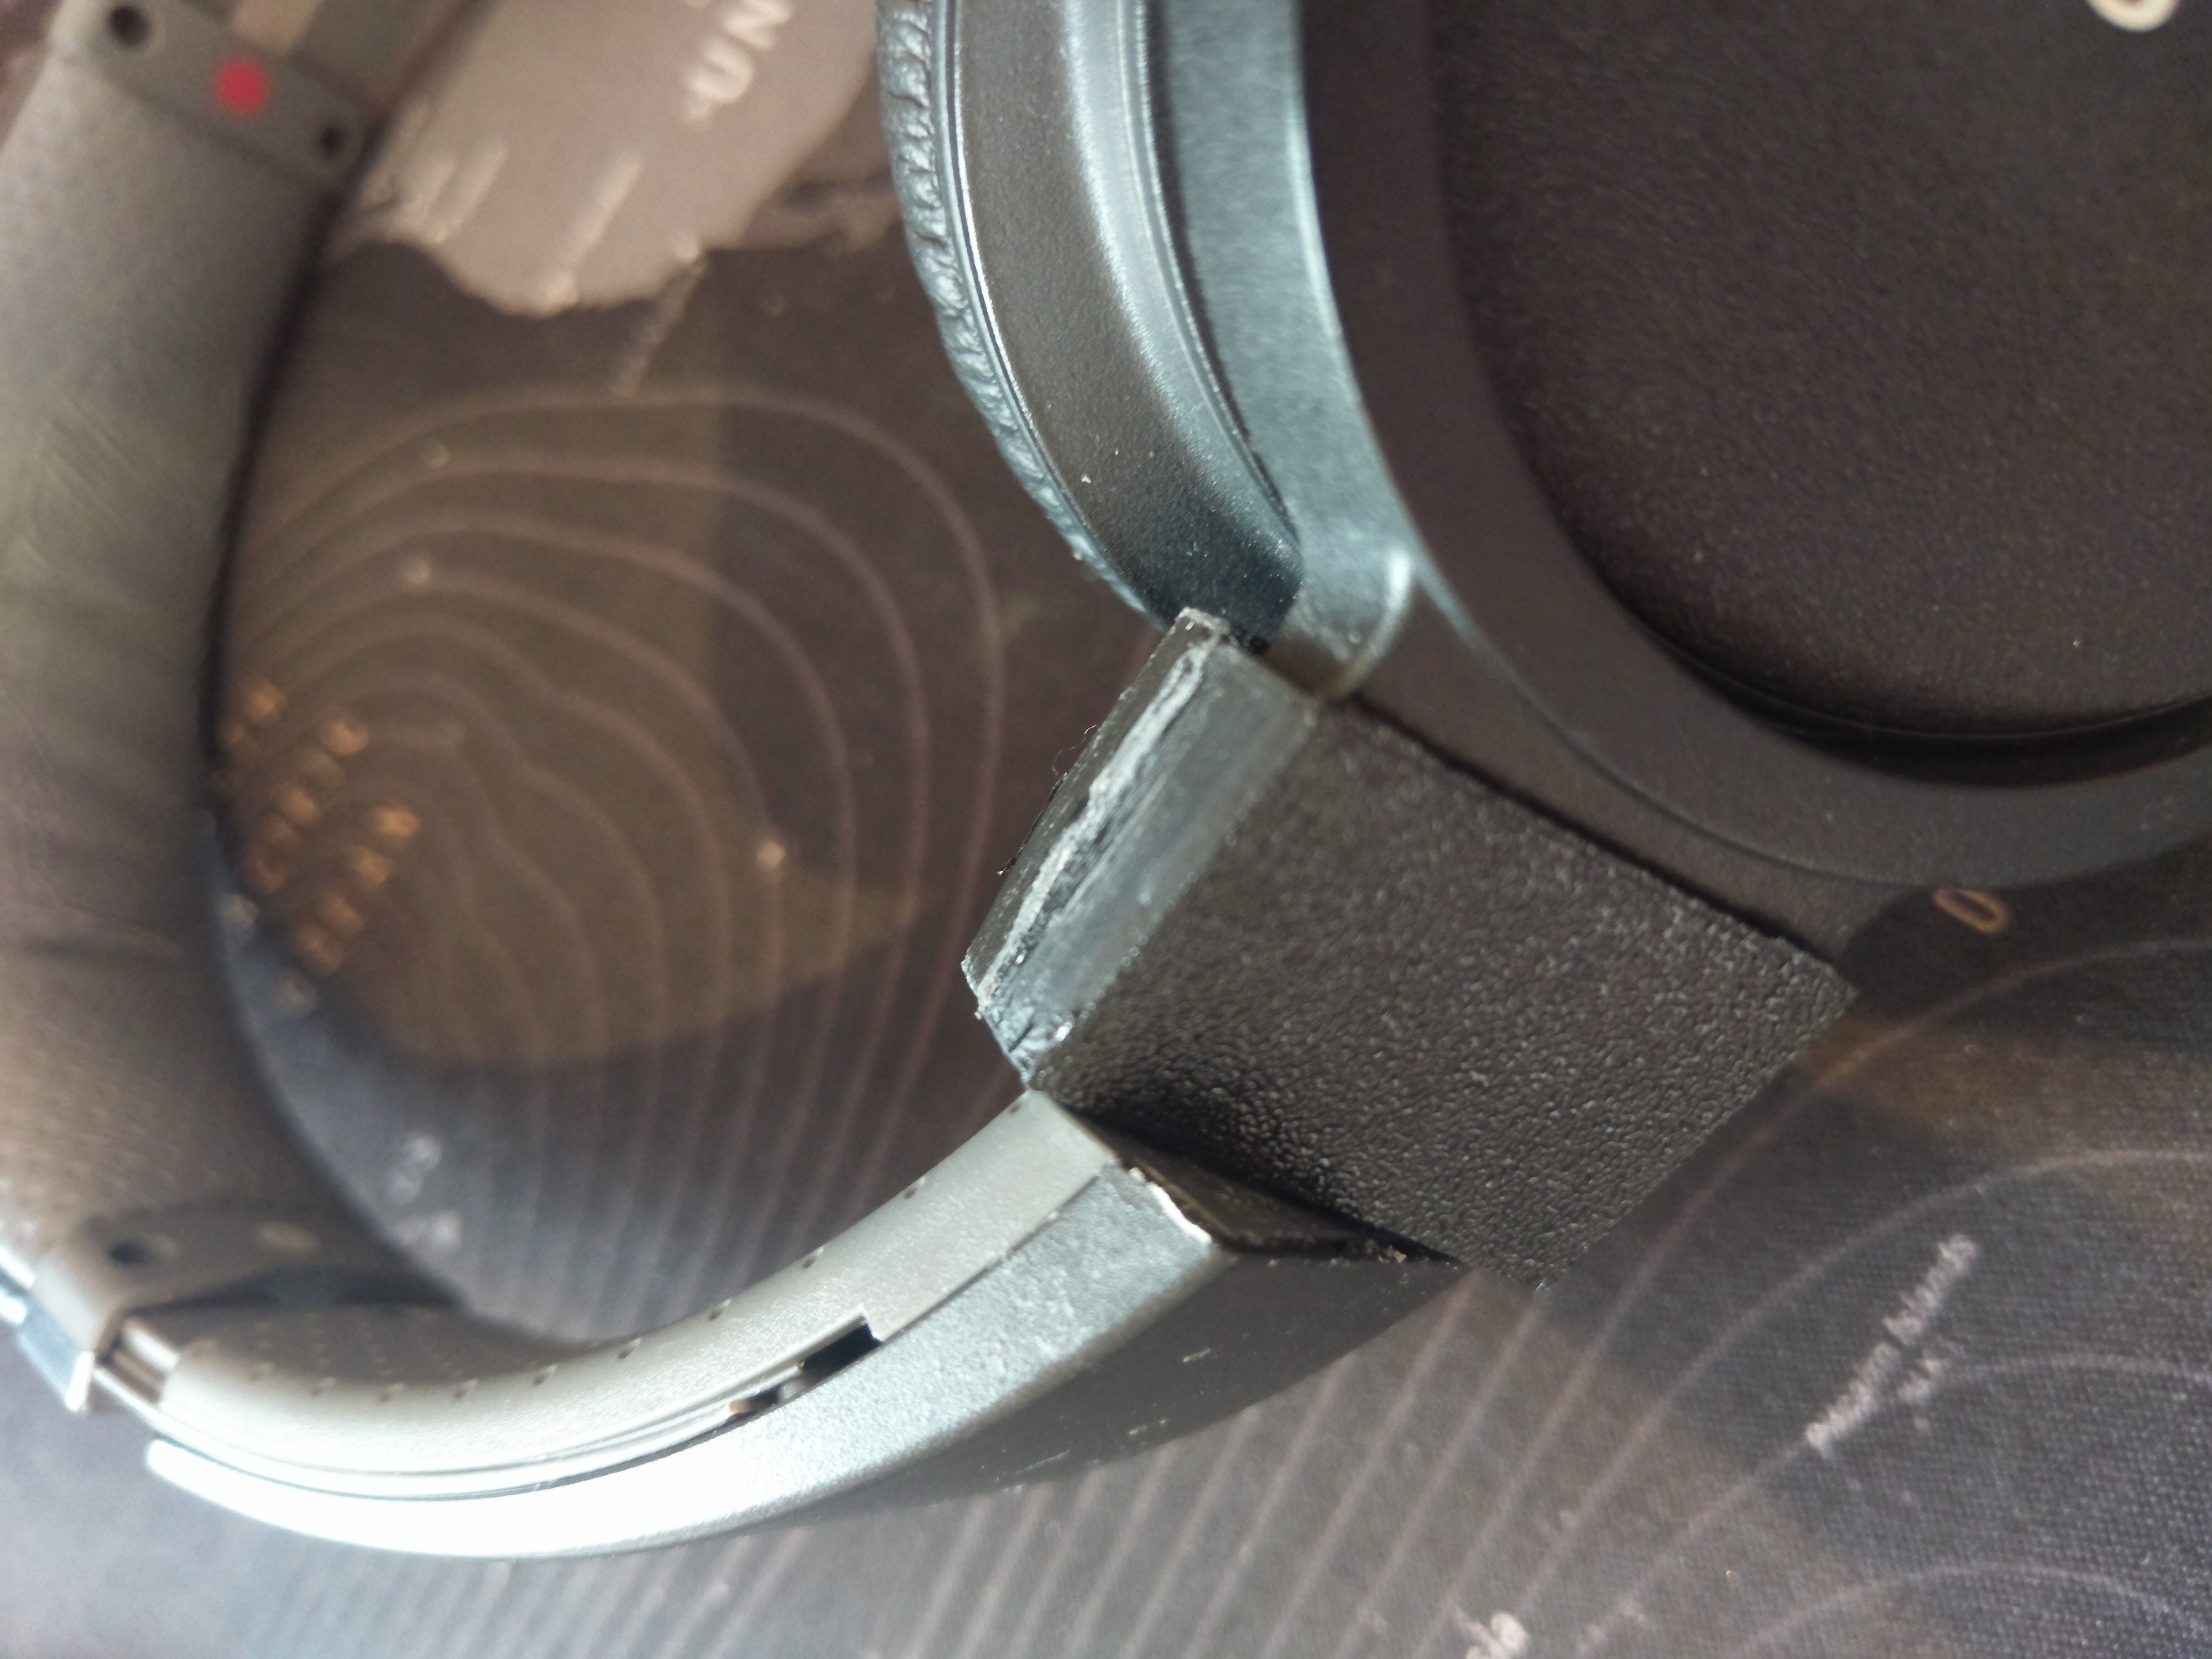
<p>The rotating joint/hinge on my Sony MDR-ZX770BN Bluetooth headphones broke on both sides. This piece attaches on both sides of the ear-cup hinge, encapsulates the existing, broken axle and puts a new one on top.</p> <p>Installation:<br/> Move the headband to the smallest possible setting in order to get as much wire as possible out. Remove the grey inside of the headband on the side you want to fix, by removing the 3 screws. Remove the metal U-piece that usually fixates the ear-cup hinge. Put both parts around the broken axis. Ensure the cable is going through the hole in the centre of the new axis. Put the new axis in and lock it in place using the metal U-piece. If the axis wont go in, use sandpaper to ensure there are no supports left. It is designed to be a tight fit. Put the inside of the headband back in place and put the screws back.</p> <p>Optional, but recommended: Use superglue to keep both pieces tighter together.</p> <p>While there are 2 pins to connect both pieces, I suggest you use superglue to further secure the fix after</p> <h3>Print instructions</h3><p>Print using PETG to ensure the print is strong enough. Lay the parts down on their large surfaces. Use supports from the build plate.</p> <p>Do not use supports on the inside: Using supports on the inside will give you trouble fitting the parts together around the existing earcup hinge.</p> <p>Make sure to remove all supports around the axle after the print is completed. Use 100-300 grit sandpaper to remove irregularities or remaining supports in case the axle doesn't fit inside the headband.</p>
With this file you will be able to print Sony MDR-ZX770BN headphones hinge fix with your 3D printer. Click on the button and save the file on your computer to work, edit or customize your design. You can also find more 3D designs for printers on Sony MDR-ZX770BN headphones hinge fix.