Sous Vide 3D
thingiverse
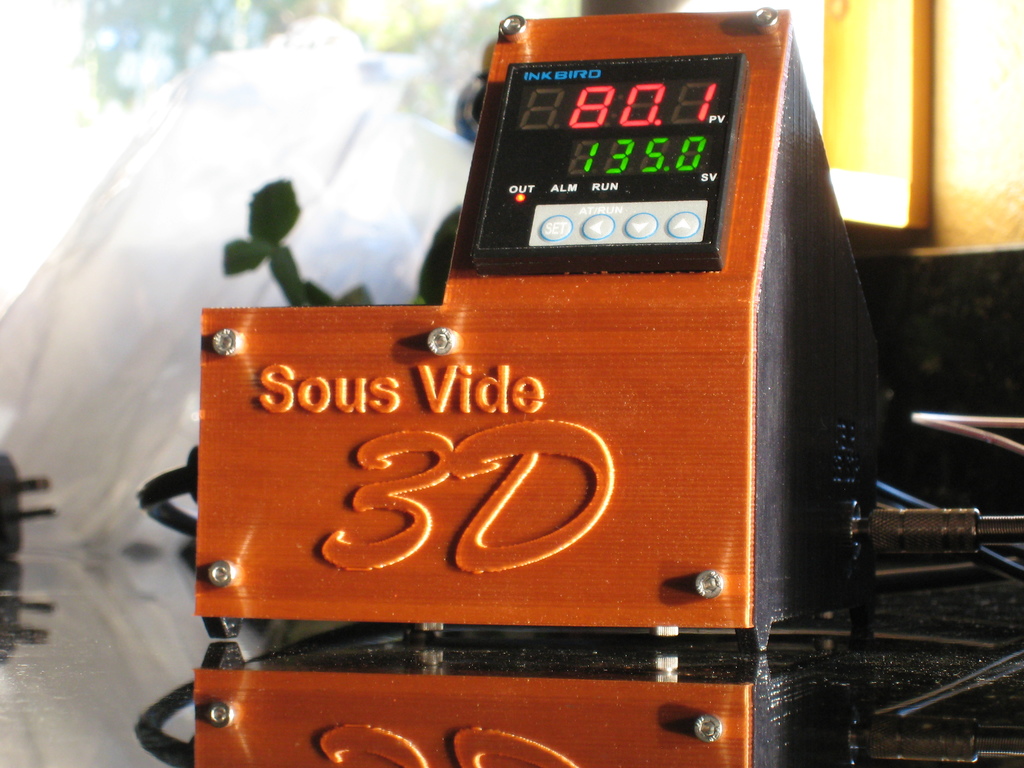
I have been exploring how to make the perfect steak, every time, with [Sous Vide cooking](https://www.youtube.com/results?search_query=sous+vide+cooking). Sous Vide cooking guarantees your meat is never under cooked or overcooked. The **Sous Vide** ***3D*** utilizes the highly accurate INKBIRD ITC-106VH PID temperature controller with intelligent proportional heat control, F & C readings, 100-240 VAC input, the angled display is easy to read and makes button presses more ergonomic, waterproof temp sensor and a small footprint. I use Sous Vide 3D to control a 200 watt slow cooker but it can easily handle any immersion heater or deep fryer up to 1,000 watts. My slow cooker is an older model with a mechanical rotating Off/Low/High switch. A model with an electronic button pad will not work. Printing the STL files is easy due to the built in supports for the square nut retention slots that would normally require support material. The hole for the PID has a single support feature that needs to be removed once the top half is done. Flexible 16 gauge wire is essential for easy assembly. Silicone wire is suggested. Strip the ends of the wire bare where they get inserted into the PID terminal screws. Do not use forked terminal connectors on the PID. They stick out too far and will interfere with final assembly. The outlet needs to be split into two independently powered outlets. To split them you need to flex the brass piece that bridges the two sides of the brass screws until it breaks off. This breaks the electrical connection between the two screws on the Hot black-wire side of the two outlets. You can leave the piece connecting the two silver screws on the Neutral white-wire side of the outlets. Breaking the little brass bridge on the hot side of the duplex outlet allows one outlet to provide power full time to a tiny water circulation pump and PID controlled power to the other outlet for your Sous Vide device (slow cooker). See included image. To save space I removed the outlet's four "ears" with the screw holes on each end of the outlet. Flex them until they break off. Save two of them. You can use them for washers when installing the outlet M3 screws and nuts. Assembly is frustration free. Each square nut is press fitted into a slot where it becomes permanently captured. This allows you to assemble the two halves without the nuts falling out of position. All the holes are in perfect alignment. Put the nuts into the slots before any other assembly steps. Though the seller says the PT100 temp sensor is a type 'K', I found the PID gave me an accurate reading when set to type 'PE'. **Shopping List:** * [INKBIRD ITC-106VH Digital PID Kit](https://www.ebay.com/itm/INKBIRD-ITC-106VH-Digital-Pid-Temperature-Controller-Fahrenheit-pt100-25ssr/264237287357) * [120V DUPLEX RECEPTACLE WALL OUTLET](https://www.ebay.com/itm/120V-DUPLEX-RECEPTACLE-WALL-OUTLET-PLUG-WHITE-15-20-AMPS/303126589249?var=602057213488) * [Mini AC 110V 3W Submersible Water Pump ](https://www.ebay.com/itm/Mini-AC-110V-3W-Submersible-Water-Pump-Aquarium-Fountain-Air-Fish-Tank-Pond-K3S7/333152460756) * [2.5mm x 5.5mm DC Power Female Jack PC Panel Mount Socket Connector](https://www.ebay.com/itm/4pcs-Brass-2-5mm-x-5-5mm-DC-Power-Female-Jack-PC-Panel-Mount-Socket-Connector/322487305604) * [5.5mm * 2.5mm DC Power Male Plug Jack](https://www.ebay.com/itm/1pcs-Metal-5-5x2-1mm-5-5mm-2-5mm-DC-Power-Male-Plug-Jack-Adapter-Connector-T/143264447691) * [3 Pin IEC320 C14 AC Inlet Male Plug Power Socket With Fuse Switch 10A 250V ST-30](https://www.ebay.com/itm/3-Pin-IEC320-C14-AC-Inlet-Male-Plug-Power-Socket-With-Fuse-Switch-10A-250V-ST-30/202419659471) * [M3 Square Nuts (12)](https://www.ebay.com/itm/5-200pcs-Metric-Thread-M3-M4-M5-M6-M8-M10-DIN557-304-Stainless-Steel-Square-Nut/283065032830?var=583459828208) * [M3 x 12mm Socket Head Cap Screws (14)](https://www.ebay.com/itm/Stainless-Steel-Hexagon-Socket-Head-Cap-Screws-Hex-Socket-Screw-Bike-Screw/254298981877?hash=item3b356685f5:m:mcP4Cr7iihXJa-XKS7X88Zw) * M3 x 45mm Socket Head Cap Screws (2) * 6-32 Machine Screw for Outlet center hole (1) * Miscellaneous M3 Screws & Nuts * 16 Gauge Stranded Wire * [Fully Insulated Female Spade Terminal Connectors](https://www.ebay.com/itm/50Pcs-Fully-Insulated-Nylon-Spade-Female-Wire-16-14AWG-Connectors-Terminals-Kit/173875892946?hash=item287bcf92d2:g:2oAAAOSwXLtctzGi) for Power Switch (7) * 3-Pin Electrical Cord for On/Off Switch - PC Power Supply Style This thing has gone through many revisions to ensure everything fits perfectly. Many, many hours of design and many print models were required to bring it to this point. If you make one for yourself, a picture would be greatly appreciated. And of course, a tip would help me recover some of my filament costs as well. Once your Sous Vide 3D is complete, you will have an accurate, easy to use device that matches the quality of Sous Vide machines costing far more. Plus, if one part goes bad, you will know how to repair it as opposed to throwing the whole thing away. **Working with bare wires @ 120-240 Volts AC can kill you, even if you know what you are doing. By building this thing, you agree to accept 100% responsibility for any personal injury or property damage you may suffer.** **-VegasGuy**
With this file you will be able to print Sous Vide 3D with your 3D printer. Click on the button and save the file on your computer to work, edit or customize your design. You can also find more 3D designs for printers on Sous Vide 3D.