SpaceX Falcon 9 Model Kit
prusaprinters
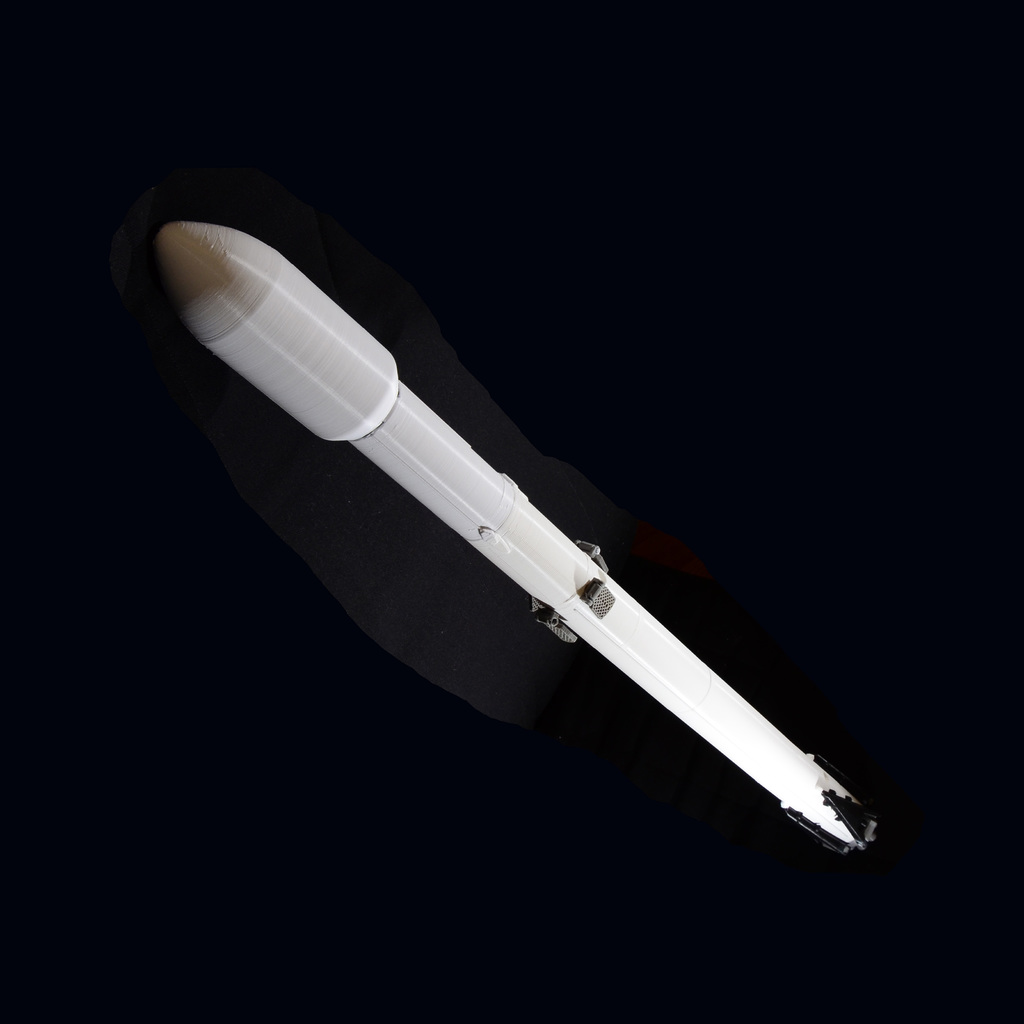
<p><i>**</i>Many of you asked, so here it is, the Strongback is now available <a href="https://www.prusaprinters.org/prints/109821-spacex-strongback">here</a>! </p><p><i>**</i>The Falcon Heavy Expansion Kit is now available <a href="https://www.prusaprinters.org/prints/109823-spacex-falcon-heavy-expansion-kit-for-falcon-9-mod">here</a>: </p><p>***V2 of the landing leg has now been uploaded. It has been redesigned for easier and more consistent printing.</p><p>This is a detailed model of the SpaceX Falcon 9 Rocket. It includes the following:</p><ol><li>First stage with landing legs that lock into place.</li><li>Grid finds that fold and rotate.</li><li>Detachable interstage.</li><li>Detachable second stage with an attachment point for your own satellites!</li><li>Interchangeable payload. Attach either the payload fairings or dragon cargo capsule to the top of the second stage.</li></ol><p>Dragon cargo capsule with detachable trunk, side panels, solar panels, and nose cone cover. Assembly (See pictures for clarification of part placement):</p><p>Glue all four components of the first stage together. There are posts and slots on each piece as a guide. Piece 1 goes on the bottom and 4 on the top.</p><ol><li>Attach 4 landing leg struts to part 1 of the first stage. The hooks will snap onto the cylinders that are in each of the four cutouts on the first stage.</li><li>Attach first stage engines to the bottom of the first stage. They will snap in place but you can also add some glue.</li><li>Attach 4 landing legs to the first stage engines using the landing leg axles. Add a small amount of glue to the end of each axle to glue it to the landing leg.</li><li>Attach 4 grid fins to 4 grid fin connectors using the grid fin axles. Add a small amount of glue to the end of each axle to glue it to the grid fin connector. These connectors snap into place on part 4 of the first stage. There are four small holes at the top of this piece for the grid fins.</li><li>Glue parts 1 and 2 of the second stage together. Make sure that the ridge on the sides of each piece is aligned.</li><li>Glue the second stage engine onto the bottom of second stage part 2. The post will fit into the hole on the bottom of the stage.</li></ol><p>All other pieces are detachable. The interstage, second stage, payload fairings, and Dragon trunk all attach by inserting the hooks into the previous stage and gently twisting the piece clockwise. Printing Recommendations:</p><p>Print the landing legs and any pieces with the attachment hooks with at least three perimeters to strengthen them.</p><ol><li>Use supports for all pieces. Avoid putting supports underneath the twist hook attachment points as they are hard to remove.</li></ol><p>Category: 3D Printing</p>
With this file you will be able to print SpaceX Falcon 9 Model Kit with your 3D printer. Click on the button and save the file on your computer to work, edit or customize your design. You can also find more 3D designs for printers on SpaceX Falcon 9 Model Kit.