Sparkmaker gasket seal resin vat
thingiverse
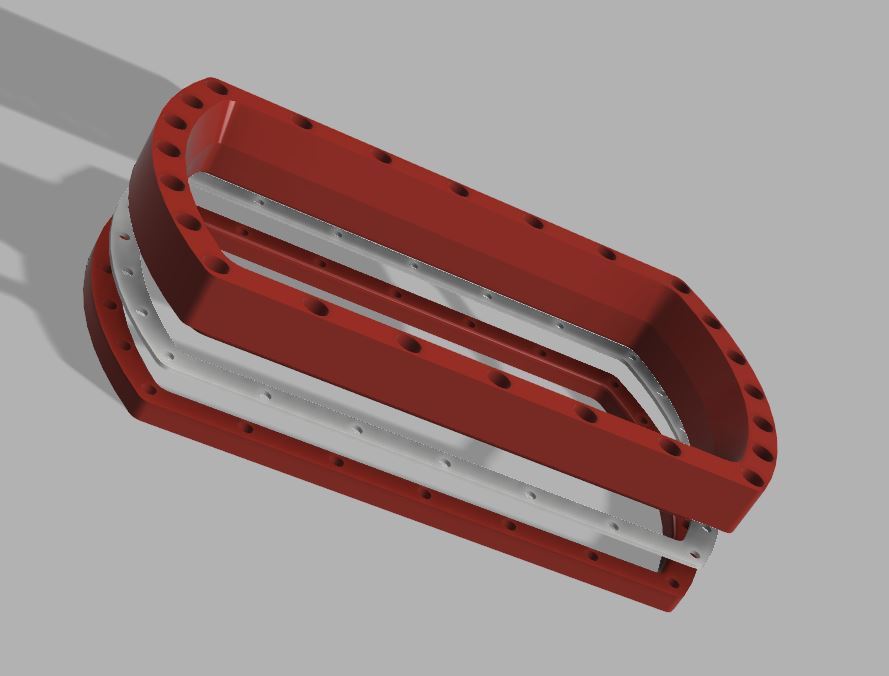
This resinvat are design for good sealing, easy of installation and easy to built, as it only need hex screw and nuts..lot of it. Due to stock vat from sparkmaker are prone to leak and warp, So plan to make a simpler resin for the sparkmaker. As one dont really need much effort to replace the fep. As the stock vat are really hard to do fep replacement. additional item needed: -silicon or rubber mat : 170mm * 80mm * 1mm -22* M3 X 10mm "DIN912" -22* M3 hex nut " DIN934" <iframe width="560" height="315" src="https://www.youtube.com/embed/hQtXRW_3OKs" frameborder="0" allow="autoplay; encrypted-media" allowfullscreen></iframe> <iframe width="560" height="315" src="https://www.youtube.com/embed/xiR-B_7br6Q" frameborder="0" allow="autoplay; encrypted-media" allowfullscreen></iframe> <iframe width="560" height="315" src="https://www.youtube.com/embed/EFWVeSzyDRQ" frameborder="0" allow="autoplay; encrypted-media" allowfullscreen></iframe> how to make the gasket: -Print the gasket template -Trace the gasket template over the silicon mat -cut the silicon mat till size -to make hole for the screw, mark the hole base on gasket template and cut or drill throughout. How to install the vat- 1. Main unit 2. silicon gasket or o-ring 3. fep 4. bottom unit sandwich all together base on the number. 1 then 2 then 3 then 4.. tighten .. !! NOTE.. Do not over tighten . Hand tight will do, else you will spoil the nut slot on the bottom unit. it plastic..!!!
With this file you will be able to print Sparkmaker gasket seal resin vat with your 3D printer. Click on the button and save the file on your computer to work, edit or customize your design. You can also find more 3D designs for printers on Sparkmaker gasket seal resin vat.