Speed Calibration Tower
thingiverse
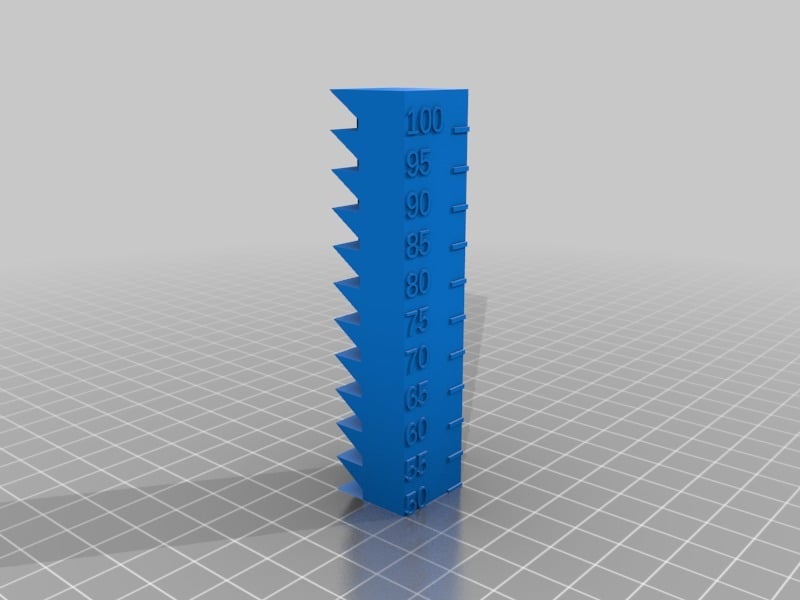
This is the tower I downloaded from a remix source, but when I went to re-download it, the source had changed the file. I really liked the original version because it compares how speed impacts bridging and overhang as well as overall print quality. I would put this into your Slicer (I use Cura) and start the speed change at the following layers or the bottom of the number, which will allow the overhang to be completely printed at the correct speed. I printed with 5% infill but it can also be done with 0%. Check out the settings to make it work properly. Layers and speed for Cura @ .2mm layer height. Further instructions are in the print settings of this post. The total tower height was 440 layers. 1 - 40 = 50 mm/s 41 - 80 = 55 mm/s 81 - 120 = 60 mm/s 121 - 160 = 65 mm/s 161 - 200 = 70 mm/s 201 - 240 = 75 mm/s 241 - 280 = 80 mm/s 281 - 320 = 85 mm/s 321 - 360 = 90 mm/s 361 - 400 = 95 mm/s 401 - 440 = 100 mm/s
With this file you will be able to print Speed Calibration Tower with your 3D printer. Click on the button and save the file on your computer to work, edit or customize your design. You can also find more 3D designs for printers on Speed Calibration Tower.