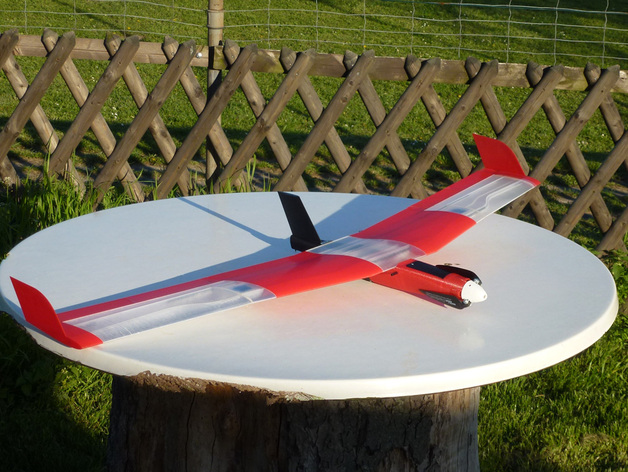
Speedy "Red Swept Wing" RC
myminifactory
See how it flies: https://www.youtube.com/watch?v=0kYWvvdJrfI Specifications airfoil: KN209838/HM50T10% - twist: -5.5° aerodynamic calculations: flight cpt. Florian Rösch wing span: 1040 mm wing chord: 173/130 mm aerodynamic center 74 mm wing overall weight: 310 g wing area: 16,1 dm² fuselage overall weight 270 g wing loading: 36 g/dm² longitudinal stability (Thies) STFs: motor: Turnigy 2632 Brushless Motor 1000kv motor camber: -3° side pull: 2° right propeller: Aeronaut CAM Aeronaut Carbon Classic 9 x 6.5" / 23 x 16.5 mm static thrust: 500 g (3S Lipo) battery: Turnigy nano-tech 950mah 3S 25~50C Lipo Pack ESC: HobbyKing YEP 30A (2~4S) SBEC Brushless Speed Controller receiver: OrangeRx R615X DSM2/DSMX Compatible 6Ch 2.4GHz Receiver w/CPPM servos: Hitec HS-55 Print Settings Attention The wings are designed to print with 0.5 width, 0.3 hight and 2 bottom and top layer If you print thinner, the perimeter of the upper side will not merge with the perimeter of the inner spars. If you print thicker, the perimeter will not be printed continuesly in one turn. The print must go as if you print in spiral vase mode. So you reach at least a smooth surface on the upper side. If needed, you must try with 0.49 or 0.48 width. It depends on which slicer you use. The second thing is, if you print with less layer hight, the inner spars will not connect the top and the bottom layer. There will be a gap inbetween. All parts: layer height =0,3mm, width =0.5 mm wing 1 perimeter, 2 bottom layer, 2 top layer, hollow wing servo: 2 bottom layer, 2 top layer, hollow aileron base: 5 bottom layer, spiral vase mode aileron end: 2 bottom layer, spiral vase mode aileron appendix: 1 perimeter, hollow aileron interface: no bottom layer, spiral vase mode fuselage fuselage front: 7 bottom layer, 3 top layer fuselage back: 3 bottom layer, 3 top layer fuselage interface: 2 perimeter 0.4 no bottom/top layer, holow fin: 4 bottom layer, spiral vase mode fin cover plate: 2 bottom layer, hollow Update 07.17.2016 The part "elevon_base_right_2.65.stl" was a wrong file! Instructions All sections of the wing are only hold together by two slightly elastic plastic cords inside the tubes.They are fixed with luster terminals on the wing ends. There are only short joints to connect the parts. Connectors 4 mm carbon tube The holes for the connections are only parallel: In the middle, between the wing_center and the two wing_middle_rigth/left (50 mm in each side of wing_middle, 200 mm total at front tubes) (60 mm in each side of wing_middle, 220 mm total at rear tubes)At the servo segment (45 mm in the middle_wing and 25 mm in the wing_right/left (110 mm total at the front tubes) (50 mm in the middle_wing and 75 mm in the wing_right/left (165 mm total at the rear tubes)At the wing end (30 mm in the wing_right/left and 30 mm in the wing_end_right/left, 60 mm total)The pipes must not be inserted deeper. There the holes bend and break very easily if you go deeper! If you have to split the wing sections, the connectors will not be parallel, that means, you have to plug in the tubes one after the other, and see that you can get them out again, if needed. If both pipes are inside, the wings can not be pulled apart!
With this file you will be able to print Speedy "Red Swept Wing" RC with your 3D printer. Click on the button and save the file on your computer to work, edit or customize your design. You can also find more 3D designs for printers on Speedy "Red Swept Wing" RC.