Sphere Painter
thingiverse
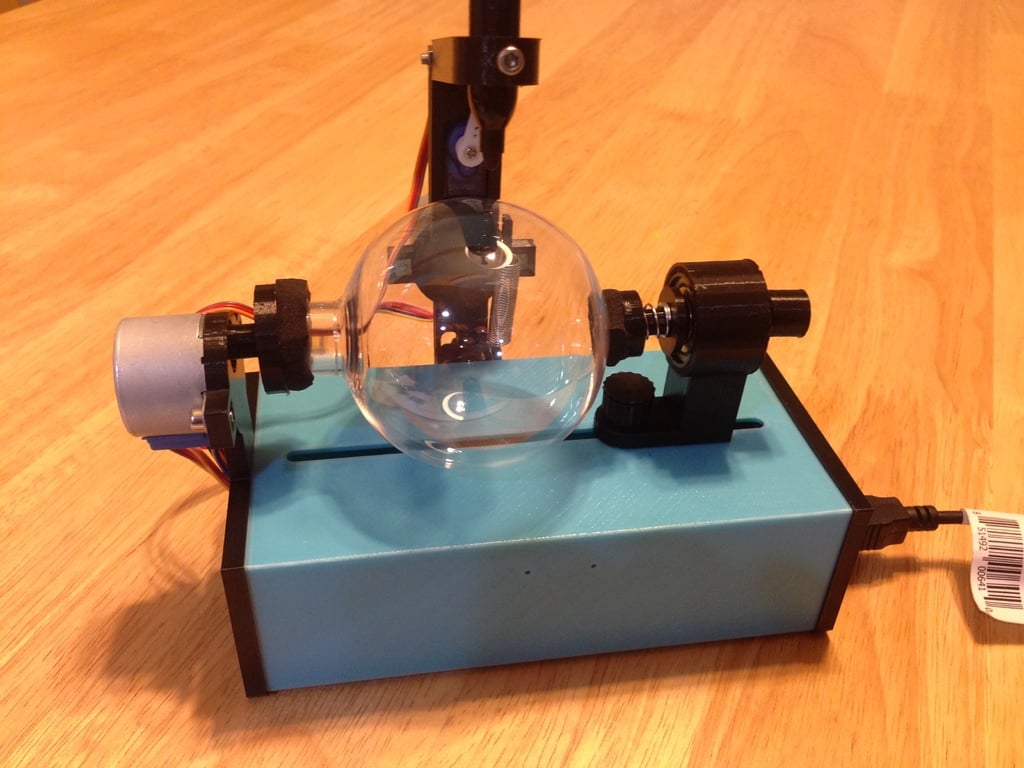
This is an <a href="https://www.egg-bot.com/">Eggbot</a> derivative that is a remix of the <a href="https://www.thingiverse.com/thing:2245428">Egg Painter Mini </a> by Thingiverse user <a href="https://www.thingiverse.com/Provlax/about">Provlax</a> . I have currently been using it for decorating Christmas ornaments like the one in the picture above. Prior to making this remix, I looked at a lot of Eggbot / Spherebot style robots available on Thingiverse. I liked how Provlax’s design used low cost components, fully enclosed the electronics, and could be powered over USB (when used with 5V motors). Additionally, I preferred how it looked compared to other designs. While printing up Provlax’s design I began to make modifications, which I think might be useful. To help spread some holiday cheer (& give back to the open source community), I am sharing my modifications. I know the holiday season is rapidly approaching. Hopefully this is posted with enough time to make some ornaments before Christmas. If not, you can get an early start building it for decorating Easter eggs. <b>Printed Parts List</b> 1 x 0000001.Case_Bottom-Remix.stl 1 x 0000002.Case_Top-Remix.stl 2 x 0000004.M5_Nut_Holder-Remix.stl 1 x 0000005.Axis_R-Remix.stl 1 x 0000006.Spring_Holder-Remix.stl 1 x 0000007.Axis_R_Holder-Remix.stl 1 x 0000008.Axis_R_Lock-Remix.stl 2 x 0000009.Bolt_Holder_Bottom-Remix.stl 2 x 0000010.Bolt_Holder_Top.stl 1 x 0000011.Axis_L_Holder-Remix.stl 1 x 0000012.Axis_L.stl 1 x 0000013.Hand_Holder-Remix.stl 1 x 0000014.Hand_Holder_Guide-Remix.stl 1 x 0000015.Hand_Holder_Guide_case-Remix.stl 1 x 0000016.Hand_H-Remix.stl 1 x 0000017.Hand_V-Remix.stl 1 x 0000018.Case_Right-Remix.stl <img src="https://cdn.thingiverse.com/renders/91/6c/d0/85/21/75c4f97575e6becbe145fac6e3495862_preview_featured.jpg" title="3D Printed Parts" /> <b>Modifications</b> As part of this remix, 16 of the 18 pieces which made up the original design were modified. A list of all of the changes is outlined below: 1) Case Bottom: All of the M3 Hex nuts were changed to M3 square nuts. Using square nuts allowed them to be captive on both sides, which should prevent a nut falling out of position during assembly. I also find using square nuts to be more forgiving when used with 3D printed designs. The hex shape seems to be harder to print accurately. 2) Case Top: All of the M3 hex nuts were changed to square nuts for the same reason as above. Additionally, the height of the enclosure was increased. This should allow for easier assembly, in that it provides more height for using those pre-made jumper wires commonly used with Arduino boards. Some of the Arduino UNO clones have lower component heights and extra headers than the original. This modification makes using the original Arduino Uno, with its fairly tall headers, and big DIP IC easier to work with. <B>UPDATE</B> The remixed Case Top piece contains the original holes used for a logo. I have left these holes in my design and have used them to hold a nameplate so that the machine can be personalized. This works well when the Sphere Painter is given as a gift. I was planing on making a customizable nameplate thing, but never got around to it. If you would prefer the top piece without the logo holes, Thingiverse user <a href="https://www.thingiverse.com/DamonJones/about"> DamonJones</a> has posted a remix with the holes removed <a href="https://www.thingiverse.com/thing:2820683">here</a>. 3) ProvLax’s PROBOT Logo (omitted): No Logo is included in this version. 4) M5 Nut Holder: The M5 Hex nut was changed to a square nut and made more captive. This should prevent the nut from ever falling onto the electronics inside the enclosure. 5) Axis R: I had a hard time locating the original spring used, so this piece was changed to be made thinner. That way I could use a spring from a 200 piece spring assortment kit I was able to easily obtain from my local budget hardware store (Harbor Freight). I have seen this same 200 piece spring kit available on Amazon, ebay, and other sites with slightly different packaging. <a href="https://www.harborfreight.com/200-piece-assorted-spring-set-67562.html"> Example 1</a> <a href="https://www.amazon.com/s/ref=nb_sb_noss?url=search-alias%3Daps&field-keywords=200+spring+assortment+kit">Example 2</a> 6) Spring holder: Changed to fit with the modifications from 5. 7) Axis R Holder: Moved the bolt hole further away from the bearings. This helps with using slightly longer bolts. I did not have any M5x20mm bolts, and substituted it with an M5x25mm, which seemed more readily available. 8) Axis R Lock: Modified to work with the changes implemented on 5. 9) Bolt Holder Bottom: I stretched these in one axis to better fit over my M5x25mm bolt’s hex head. However, I think the M5 x25mm bolts have slightly higher hex heads. 10) Bolt Holder Top: No changes. 11) Axis L Holder: Increased the height of this part to match the height added in the modifications to piece 2. Additionally, the part was modified to use M3 square nuts that are captive. 12) Axis L: Added a captive square nut holder. In the original version, the set screw would force threads into the plastic. The plastic grooves were not very strong. This updated remix part relies on the square nut's threads for tightening to the motor shaft, which should produce a more reliable design. 13) Hand Holder: Modified to use M3 square nuts instead of hex nuts. The square nuts are captive. 14) Hand Holder Guide: This piece was elongated as part of a modification for parts 15 and 17. See 17 for more details. 15) Hand Holder Guide Case: This piece was elongated and a hook was added to it. This allows an optional spring to be added to improve accuracy. See 17 for details. 16) Hand H: An optional square nut was added to this piece to help hold the Pen. The hinge mechanism was changed from the nail/rivet to a M3 screw and a captive square nut. Additionally, this piece was lengthened to match the modifications applied to 14, 15, & 17. The hand H piece was modified such that the square nut used to hold the pen could not fall down if the screw was completely removed. 17) Hand V: This piece received three significant changes. The first is the hinge mechanism mentioned above. The second is the servo motor mounting was changed to be in the middle of the part. This allowed for a more secure mounting of the servo motor using both screws in the middle of the piece. The third modification is the addition of a hook for use with an optional spring. The stepper motors used in this design seem to have some “wobble” or “play” in their mechanism. By adding a spring (which comes from the same 200 piece spring assortment kit used in 5) it seems like some of the “wobble” is reduced. To make room for the spring, some of the pieces mentioned earlier were elongated/stretched. Added a captive square nut holder. In the previous version, the set screw would force threads into the plastic. The resulting plastic grooves were not very strong. This updated remix part relies on the square nut's threads for tightening to the motor shaft, which should produce a more reliable design. 18) Case Right: This piece was extended to match the height of the enclosure. Additionally, a little extra clearance was added to the connectors. Adjusted the connector cut-outs to remove some of the excess space around connectors. <b>Bill of Materials (with changes for this remix indicated)</b> <img src="https://cdn.thingiverse.com/renders/56/4f/5a/a9/81/925e8ca3b03600cc1734a85d208f6d5c_preview_featured.jpg" title="BOM" /> 2 x 608zz Bearing 1 x 24mm Silicone, Rubber Gasket, Pads, or Cushions 1 x 15mm Silicone, Rubber Gasket Pads, or Cushions <s>1 x Spring Diameter 9-15mm Length 17-20mm</s> 1 x Compression Spring 3/8 x 3/4 <blockquote>This is the spring in Row 2 Column 2 from these generic 200 Piece Spring Assortment Kits:</blockquote> 1 x Spring Extension 5/16 x 1-1/4 (optional) <blockquote>This is the spring in Row 3 Column 2 of the same spring kits linked above</blockquote> <s>1 x 2x18mm Iron Nail without a hat or Rivet </s> <blockquote> Replaced with M3 bolt and square nut. Quantities reflected in counts below.</blockquote> <s>2 x M5x20 Bolt</s> 2 x M5x25mm Bolt <s>2 x M5 Nut</s> 2 x M5 Square Nut <blockquote> I used the ones with the weird bronze tint. Typical caliper dimensions are 7.74mm x 7.81mm x 2.74mm (but listed as 8mm x 8mm x 3mm). </blockquote> 4 x M3x6 Screw 2 x M3x8 (optional for stepper motor shaft) <s>8 x M3x10 Screw</S> 5 x M3x12 Screw 4 x M3x16 Screw 1 x M3x20 screw <s>12 x M3 Nut</s> 16 x M3 square nut. <blockquote>I used the ones with the weird bronze tint. Typical caliper dimensions are 5.36mm x 5.42mm x 1.78mm (but listed as 5.5mm x 5.5mm x 2mm).</blockquote> <s>4 x M3 Washer</s> 12 x M2x5 Screw (self tapping) 1 x Arduino UNO 2 x ULN2003 Stepper Motor Driver Board 2 x or 28byj-48-5v (or 28byj-48-12v) Stepper Motor 1 x SG90 Micro Servo 1 x 12V DC Power Supply (not needed for 5v motors) 1 x USB Cable for connect to PC 2 x Arduino Jumper Wires (F-F) 10 x Arduino Jumper Wires (M-F) 3 x Arduino Jumper Wires (M-M) 1-3 zip ties (for cable management)
With this file you will be able to print Sphere Painter with your 3D printer. Click on the button and save the file on your computer to work, edit or customize your design. You can also find more 3D designs for printers on Sphere Painter.