Spoolholder 608
thingiverse
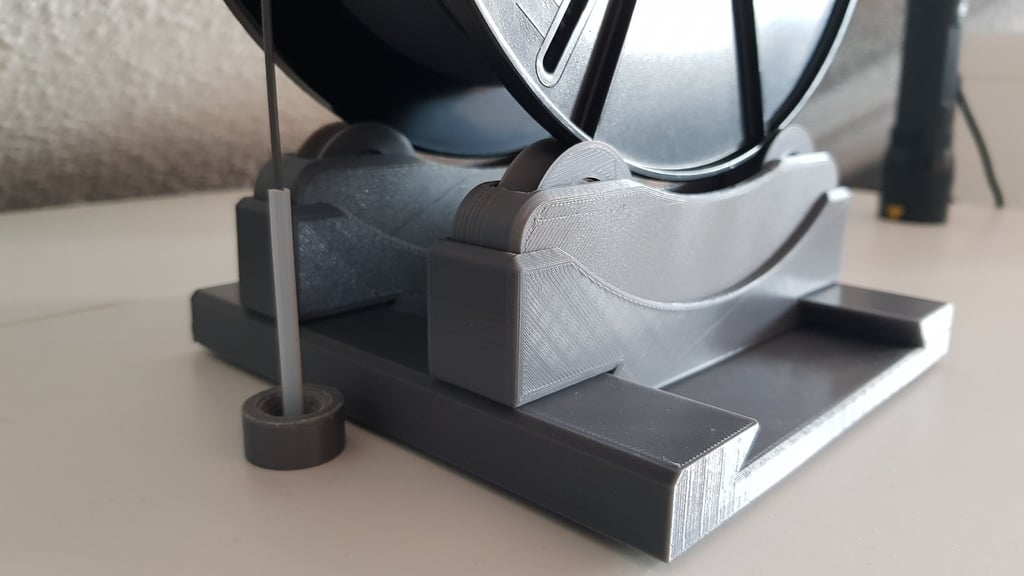
Deutsch: English is below =) Ich habe diesen Spulenhalter entworfen nach dem Vorbild des TUSH Spoolholders. Diesen habe ich auch verwendet (ist auch sehr gut!), nur ein paar Dinge haben mir daran nicht ganz gefallen. 1. Die Rolle läuft nicht mittig auf dem Kugellager und „kratzt“ immer minimal am gedruckten Gehäuse. 2. Die Tatsache, dass der Halter relativ leicht umfallen kann, wenn man versehentlich gegen die Spule kommt. Meine Variante kann die Filamentspulen ebenfalls unabhängig vom Durchmesser aufnehmen. Ebenfalls kann eine relativ große „Wandstärke“ der Spule aufgenommen werden. Das Lagerrad ist 10mm breit (3mm breiter als das Lager). Weitere Vorteile: - Die Spulenhalter können nicht mehr umfallen. - Sie stehen immer parallel zueinander. - Die Spule läuft zentriert in der V-Form des Lagerrads. - Die beiden Grundträger (Bearing holder) sind gesteckt und können durch den Träger (partholder) nicht mehr voneinander getrennt werden bzw. auseinanderfallen. - Alle Teile kommen komplett ohne Schrauben aus. Es werden lediglich 4x Kugellager 608 benötigt. Dies sind sehr gängige Kugellager, welche nicht zu teuer sind. Optional kann man den Spulenhalter auch ohne die Teile „part holder“ und „Base“ verwenden, allerdings geht dann einige der wesentlichen Vorteile verloren. Die Datei „Wheel“ wurde in 0.1mm Auflösung gedruckt mit 100% infill. Alle Restlichen Dateien wurden in 0.2mm gedruckt mit 20% infill. „Bearing holder“ und „bearing wheel“ werden komplett ohne Supports gedruckt. „Part holder“ benötigt überall Supports. Die Datei „Base“ benötigt Supports nur mit der Einstellung „Druckbett berührt“ für die 5x Aussparung an der Unterseite, in der man optional kleine selbstklebende Gummifüße anbringen kann. Alle Dateien habe ich in der Ausrichtung wie in den Bildern zu sehen gedruckt. Es muss gedruckt werden: - 4x bearing holder - 4x bearing wheel - 2x part holder (optional, aber empfohlen) - 1x Base (optional, aber empfohlen) Zusammenbau: 1. Die Kugellager in die Lagerräder drücken (die Lager sitzen mittig im Lagerrad). 2. Die Lager mit dem Lagerrad in den Träger „bearing holder“ drücken. Dabei mittig am Lager drücken und nicht am äußeren gedruckten Plastikteil. 3. Die Gegenseite des Lagerhalters andrücken. 4. Den fertigen Träger in den Gehäusehalter „part holder“ stecken. 5. Den Schwalbenschwanz in dem Grundträger „base“ platzieren. Vielleicht ist die Sache ja etwas überdimensioniert, funktioniert aber gut =) Anmerkungen und Kritik bitte in die Kommentare. Update 02.02.2020: Falls jemand etwas ändern möchte, habe ich die .step-Dateien angefügt. ------------------------------------------------------------------------------------------------------ ------------------------------------------------------------------------------------------------------ English translated by Google translator: I designed this Spoolholder modeled after the TUSH Spoolholder. I also used it (which is also very good!), But I did not quite like a few things. 1. The roller does not run in the middle of the bearing and always "scrapes" the printed case. 2. The fact that the holder can fall over relatively easily if you accidentally hit the spool. My variant can also take the filament spools independently of the diameter. Also, a relatively large "wall thickness" of the pool can be recorded. The bearing wheel is 10mm wide (3mm wider than the bearing). Additional advantages: - The Spoolholder can not fall over anymore. - They are always parallel to each other. - The Spool runs centered in the V-shape of the bearing wheel. - The two Bearing holders are plugged in and can no longer be separated or fall apart by the partholder. - All parts are completely without screws. Only 4x bearings 608 are needed. These are very common bearings, which are not too expensive. Optionally, you can use the Spoolholder holder without the parts "part holder" and "base", but then some of the major advantages will be lost. The file "Wheel" was printed in 0.1mm resolution with 100% infill. All remaining files were printed in 0.2mm with 20% infill. "Bearing holder" and "bearing wheel" are printed completely without support. Part holder needs support everywhere. The file "Base" requires support only with the setting "print bed touched" for the 5x recess at the bottom, in which one can optionally attach small self-adhesive rubber feet. I have printed all the files in the orientation as seen in the pictures. List to be printed: - 4x bearing holder - 4x bearing wheel - 2x part holder (optional, but recommended) - 1x base (optional, but recommended) Assembly: 1. Press the bearings into the bearing wheels (the bearings are centered in the bearing wheel). 2. Press the bearings with the bearing wheel into the „bearing holder". Press in the center of the bearing and not on the outer printed plastic part. 3. Press the opposite side of the bearing holder in place. 4. Insert the finished carrier in the housing holder "part holder". 5. Place the dovetail in the base carrier "base". Maybe the thing is a bit oversized, but works well =) Comments and criticism please in the comments. Update 02.02.2020: If anyone wants to change something, I have added the .step files.
With this file you will be able to print Spoolholder 608 with your 3D printer. Click on the button and save the file on your computer to work, edit or customize your design. You can also find more 3D designs for printers on Spoolholder 608.