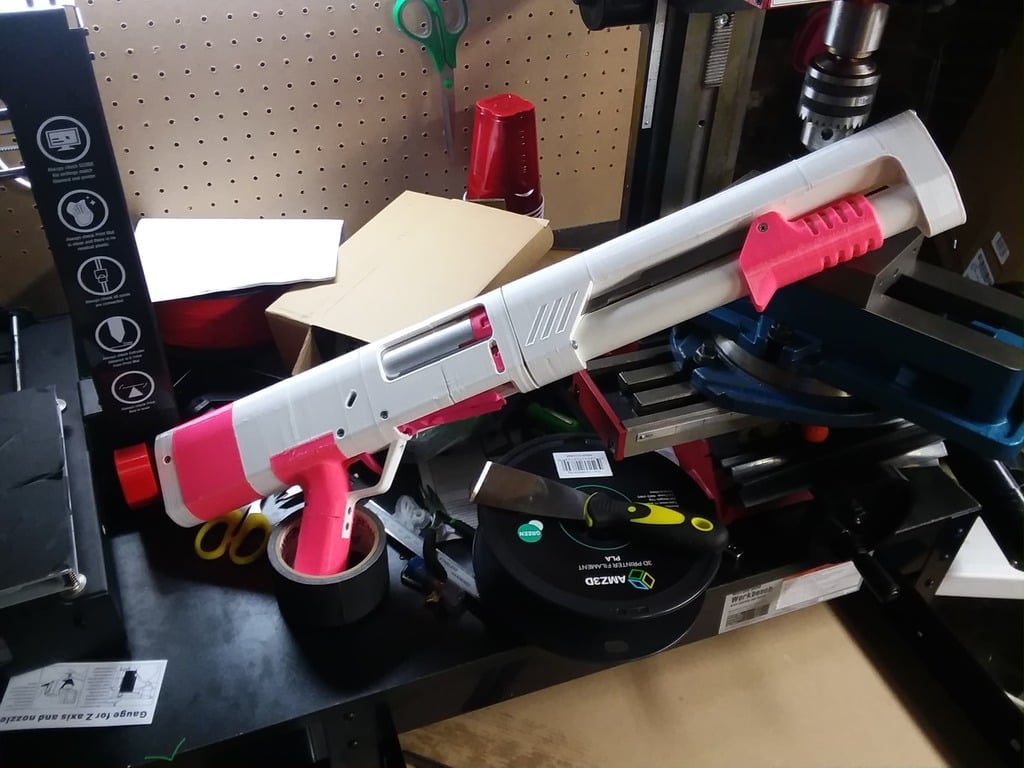
Spring Thunder - Shell Ejecting Foam Dart Blaster (WIP)
thingiverse
The author of this text appears to be a designer and manufacturer of a blaster (likely a Nerf blaster) known as the "Model 3." The author has been updating parts, releasing new shells, and planning to release hardware kits and assembly guides. They have also been dealing with issues related to patent and intellectual property concerns, which has led to delays in releasing the fabrication guide and STLs (STereoLithography files). The author plans to continue working on the project despite these challenges. The text includes updates on various aspects of the project, such as: * Updating parts: The author has updated several parts, including the Ejection_Port_A, Ejector, Bolt, Shell_Aligner, and PRail_Standard. * Releasing new shells: The author has added new shells, including Rival Buckshot, Elite Slug, MEGA Slug, and Boomco Flechettes. * Planning to release hardware kits and assembly guides: The author plans to release hardware kits and assembly guides in the next month, but is facing challenges due to moving to a new state and starting a new job. The text also includes information about the project's history, including: * Previous updates: The author has made several previous updates, including releasing new shells and updating parts. * Challenges faced: The author has faced challenges related to patent and intellectual property concerns, which have led to delays in releasing the fabrication guide and STLs. Overall, the text provides an update on the project's progress and plans for future releases.
With this file you will be able to print Spring Thunder - Shell Ejecting Foam Dart Blaster (WIP) with your 3D printer. Click on the button and save the file on your computer to work, edit or customize your design. You can also find more 3D designs for printers on Spring Thunder - Shell Ejecting Foam Dart Blaster (WIP).