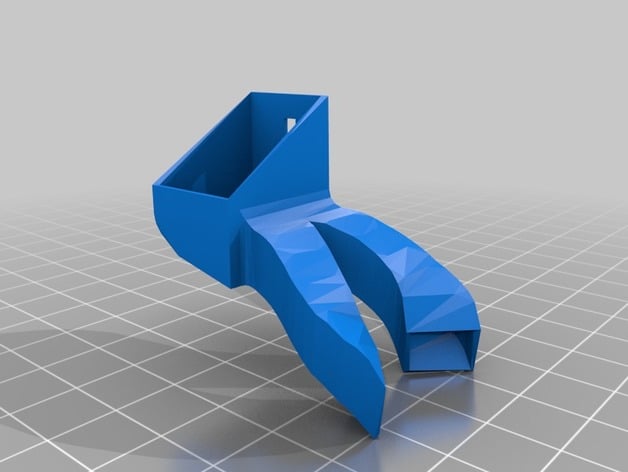
"Spriya" - High Efficiency Anet A8 Fan Duct
thingiverse
If you use this fan duct & think it makes your prints look better, don't forget to TIP! ;)\nThe story\nI designed this fan duct as a 100% free & open source alternative to another one which was very good, but unfortunately it's license was preventing me from modifying it the way I see fit & share it freely.\nSo I started Blender, and made my own from scratch in a couple of days. One that I can share freely with the community, so anyone can use it, remix it or trash it - in any order ;)\nThe fan duct works very good for me, but I do not guarantee its effectiveness for you :)\nEvery time you install a new fan duct, it's highly recommended to perform the so-called "PID Auto Tune" procedure on your heat block. It's performed very easily - when your printer is cold, connect it to your PC, and start your preferred program that allows you to send GCODE commands directly to your printer.\nNext, decide what's your preferred print temperature - in my case it was 190C.\nYou will also have to turn the fan ON.\nExecute the following GCODE command to turn it on:\nM106 S255 \nNow run the PID auto tune GCODE command (replace "190" with whatever temperature you use):\nM303 E0 S190 C8\nIt will respond with\nInfo:PID Autotune start\nYour printer will go through 8 cycles of heating / cooling, so it will take a couple of minutes.\nIn the end, you will get a response, that looks something like this:\nbias: 164 d: 90 min: 188.73 max: 191.76\nKu: 37.70 Tu: 20.50\nClassic PID\nKp: 22.62\nKi: 2.21\nKd: 57.96\nInfo:PID Autotune finished ! Place the Kp, Ki and Kd constants in the Configuration.h or EEPROM\nCopy this response somewhere, otherwise it will quickly get lost in the idle "wait" messages.\nNow go to your printer's Configuration -> Extruder menu, and set the control type to PID. Next, set the P value to match the Kp, I to match Ki, and D to match Kd.\nFinally, save your settings to the EEPROM.\nThis is how it's done with the Repetier firmware. It should be almost the same with the stock Anet firmware, and similar with Skynet3D (Marlin)\nWhen you have tuned your heater properly, the temperature will fluctuate by just plus/minus 0.5 - 1C and will be very stable.\nNotes\nActually try it before starting to philosophize whether it's effective or not :)\nRead below to find out the recommended print settings\nTo mount the fan duct, you have to loosen the screws of your fan a bit, insert the duct, and tighten them again. \nThe name "Spriya" is a Bulgarian dialect word, and means "strong wind", "vortex", "blizzard" etc ;)\nCheck out some of my other open source stuff at http://lokspace.eu\nIf you have problems slicing / printing the normal version, try the "thick walls" version - "Spriya - Anet A8 Fan Duct - Thick Walls.stl" found in the archive (it has 1.2mm walls, but it's still lightweight).\nDon't forget to post "I made one" photos! Your input is welcome!\n\nPrint Settings\nPrinter: \n Anet A8\n \n Rafts: \n No\n \n Supports: \n Yes\n \n Resolution: \n 0.2\n \n Infill: \n 100\n \n Notes: \n I used Cura 2.4 to print this.\nCheck the pictures to see how you should lay the model down when printing (rotate it 90 degrees along the X axis, and allow supports - as shown on the fifth picture. Only the attachment part needs a bit of support, so you can set the "Support Overhang Angle" to something high like 80.\nYou also need to set the support placement to "everywhere", and support type to "concentric".\nSupport density of 15% works OK. Be careful when removing the supports afterwards!\nWithout support, the upper part of the attachment might sag a bit, but it will still work.
With this file you will be able to print "Spriya" - High Efficiency Anet A8 Fan Duct with your 3D printer. Click on the button and save the file on your computer to work, edit or customize your design. You can also find more 3D designs for printers on "Spriya" - High Efficiency Anet A8 Fan Duct.