Squaring Modules Ender 3v2
thingiverse
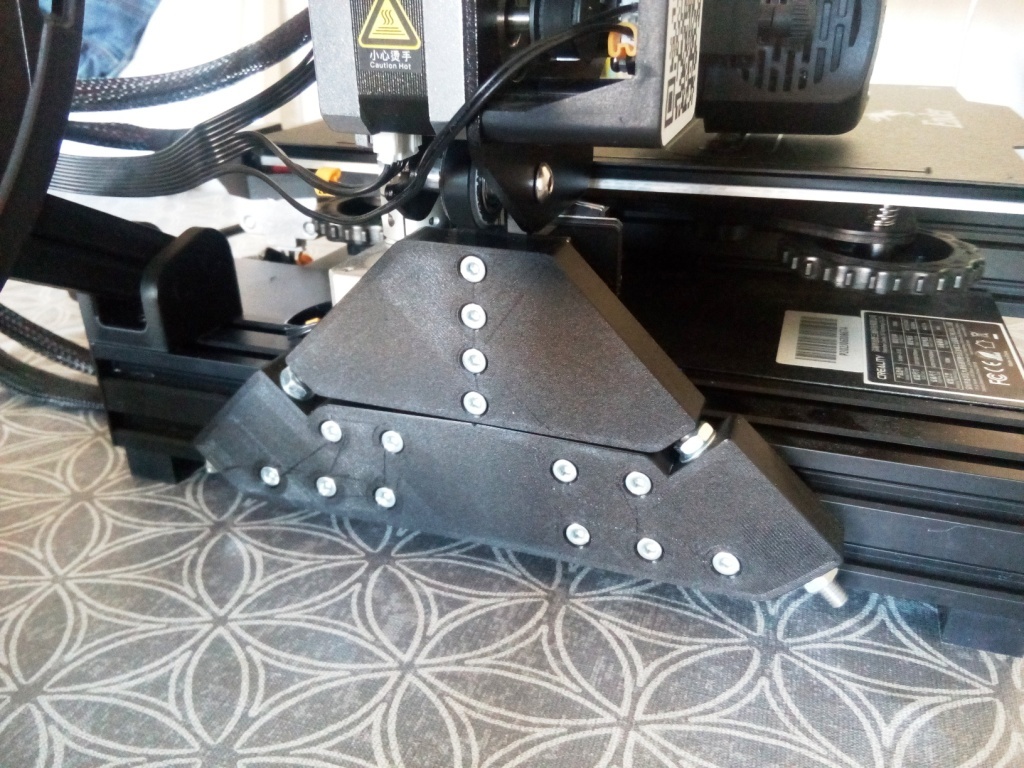
Hello Unless you are lucky ; using a precision square will show that a printed cube is not really square in all directions. Especially if you use the portico as an handle or you let a 1kg spool gently ply it all day long... Then you have to fine tune the Z profiles to square them perfectly with the absolute reference that is the Y profile. Here is my solution to fine tune my Ender 3v2. Advanced user only ! I'll not give a step by step tutorial just few tips. Assemble the M6 threaded rods in the Squaring Modules. Tighten two M6 nuts together on one side of the rod so you can screw the threaded rod easily. Do not forget to add the intermediates nuts and washers as shown on the picture. Then tighten the modules on each side, just let the M6 nuts loose for the moment. Take off the gantry profile (horizontal one) and all the X axis (extruder profile hotend). No need to take off the bed. 1. Loosen the Z profiles and use strong spring clips to join them together with the gantry profile as a ruler (horizontal upper profile). Perfectly align them and tighten them just a little. Unscrew a little the bed Y profile to square it perfectly with this reference using a precision square. You'll never change this any more it is now an absolute reference so tighten it properly. 2. Firmly assemble the gantry profile (upper horizontal one) on the Y profile you've just tuned, Use a precision square to vertically square the left Z profile with the Y profile. You'll probabely have to use spacers to tune this. A thin sheet of metal is better than paper. 3. Reinstall the Z axis moving kit (X axis extruder and nozzle...) and slide it down an up to make the two Z profiles paralleles. Use spacers if necessary on the right Z profile as you did on the left one. Tighten gently your profiles but not very much to keep all this in position. 4. Firmly assemble your precision square on the Y profile in order to make a ligne of sight between the left Z profile, the square and a white background well illuminated. You should see a thight line of light between the Z profile and the square. Use the nuts to perfectly aligne the square and the profile. The light must not appear faster up or down. It must be occulted evently everywhere. Tighten the nuts and the Z profile but not too much and do the same for the right Z profile. You're done Have fun You'll need M4x16 allen head bolts as shown on picture, M4 nuts, M6x115 threaded rod, M6 nuts and washers
With this file you will be able to print Squaring Modules Ender 3v2 with your 3D printer. Click on the button and save the file on your computer to work, edit or customize your design. You can also find more 3D designs for printers on Squaring Modules Ender 3v2.