Squash Ball Vibration Dampening Feet for 3D Printers with 2020 / 2040 Extruded Frameworks
prusaprinters
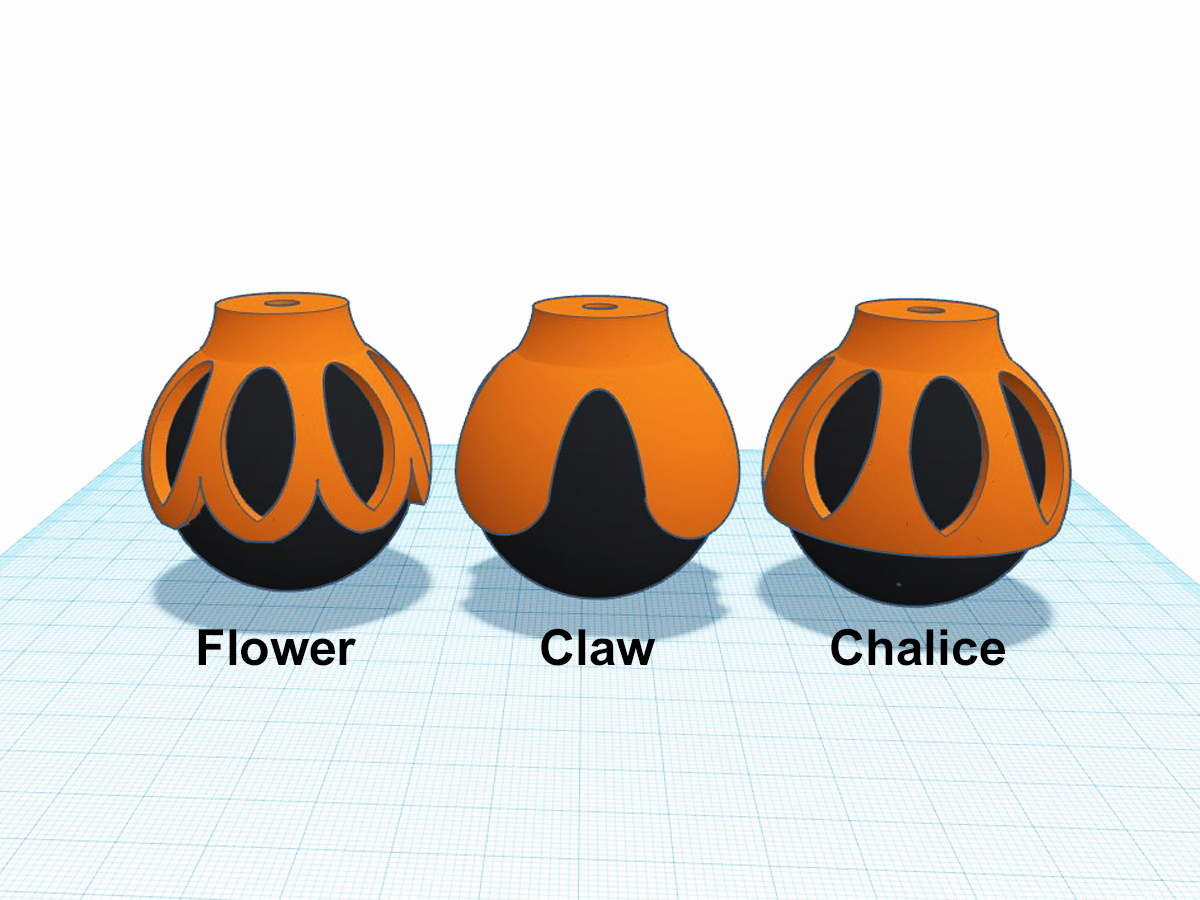
<p>These are three designs for vibration dampening feet for 3D printers, incorporating standard 40mm squash balls. The models are designed for 3D printers that have 2020 or 2040 extruded aluminum frameworks (Ender 3, 5 10, etc.). The models attach to the frame using an M5 'Drop in' T-slot nut, an M5x8mm Hex Button Head Cap screw and an M5 washer. The feet can be installed without disassembling your printer. No supports are needed, but can be used if desired.</p><p>The purpose of these feet is to isolate the printer so that motor and print noises don't travel through the printer and into the table or desk surface on which the printer is situated, thereby reducing the noise that is amplified through the table surface. The end result is that your printer will likely be quieter. I can definitely hear the difference between the stock hard feet and these vibration dampening feet on my Creality Ender 5.</p><p>I installed six feet and so I purchased two 3-packs of squash balls. I bought the least expensive balls that I could find that were built to the official 40mm dia. spec.</p><p>There are three designs: Flower, Claw and Chalice (see photos). These are updated versions that require less filament than my earlier versions. I did not print them because I already had printed and installed an earlier version, so I didn't need more feet (see photos of the earlier version Chalice style that I use).</p><p>Because 3D printers tend to be back heavy (motors, filament spools, other hardware, etc.), it is recommended that you install six feet: 2 in front, 2 in back, and one on each side close to the back. This will help keep the printer level. You can play with the positions to achieve optimum disbursement of weight across the 6 feet.</p><p>INSTALLATION:</p><ol><li>Insert the T-slot nut into the T-slot rail at the desired location for a foot.</li><li>Rotate the T-nut 90 degrees to set it in the locked orientation (fine tweezers come in handy).</li><li>Insert the washer and screw in the foot, from the inside, protruding out of the center hole in the foot.</li><li>Align the screw to the installed T-nut in the T-slot and tighten the screw with the appropriate size hex wrench.</li><li>Install a squash ball by gently pushing in and indenting the side of the ball; little by little it will work itself into the foot.</li><li>Repeat this process for all of the feet.</li></ol><p>NOTE: If you install the T-nut onto the screw before inserting it in the T-slot, which seems like a logical thing to do, you will likely have a difficult time getting the T-nut to rotate and engage the inside surface of the T-slot while tightening. It will likely remain aligned with the T-slot, not engage the T-slot, and pull back through the T-slot as you tighten the screw.</p>
With this file you will be able to print Squash Ball Vibration Dampening Feet for 3D Printers with 2020 / 2040 Extruded Frameworks with your 3D printer. Click on the button and save the file on your computer to work, edit or customize your design. You can also find more 3D designs for printers on Squash Ball Vibration Dampening Feet for 3D Printers with 2020 / 2040 Extruded Frameworks.