SRAM shifter to Shimano derailleur adapter
thingiverse
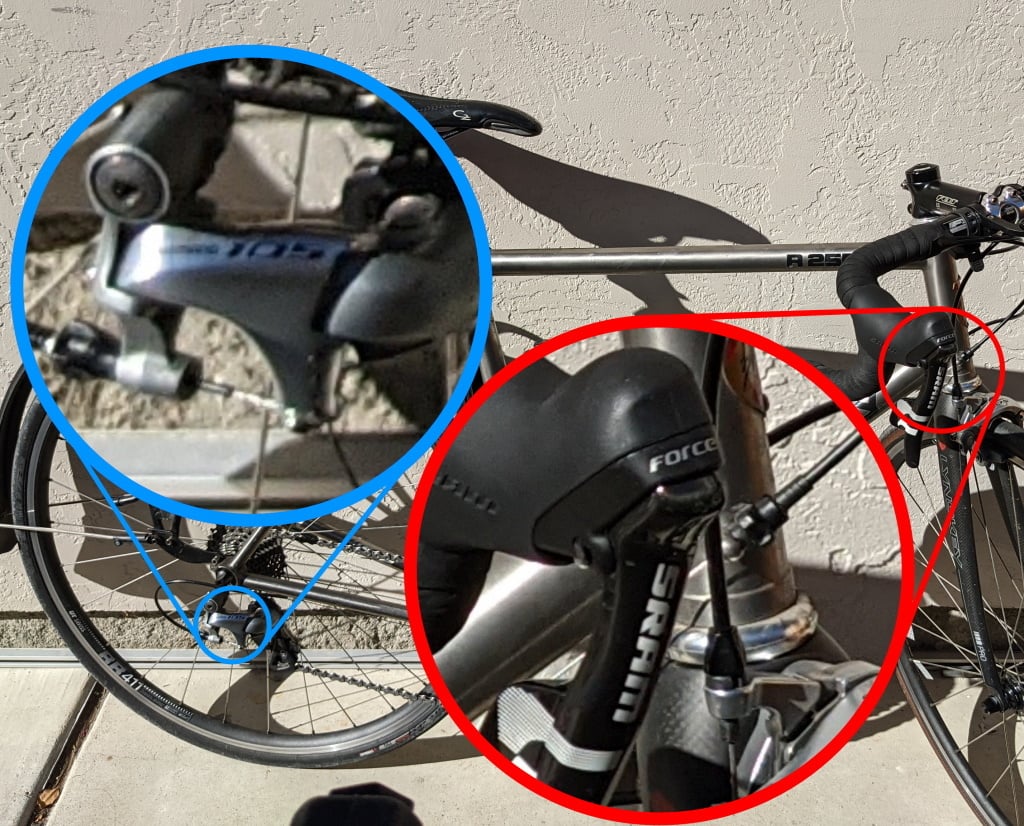
This is an adapter to make a SRAM Double Tap 11-speed shifter work with a Shimano 11-speed road rear derailleur. It replaces the red cable takeup spool inside the SRAM shifter and pulls the slightly smaller amount of cable that Shimano road rear derailleurs need. Because of variations in 3D printers, especially when printing holes in parts, I needed to make a number of iterations, especially since my 3D printer is poorly tuned. Included is that file. I have also included the Fusion 360 design file for fine tuning the spool diameter and to account for even more 3D printer variations. I have had best results with a 18.1mm diameter spool, as measured with a caliper, even though the file says it should be 18.15mm. Diameter differences (runout) can vary by as much as 0.03 or 0.04mm. Shifting can suffer with even a 1% difference in diameter. Changing the spool diameter by much more than 0.5mm may result in errors in the model. **Fusion 360 file has been updated, 15 April 2021.** The old one seems to have lost a dependency so changing the diameter did noting. Parameters may be changed by going to Solid->Modify->Change Parameters. Most of the pertinent parameters are at the top in the Favorites area: * **SmallerPulleyDia** is the nominal diameter of the takeup spool- 18.15mm in this case. Decrease or increase this if the derailleur is shifting too far or not enough, respectively. Measurements will be smaller than expected when measured near the cable head. * **HoleCorrectionOffset** is how much larger you want to make the diameter of vertical holes- namely if the gear ratchet is too tight or loose. I am using 0.45mm for a snug fit onto the gear ratchet. * **LesserHoleCorrection** is how much larger you want to make vertical holes, namely the holes for the shifter cable and the cable head. These can probably easily be enlarged with a drill bit if necessary. I chose 0.3mm, but could probably have gone smaller. Basic steps to changing the takeup spool are as follows, though there are slight differences for cable brake vs. hydraulic. 1. Remove cables and housings. 1. Remove hood from brake lever. 1. Remove lever from bar and make sure not to lose the bar clamp pieces. 1. Remove cover over shifter components (3 cross-head screws). 1. Loosen screw holding shifter shaft in. 1. Remove shifter shaft, shift lever, gear ratchet, and takeup spool. * For the shifters on hydraulic brake levers, the shifter shaft can be removed by screwing an M2 bolt (*correction:* M2.5) into the end of the shaft and pulling it out. A 14 gauge or 2mm threaded spoke still works, it's just a bit loose. * For shifters on cable brake levers, the shaft has to be pushed out from the brake lever side. I have found that a 2mm L-shaped allen wrench works well to get into the space near the inside brake lever pivot and press on the end of the shaft. Be careful note the orientation of the shifter return spring within the shifter, and make sure not to lose it or the inner spacer- sometimes they can spring loose on the cable brake levers. 1. Remove the metal gear ratchet from the original red takeup spool- if your spool is not red, this probably will not work. 1. Remove spring from red takeup spool- use a small screwdriver to unhook the inside coil from the spool. 1. Fit the metal gear ratchet on the 3D printed piece. make sure you have the correct orientation- with the cable running next to the ratchet teeth. 1. Install the spring onto the takeup spool. 1. Install takeup spool, gear ratchet, and shift lever (and spring and spacer too if they are separate). * Lining up the holes in all the parts can be a bit tricky while also trying to keep tension on the shift lever return spring. * Hopefully the pictures are mostly in order. My assembly order goes: 1. Install the gear ratchet, takeup spool, and spring assembly first, fitting the gear ratchet so it goes over the pawl on the lever body (missing picture). 1. Rotate the assembly until the pawl catches on the gear ratchet 1. Push the shifter shaft through to the end of the gear ratchet, making sure that the threaded end- if there is one- faces out/back so it can easily be removed again. Leaving the spoke threaded onto the shaft forces you to install it the correct way around. 1. Rotate the assembly even more until the gear ratchet is in the lower gears. This allows you to press the shift lever straight down into the body while getting the spring in the correct position so that you can... 1. Wiggle the shift lever around while pressing on the end of the shaft until it goes into the shift lever pivot hole. 1. Keep wiggling and pressing on the shift lever and gear ratchet assembly until the shaft presses fully into the body so you can... 1. Tighten the shaft retention screw, reinstall shifter cover and brake hood, and reinstall lever onto bar. Though one of the posts on the gear ratchet sticks into the cable bed of the takeup spool, it does not seem to adversely affect the shifting. If shifting requires increasing amounts of force, make sure the pawl on the shift lever is lubricated, especially where it slides against the other pawl. Make sure to use a lubricant that is compatible with your plastic or vice versa. I recommend against PLA in this application. Though I have been using this part on my bike since March 2021 and have had no problems, the usual disclaimers apply: Build and/or use at your own risk. The model supplied is provided 'as is' without any warranty of any kind, express or implied. I make no claim as to the suitability of the part for any given application. User takes full responsibility for any damage or injury sustained by using or assembling this part.
With this file you will be able to print SRAM shifter to Shimano derailleur adapter with your 3D printer. Click on the button and save the file on your computer to work, edit or customize your design. You can also find more 3D designs for printers on SRAM shifter to Shimano derailleur adapter.