Stacked Pumpkin Lantern
prusaprinters
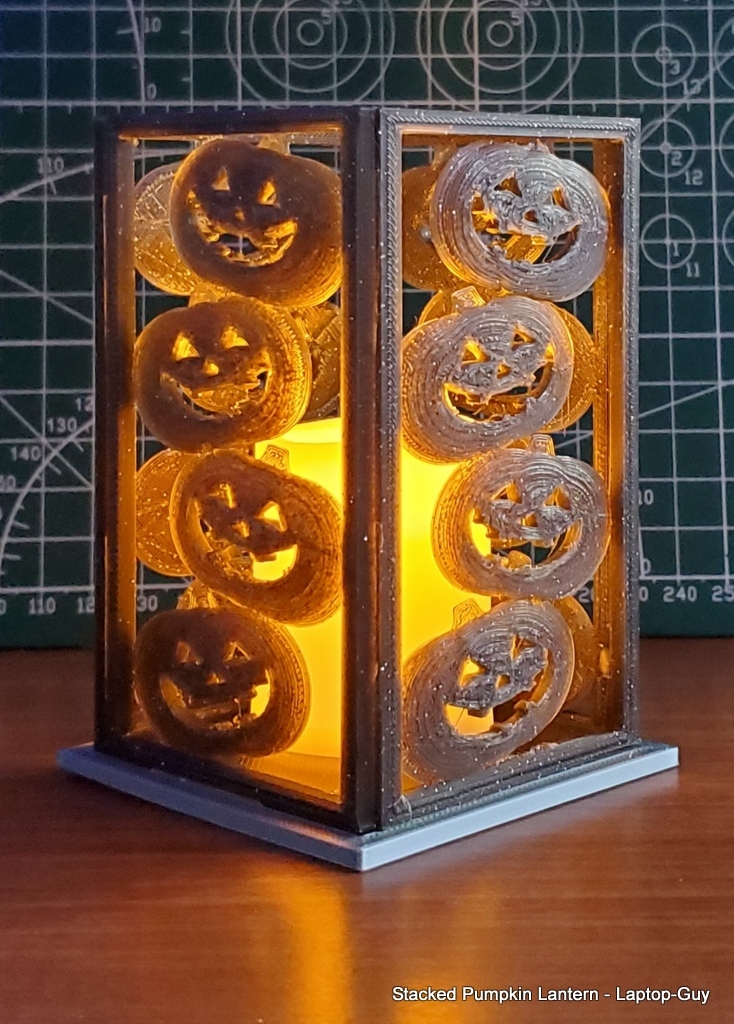
<h3>Stacked Pumpkin Lantern</h3> <h3>LED Tealight or Votive Candle Holder</h3> <h3>Halloween Decoration</h3> <p>This is a 100x60x60mm Halloween LED tealight or votive lantern.</p> <p>The thin print settings make this lantern glow with light from the flicker of LED candles.</p> <p>Easy print, easy assembly.</p> <p>My first print I used "twinkle black".</p> <p>A later print, photos added I used Orange..</p> <p>If you like this and make in other colors please share.</p> <p>See my follow-up designs <strong><a href="https://www.thingiverse.com/thing:5023087/files">Spider Web Lantern</a></strong> <strong><a href="https://www.thingiverse.com/thing:4975473">Stacked Bat Lantern</a></strong></p> <p>and <strong><a href="https://www.thingiverse.com/thing:4978785">Fall Leaves Lantern</a></strong></p> <h3>Print Settings</h3> <p><strong>Printer Brand:</strong></p> <p>FlashForge</p> <p class="detail-setting printer"><strong>Printer: </strong> <div><p>Adventurer 3</p></div> <p><strong>Rafts:</strong></p> <p>Yes</p> <p class="detail-setting supports"><strong>Supports: </strong> <div><p>No</p></div> <p><strong>Resolution:</strong></p> <p>.24</p> <p class="detail-setting infill"><strong>Infill: </strong> <div><p>100%</p></div> <p><strong>Filament:</strong> Enotepad PLA Twinkle Black</p> <p><br/> <p class="detail-setting notes"><strong>Notes: </strong></p> </p><div><p>I had to have a raft to get the pumpkins to release. The panels are very thin prints, only 3mm thick so the light can glow through them and they print fast.<br/> Use 100% infill or 3mm worth of shell for the panels. <p>The base I just did at my printers default fast profile .3mm layer and 15% infill.</p> <p>Also on the base I did a print pause at the 5mm mark so I could switch from Silk Silver to the Twinkle Black. I wanted the base to stand out in silver but still have the inside candle area to be dark.</p> <p>The added Orange print got a solid Silk Bronze (Amolen) base.</p> <h3>Post-Printing</h3> <p><strong>Easy Assembly</strong></p> <div><p>Print 4 frames and the base which has a groove to help hold the panels square.</p> For assembly, to fit the base, each panel attaches left inside and right on end (see pic). <p>The groove on the base is meant to hold the panels inserted into it. I assembled the sides put glue strips on a couple spots on the bottom edges then tapped the assembly down into the base groove with the palm of my hand.</p> <p>Stick them together with double side tape or glue. I used Glue Dots 22263E Adhesive Glue Line, Clear. These or similar "craft glue dots" are easy to rearrange, hold well and are removable so it can be flatten for storage.</p> <p>For the Orange print; I used that same crafting Adhesive Glue Line "glue dots". Two added evenly space to the left edge of each panel. The glue strips are a wider then the edge so once applied roll the extra back on top of itself. Assemble the panels and squeeze them firmly till there are no visible gaps. Add the "glue dot" to each bottom edge and push it down onto the base while carefully lining it all up square.</p> <h3>How I Designed This</h3> <p>This little lantern was designed in TinkerCad using their holiday pumpkin. Smashed it flat, carved a happy jack-o-lantern face and stacked them up with a frame.</p> <p><strong>TinkerCad Preview</strong></p> </div></p></div></p></p></p> Category: Decor
With this file you will be able to print Stacked Pumpkin Lantern with your 3D printer. Click on the button and save the file on your computer to work, edit or customize your design. You can also find more 3D designs for printers on Stacked Pumpkin Lantern.