Stamp Set
thingiverse
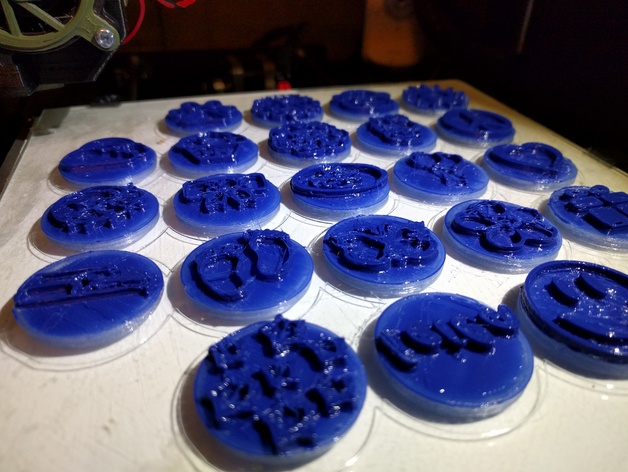
With my niece's 3rd birthday quickly approaching, I was told that she really like stamps. I perused Thingiverse but didn't find what I needed... a few options but nothing ready-to-print. So I set about to make my own. Boxes customized from: http://www.thingiverse.com/thing:1255039 Stamp handle: http://www.thingiverse.com/thing:1409724 I drew inspiration from various stamp designs including: http://www.thingiverse.com/thing:5676 (but this is not a derivative). No one seemed to have good instructions for making custom stamps like what I wanted so here is what I used to make a bunch of stamps easily without having to actually draw out each shape/design. Instructions are for creating a 30mm diameter and 6mm thick (3mm design + 3mm base) stamp to use with the 30mm customized handle above. I found Cura to put a base on the stamp designs even with the base set to 0 which is why I set it to 4mm thick stamp designs and then cut off 1mm from the bottom. Some more background on the stamp set with a few more photos on my blog: http://blog.mattsphotogallery.com/2016/03/stamp-set/ Print Settings Printer: Monoprice Maker Select Rafts: Doesn't Matter Supports: Doesn't Matter Notes: Everything was printed in PLA. The silver and green stamp handles were natural PLA run through sharpies. The darker blue on the stamps is flexible filament from Fry's (http://www.frys.com/product/8452878) - I just paused the print at a height of 3mm and switched. Post-Printing I used cyanoacrylate gel to glue the magnets into the stamps and stamp handles. I few of the stamps had to have the hole drilled out slightly. I didn't measure to see if the variation was due to the cheap magnets I had or in the printed size of the holes (which is probably what it was). Make sure the magnets are oriented correctly before gluing :-) How I Designed This Find source image(s): Google image search for "Icon" sized "Black and White" images with various terms such as "stamp" or "butterfly" or "heart" or whatever you might want. You can also take screenshots of symbols or text... for the "Leila" stamp, I just typed out "Leila" in Word, changed the font to "Forte" and took a screen shot before processing as below. Gimp: Flatten image with white background. Scale size to 10x initial size. Autocrop Image --> Mode --> Indexed --> Generate optimum palette (2 colors) --> Convert Scale to 250px wide Export as .jpg Cura: File --> Load Model File --> pick your .jpg Height: 4 Base: 0 Width/Depth: change the larger of the two to 30mm Darker is higher No smoothing or light smoothing (depends on the image) Hit Ok File --> Save Model (make sure to save as a .stl file) Netfabb: Open the model you saved above. Under the cuts section, change the Z cut height to 1mm. Click execute cut. Click cut. Click on the bottom 1mm of the model and hit the delete button. Right click on the remaining 3mm of the model and export as STL (ASCII). Combine the stamp model with the stamp base in the program of your choice (I use MeshLab). You may have to scale and/or rotate depending on the design. For the lid, I took a screenshot of my niece's name (Leila) typed into Word (the font is Forte) and followed the above instructions but scaled the width to 100mm when opening in Cura. All the intermediate files and miscellaneous items are included the .zip file if you are interested, including the customized handle and boxes.
With this file you will be able to print Stamp Set with your 3D printer. Click on the button and save the file on your computer to work, edit or customize your design. You can also find more 3D designs for printers on Stamp Set.