Stanley blade printed label / heat shrink tubing trimmer
thingiverse
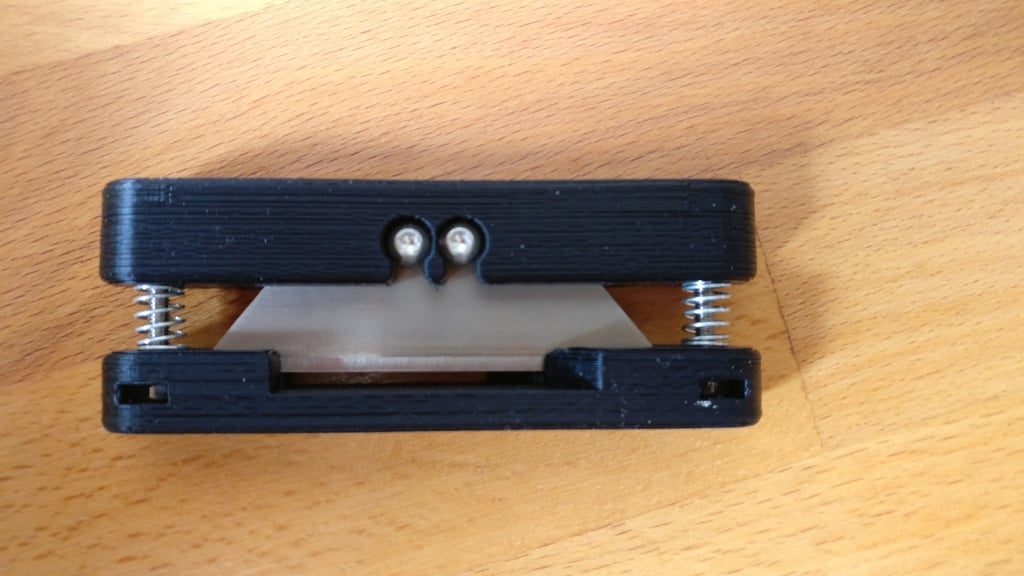
Using a 12mm/9mm label printer has its frustrations, they always print a load spare on each side so that the label comes out of the printer enclosure. I have never managed to cut these squarely with scissors so I created this. It takes a good amount of force to cut through but it does work. Heat shrink is easier. Parts: 2x M3 x 12mm dome head (to hold the blade) 2x M3 x 25mm dome head (side supports) 4x M3 nuts 2x spring 6.4mm x 10.3mm (or similar), I obtained this from Rolson set 61298: http://www.rolsontools.com/150pc-spring-assortment.html Obvious note: Stanley knife blades are sharp, use/assemble at your own risk! Assembly: If needed, clean up the holes with 3.2mm/6.5mm drills, be careful not to eat into the rest of the plastic body. Carefully insert the blade and add the M3 x 12mm bolts and nuts to hold it securely. Slide the M3 nuts into the holes in the base, add the M3 x 25mm bolts an tighten securely but not over tight. Check that the assembly slides up and down cleanly.
With this file you will be able to print Stanley blade printed label / heat shrink tubing trimmer with your 3D printer. Click on the button and save the file on your computer to work, edit or customize your design. You can also find more 3D designs for printers on Stanley blade printed label / heat shrink tubing trimmer.