Star Trek Isolinear Chips (vector fix)
thingiverse
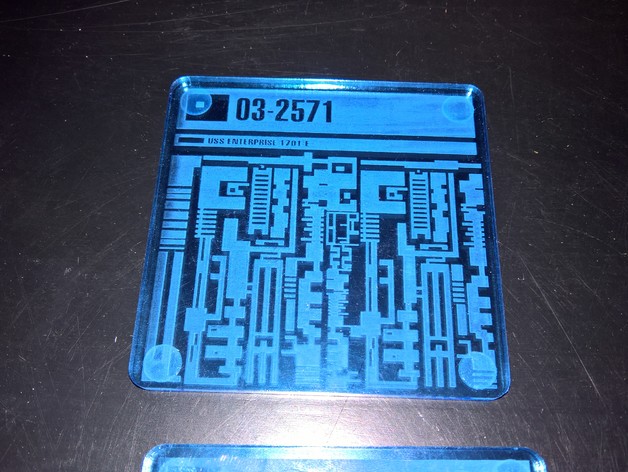
This is a conversion of the original thing's isolinear chip designs from the TechSoft 2D Design files to standard SVG and EPS files. If you need other formats, the SVGs can be imported into Inkscape or CorelDRAW, among other programs, and exported. If you are looking for the 3D isolinear chip holder models, please visit the original thing. The original thing's sizings didn't make sense to me, so I made my best guesses as to what applied. As such they now may or may not fit into the original thing's 3D holders, so if you intend to do both, it would be wise to print the holders first, take measurements, then scale these files appropriately. Default (baked-in) sizes: Isolinear_Chip: 2.5cm x ~8.696cm Isolinear_Chip_-_Voyager: 2.5cm x ~8.67cm Isolinear_Chip_-_Large_-_Mk_1: 5 x ~12.475cm Isolinear_Chip_-_Large_-_Mk_2: 5 x ~12.49cm Isolinear_Chip_-_Large_-_Mk_3: 5 x ~12.498cm Isolinear_Chip_-_Square: 10 x 10cm Printing, with a regular non-3D printer, any one of these designs will give you a cheap idea of the real world size for measurement purposes. Paper-masked acrylic is a good choice if you intend to paint these after laser engraving them. (See the "post-printing" section.) Real pictures will be added later after my laser cutter is running again and I am able to try these. Post-Printing Painting If you used paper-masked acrylic (not the film kind) and left it on during the lasering process, just tape off the edges and use spray paint to get a nice uniform coloring easily. 3M's edge lock painters tape works wonders, but any masking or painters tape will do. Multiple lighter coats will likely come out better than one oversprayed one, especially for the finer details. It is advised to wait for the paint to dry enough that it is no longer tacky to avoid leaving fingerprints or smearing the paint across the acrylic when removing the mask. How I Designed This From the Original to Convenient Vectors I used the demo version of the TechSoft software to get high resolution screenshots that I pieced together to create images of the designs. This was mostly for the benefit of the text, as I do not know the font used (but have a good guess, see below) and did not want to try recreating that. After "export", I touched up some of the designs to fix odd single-pixel lines and holes that shouldn't have been, straightened lines that shouldn't have been curves, and adjusted the thicknesses or alignment of some lines that should have been the same but weren't. In particular I did the most fixing to the base isolinear design, the least to the "mark X" and square designs, and redid the bottom angle on the Voyager design. All designs with rounded corners had their edge line redone. If you want to change the ID of each chip to be different, the best guess for the font is Standard CT Condensed: https://www.myfonts.com/fonts/castletype/standard/ Unfortunately the '7' doesn't match above the regular font weight.
With this file you will be able to print Star Trek Isolinear Chips (vector fix) with your 3D printer. Click on the button and save the file on your computer to work, edit or customize your design. You can also find more 3D designs for printers on Star Trek Isolinear Chips (vector fix).