Steampunk Nixie Tube Clock
thingiverse
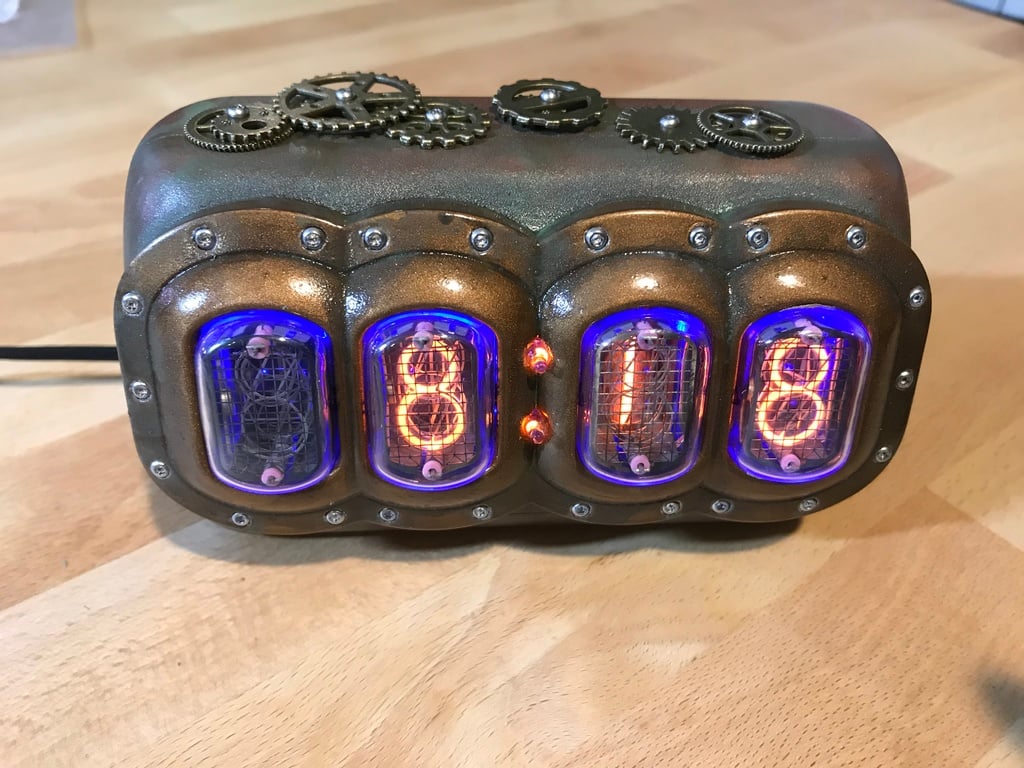
Create a desktop Steampunk style Nixie Tube Clock. You will need to acquire a Nixie Tube Clock kit and other misc hardware to assemble this clock. Quantity 1: 3D Print of <strong>Nixie_Tube_Front.STL</strong> Alternate: <strong>Nixie_Tube Front_lower_resolution.STL</strong> (this is a smaller file but some detail is lost during printing) Quantity 1: 3D Print of <strong>Nixie_Tube_Back.STL</strong> Quantity 2: 3D Print of <strong>Nixie_Tube_Button M2.STL</strong> or <strong>Nixie_Tube_Button M1.STL</strong> or <strong>Nixie_Tube_Button_No_Gear.STL</strong> Select from the three Nixie_Tube_Buttons depending which size screw you intend to use to install on the back of the clock. M1x3mm or M2x5mm screws. You can also just print the button with no gear on it. Quantity 1 <strong>Nixie Tube Clock Kit (FunKlock)</strong> https://www.pvelectronics.co.uk/index.php?main_page=product_info&cPath=1&products_id=140 Quantity 2 <strong>Tack Switch</strong> Panasonic part number: EVQ-PAC09K - these replace the switches which come with the FunKlock kit such that the adjustment switches are accessible from the back of the clock. Note: PV Electronics sells compatible buttons with the Finned Case for the FunKlock, you might be able to source these switches from them when you get your Nixie Tube Clock Kit. https://www.digikey.ca/product-detail/en/panasonic-electronic-components/EVQ-PAC09K/P8012S-ND/91455 Quantity 35 of <strong>M2x5mm Stainless Steel Button Screws</strong> https://www.amazon.ca/gp/product/B01E5CEKFY/ref=oh_aui_detailpage_o00_s00?ie=UTF8&psc=1 Quantity 4 <strong>M2x22mm Scew Bolt</strong> https://www.amazon.ca/gp/product/B011BNU9EQ/ref=oh_aui_detailpage_o03_s00?ie=UTF8&psc=1 Quantity 7 <strong>M2x6mmx3.5mm Female Threaded Brass Knurled Insert Embedded Nuts</strong> https://www.amazon.ca/gp/product/B01BHDXL18/ref=od_aui_detailpages00?ie=UTF8&psc=1 Quantity 1 <strong>Packet of Antique Steampunk Gears</strong> https://www.amazon.ca/gp/product/B076Z7H5HZ/ref=oh_aui_detailpage_o04_s00?ie=UTF8&psc=1 Optional Quantity 3 <strong>M1x3mm screws</strong> to install smaller gears. I used these to install small gears on the buttons and one of the sides. You can just use M2x5mm screws and gears with larger holes in the centre instead. These screws can be found in eye glasses repair kits for cheap.
With this file you will be able to print Steampunk Nixie Tube Clock with your 3D printer. Click on the button and save the file on your computer to work, edit or customize your design. You can also find more 3D designs for printers on Steampunk Nixie Tube Clock.