Steampunk style shop goggles
prusaprinters
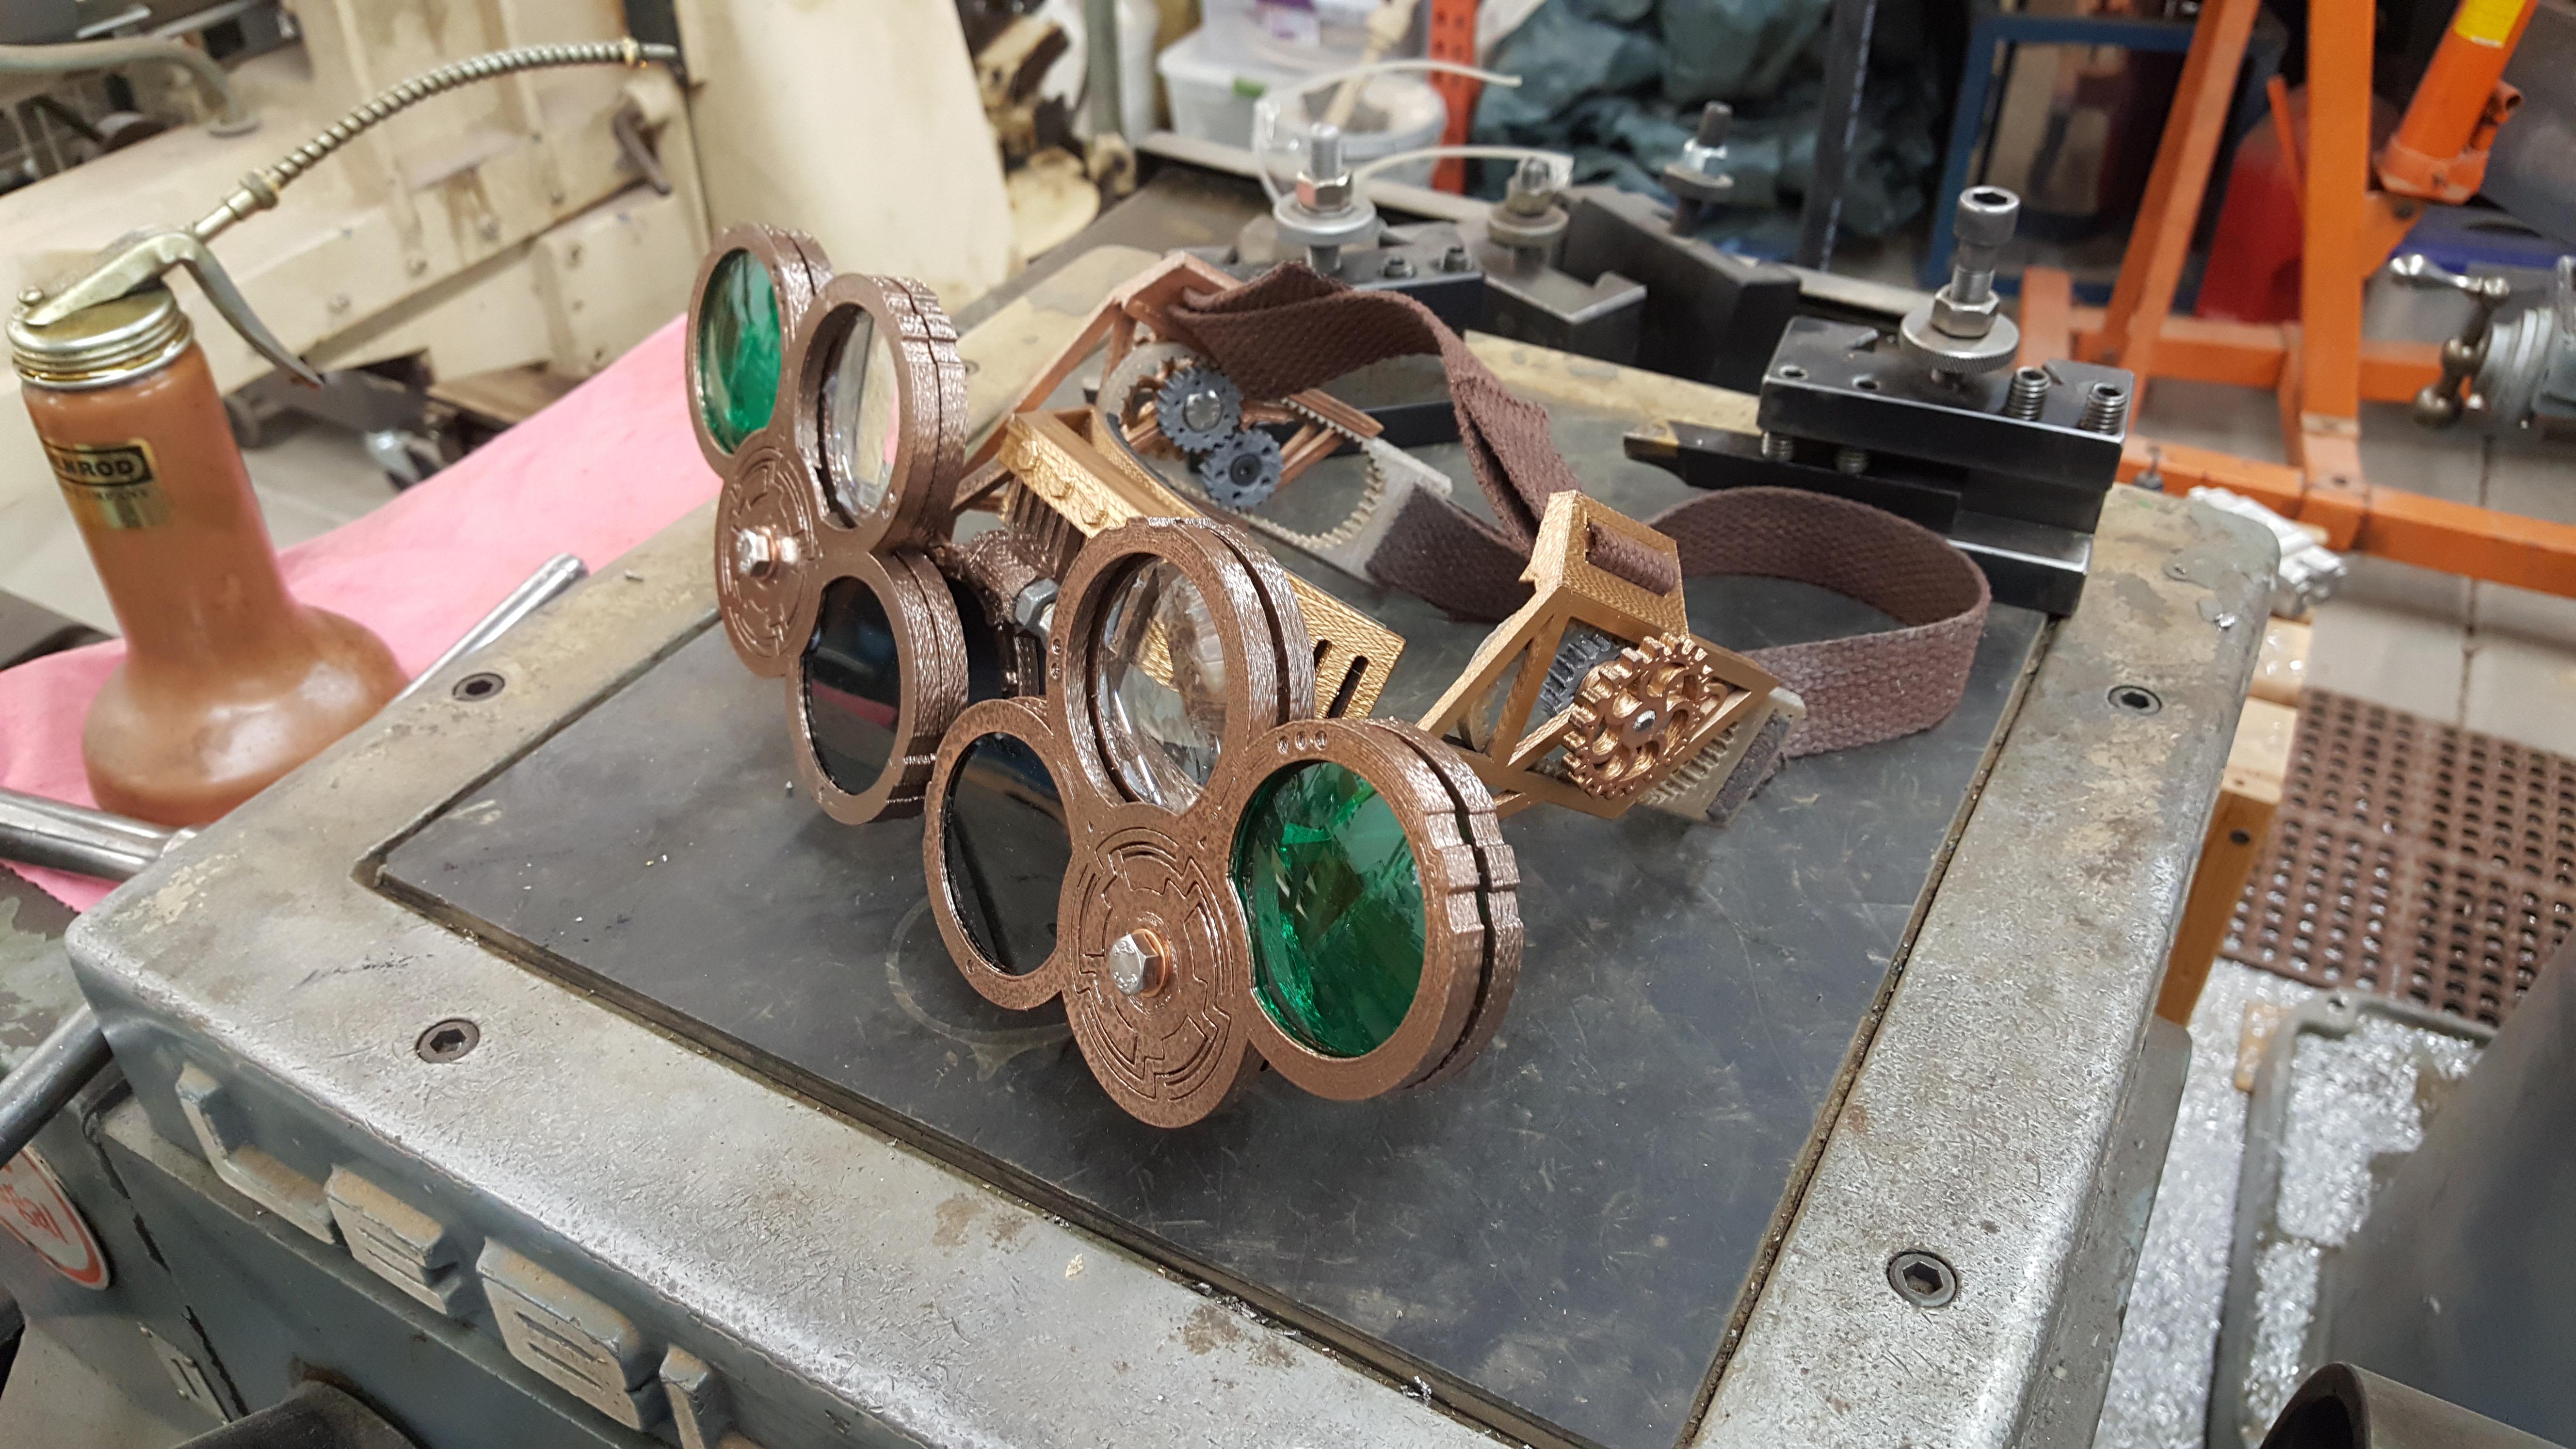
<p>This is a set of functional shop goggles designed with a steampunk theme. It hold six lenses per eye in groups of three enabling filters to be used along with magnification, prescription, etc.</p> <p> <figure class="media"> <oembed url="https://youtu.be/xMS4i1LPUTI"></oembed> </figure> </p> <h3>Print instructions</h3><h3>Category: Tools Print Settings</h3> <p><strong>Printer Brand:</strong> Solidoodle</p> <p><strong>Printer:</strong> [Solidoodle 3]</p> <p><strong>Rafts:</strong> No</p> <p><strong>Supports:</strong> No</p> <p><strong>Resolution:</strong> 0.3mm layer height</p> <p><strong>Notes:</strong></p> <p>Everything except the headrest and eyecups will need to be printed twice - once as-is and once mirrored (scale X axis by -1). The files labeled "alternative_*" are exactly that. They are options to have two or five lens slots instead of the default three. You only need to print one variant of carousel and carousel2 for each eye.</p> <h3> Post-Printing</h3> <p><strong>Parts List</strong></p> <p>All printed parts except the headrest and eyecups are for the right side only. To print the left half of the goggles you will need to mirror them by applying a scale of -1 to the X or Y axis. Alternatively, you can issue M579 X-1 and G10 L2 P1 X200 (for a 200mm bed) to flip the X axis on your printer (assuming it supports these gcodes - RepRap version 1.21 or later does). I prefer this method since you can use the same gcode to print both variants.</p> <p>The eyecups were designed to fit my face perfectly so probably won't work for most people. They aren't really required - they just provide some more protection.</p> <p>In addition to the printed parts, you will need the following:<br/> 1) 1/4-20 threaded rod, 3" length<br/> 2) 2 1/4-20 nuts<br/> 3) 2 M6-1.0 hex bolts 16mm length<br/> 4) 2 M6-1.0 hex bolts 30mm length<br/> 5) 2 M5-0.8 hex bolts 40mm length<br/> 6) 2 M4-0.7 flat head tapered machine screws 8mm length<br/> 7) about 2 feet of 1" strapping (cloth, leather, cord, etc)<br/> 8) various 50mm lenses<br/> 9) bench grinder or file<br/> 10) 1/4-20 tap</p> <p><img src="https://media.prusaprinters.org/media/prints/15121/images/142064_5667093f-a114-4f51-b92d-f251b115935c/20180407_061938_15121.jpg" width="800"/></p> <p><strong>parts</strong></p> <p><strong>Step 1 - Remove supports</strong></p> <p>Although supports are not required to be added, there are a couple that have been built into the model.</p> <p>In the hinge, carefully snip off the wedge support as show in the first picture below.</p> <p>In the carousel, carefully break each spring free from the back by prying with a screw driver long the inside as shown. Take care not to lift up as this could break the spring off.</p> <p><img src="https://media.prusaprinters.org/media/prints/15121/images/142065_840dfa3a-22e3-4cf9-be64-de0c9f3c5e7f/20180410_170025_15121.jpg" width="800"/></p> <p><strong>Removing the ratchet support from the hinge parts.</strong></p> <p><img src="https://media.prusaprinters.org/media/prints/15121/images/142066_d5de4bc9-5bb8-4b22-8e30-1906b819e861/20180402_064351_15121.jpg" width="800"/></p> <p><strong>Breaking carousel springs from their supports.</strong></p> <p><strong>Step 2 - paint</strong></p> <p>Allow to dry thoroughly before assembling.</p> <p><strong>Step 3 - tap frame</strong></p> <p>Using a 1/4-20 tap, tap the horizontal hole in the frames.</p> <p><img src="https://media.prusaprinters.org/media/prints/15121/images/142067_ffeb229a-a2aa-4088-839c-76103898a289/20180406_184043_15121.jpg" width="800"/></p> <p><strong>Tapping the frames</strong></p> <p><strong>Step 4 - Assemble frames</strong></p> <p>Thread the two 1/4-20 nuts onto the threaded rod and then onto each of the frames. Adjust for pupillary distance and tighten the nuts. Finally slide the headrest onto place. I also glued a piece of a neoprene mousepad to the inside of the headrest to make it more comfortable to wear.</p> <p><img src="" width="800"/></p> <p><strong>Assembled frames</strong></p> <p><strong>Step 5 - Assemble gears</strong></p> <p>1) Grind a flat on the two 16mm M6-1.0 hex bolts<br/> 2) snap the rail into the slides on the hinge. Lubricate with graphite.<br/> 3) Attach the idler gear using the M4-0.7 flathead screws<br/> 4) Insert the M6-1.0 hex screw through the drive gear and through the hinge<br/> 5) Press the adjustment gear onto the other side mating with the flat on the screw</p> <p><img src="https://media.prusaprinters.org/media/prints/15121/images/142069_e39eaf3d-0e8c-4a05-a91f-556bf493748e/20180406_183411_15121.jpg" width="800"/></p> <p><strong>Grinding the flat</strong></p> <p><img src="https://media.prusaprinters.org/media/prints/15121/images/142070_9e998e84-fcba-430d-9d75-f0197417fb8e/20180407_064029_15121.jpg" width="800"/></p> <p><strong>Rail snapped in place. Lubricating with graphite</strong></p> <p><img src="https://media.prusaprinters.org/media/prints/15121/images/142071_aa587635-db9c-455e-bec0-f200dcd32ce9/20180407_063438_15121.jpg" width="800"/></p> <p><strong>Attaching the Idler gear</strong></p> <p><img src="https://media.prusaprinters.org/media/prints/15121/images/142072_7325de78-5dab-4b51-acd8-855aea7c0ef2/20180407_063559_15121.jpg" width="800"/></p> <p><strong>Adding the drive gear</strong></p> <p><img src="https://media.prusaprinters.org/media/prints/15121/images/142073_c09f8cd0-e9ea-43ef-9f54-553ad52a6a21/20180407_063626_15121.jpg" width="800"/></p> <p><strong>Pressing on the adjustment knob</strong></p> <p><strong>Step 6 - Attach hinges to frames</strong></p> <p>Using the 40mm M5-0.8 hex bolts. Attach the hinges to the frames. Bolt should slide easily down from the top and then self-tap into the smaller lower hole in the hinge.</p> <p><img src="https://media.prusaprinters.org/media/prints/15121/images/142074_f8dfa4b7-6a2b-4152-a1fe-ef3c3be20ce4/20180407_063214_15121.jpg" width="800"/></p> <p><strong>Attaching hinges to the frames</strong></p> <p><strong>Step 7 - Thread strap</strong></p> <p>Using gaffers tape or similar, pull the straps out one slot and back through the other on each side of the goggles. Repeat for the top strap.</p> <p><img src="https://media.prusaprinters.org/media/prints/15121/images/142075_47c499d6-2eb5-4ac9-9076-5344a96a3396/20180407_155752_15121.jpg" width="800"/></p> <p><strong>Pulling the straps through the rails</strong></p> <p><strong>Step 8 - Attach the carousels</strong></p> <p>Using optional washers if desired, slide the 30mm M6-1.0 screw through carousel2R3 to carouselR3 and thread into the right frame. Hole should not require tapping but if it does, you will need to add thread locker or some other means to prevent the screw from loosening. Lift the springs so they snap around the outside of the mounting point. If the lenses of the carousels do not align with the lenses on the frame it means you are putting the left-handed version on the right or vice-versa. They must be attached to the proper side.</p> <p><img src="https://media.prusaprinters.org/media/prints/15121/images/142076_a1fcb6d1-7c8e-49ca-9f05-858f10f8c8d8/20180407_094140_15121.jpg" width="800"/></p> <p><strong>Attaching the carousels to the frame</strong></p> <p><img src="https://media.prusaprinters.org/media/prints/15121/images/142077_a42f7c09-9e35-48bb-b531-c8abbe06e6ba/20180407_094221_15121.jpg" width="800"/></p> <p><strong>Springs properly in place.</strong></p> <p><strong>Step 9 - Add eyecups</strong></p> <p>Check eyecups for fit. As I said these were designed with one head shape in mind and will likely need adjusting for others. If you make your own, the inside diameter is 52mm and the wall thickness is 1.2mm. Once you have a good fit, glue them in place.</p> <p><strong>Step 10 - Add lenses</strong></p> <p>Lens mounts are 51mm diameter drawn making it easy to install 50mm hardware. I used a 2-1/8 hole cutter with the drill removed to cut the laser lenses from a pair of goggles for the red and green lenses and was able to find a cheap pair of welding goggles with 50mm lenses.</p> <p>For my prescription, I purchased a pair of "Inscription" eyeglasses (<a href="https://www.eyebuydirect.com/eyeglasses/frames/inscription-bronze-l-18897">https://www.eyebuydirect.com/eyeglasses/frames/inscription-bronze-l-18897</a>). It is unfortunate to have to buy a $29 pair of frames just for the lenses but I could not find anyone who would sell me just lenses. They were just a hair too wide so I used my dremel with a ball mill to remove about 0.5mm from either side of the socket in the carousel and then the lenses snapped in very securely. Make sure you mark which side is up as soon as you remove the lenses from the frames since it is very hard to tell later. I used a triangle file to grind one notch at the top of the right lens and two notches at the top of the left lens.</p> <p>For the magnification, avoid short focal length as you will not be able to focus both eyes on it at the same time if it is too short although more magnification might be useful for one eye operation. I found 15cm works well for me. I specifically used these lenses from eBay (<a href="https://www.ebay.com/itm/Magnifying-Glass-Reading-50mm-Diameter-15cm-Focal-Length-Eisco-Labs/272501027894">https://www.ebay.com/itm/Magnifying-Glass-Reading-50mm-Diameter-15cm-Focal-Length-Eisco-Labs/272501027894</a>).</p>
With this file you will be able to print Steampunk style shop goggles with your 3D printer. Click on the button and save the file on your computer to work, edit or customize your design. You can also find more 3D designs for printers on Steampunk style shop goggles.