Steel Ball Puzzle Maze
prusaprinters
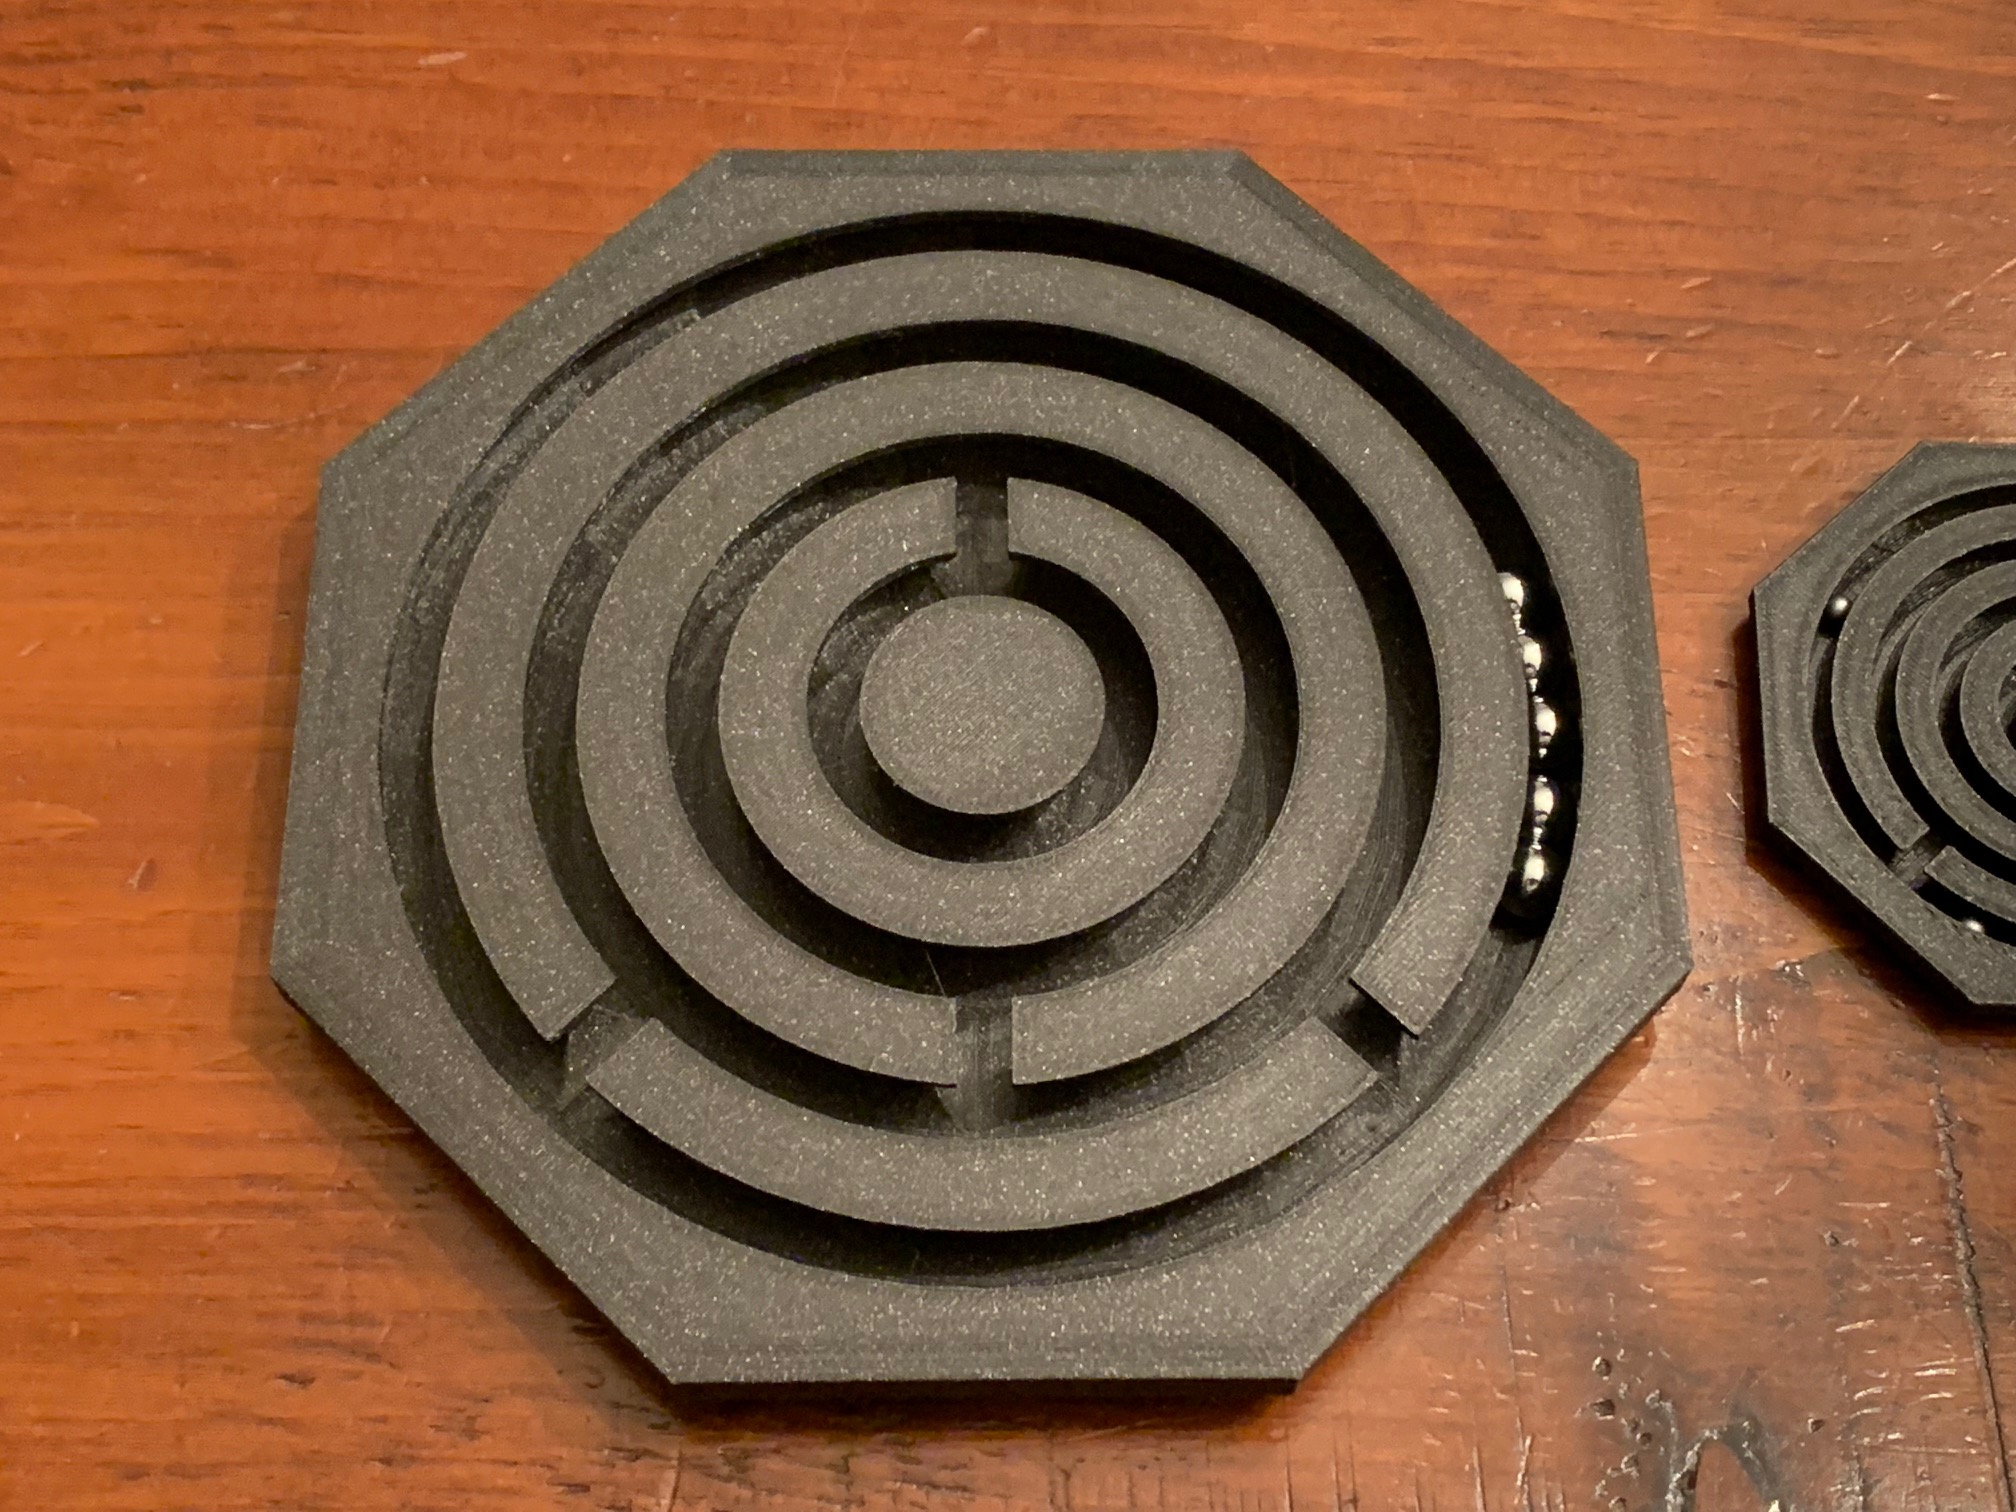
<p>This steel ball puzzle is based on a wood version. The wood versions are built in a way that hides how the steel balls are inserted. We created a 3d printed version and inserted the steel balls mid-print to create the same illusion. The object of the puzzle is to get all of the steel balls into the center ring.</p><p>This project was an attempt by the two of us (dad and son) to see if we could design the item in CAD software. It was also an good excuse to get my son designing on Fusion 360. We both attempted a design, me on Tinkercad and my son on Fusion 360. Ultimately, my version turned out better - my son’s version was misaligned which prevented the balls from rolling smoothly. The Tinkercad version is not nearly as smooth on the inside as the Fusion 360 version, but it works well.</p><p>Provided are two sizes. The pocket sized version is sized for metal BBs (4.6mm) used in BB guns. It measures 78mm x 78mm (3” x 3”). The larger version is sized for 3/8th inch (9.5mm) steel slingshot balls/ammo. It measures 171mm x 171mm (6.7” x 6.7”). The versions are identical except for their dimensions. You could use ball bearings, marbles, or other spherical objects. The steel balls are good because they have sufficient mass to roll smoothly. For different size balls, size the print up or down proportionally.</p><p>I would recommend inserting a pause print about about half way into the top overhang being printed. You could put the steel balls in while the print is ongoing, but IF mid-print you realize you forgot to buy slingshot ammo, AND the store has these dangerous items locked in a glass case, AND there are no employees to open the case, you will be glad you inserted a pause print. There shouldn’t be an issue with the printer hitting the balls as long as you wait until the top overhang is formed half-way. 4 steel balls is a good difficulty level. 5 is more challenging to solve. Any more than that is at your own risk.</p><p>The prints work at all layer heights. The balls will roll smoother and the puzzle is more challenging when lower layer heights are used for the floor. With higher layer heights, the balls tend to stay in the channel created. Using variable layer heights in PrusaSlicer allowed us to print .07 to .10 layer heights for the floor region while keeping the rest of the print at .25. This was the best compromise in performance and print time. Both examples were printed on Prusa Mini+ using Galaxy Black Prusament PLA. The design is intended to be printed without supports.</p>
With this file you will be able to print Steel Ball Puzzle Maze with your 3D printer. Click on the button and save the file on your computer to work, edit or customize your design. You can also find more 3D designs for printers on Steel Ball Puzzle Maze.