STEP Calibration Piece (X, Y and Z axis)
thingiverse
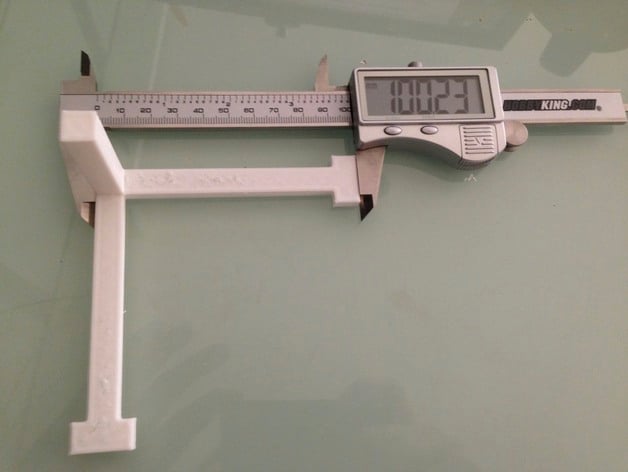
To ensure precise prints, calibrate your printer using this calibration piece that adjusts X,Y, and Z-STEP settings. Measure the 3 sides with a caliper, excluding first layers, then apply the formula to calculate new STEPS values for each axis. Print the object again with updated settings; it should measure 100x100x50mm accurately. Note that PLA and ABS shrinkage varies, so calibrate your printer with your primary material first. Most slicers allow scaling models based on measured deviations. Print at a comfortable speed (e.g., 120mm/s) and use an infill of 10%. Be cautious when identifying X and Y axes post-print, as some printers may have them reversed.
With this file you will be able to print STEP Calibration Piece (X, Y and Z axis) with your 3D printer. Click on the button and save the file on your computer to work, edit or customize your design. You can also find more 3D designs for printers on STEP Calibration Piece (X, Y and Z axis).