 Thingiverse
Stepper Delta Robot
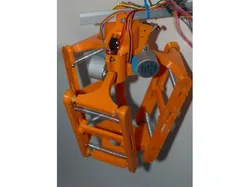
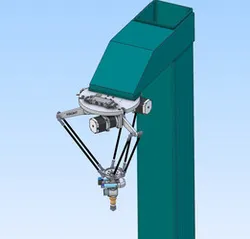
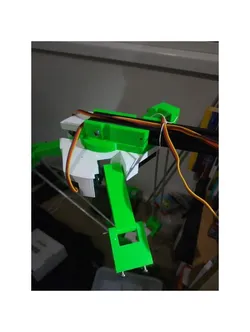
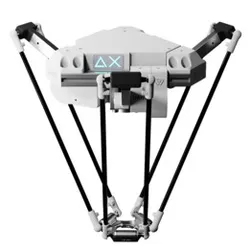
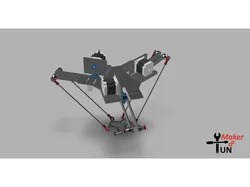
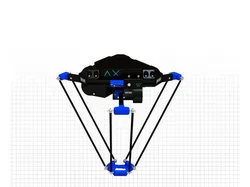
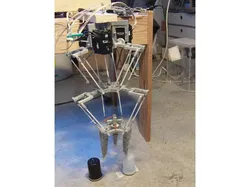
This is a fun little delta robot that is mostly 3D printed with no special parts. The delta robot uses 4 stepper motors to move.https://youtu.be/kSbgZ-DwsjMParts Required1x Arduino UNO1x CNC shield3x 28byj-48 Stepper motor3x Limit switch6x Springs6x M3 nuts30x M3 screws3D printed parts1x base3x arms6x connecting rods3x parallels1x platformPrintingThe parts do not need to be printed with high quality but it helps.Some of the parts of the robot are difficult to print because they are a sphere. When the print starts (depending on printing settings), the spheres do not have much to start printing on. After some experimenting, I worked out it was better to drop the part down into the bed by 0.2-0.3mm (Z=-0.2 or -0.3mm).After the prints finished printing its best to file/sand the sphere and the sphere socket to make them smooth. Avoid taking too much off.How It is AssembledStarting from the top and working down the robot stating with the base. The base is where the motors and limit switches are mounted. The base will also be used to hold the robot while in operation. The limit switch will be used to HOME the robot.After the motors and limit switches are mounted the arms can be attached to the motor. Ensure the arm is the correct way around with notch facing away from the robot.Next is to assemble the connecting rods, the connecting rods are used to connect the arms/motors to the platform. Connect the parallel 3d part to the middle of 2 connecting rods with M3 screws, it will be best if you first drill the parallel 3d part with a 3mm to make the screw more smooth. The parallels will ensure the connecting rods do not rotate out of the sockets.Next, add 2 springs to the connecting rods, 1 at the top and 1 at the bottom, going between each side. The springs will help the spheres of the arms and the platform stay within there socket.After the connecting rods are assembled, they can be attached to the robot. 1 at a time, attach the connecting rod from the arm to the platform. I used a bit of graphite powder on the spheres and sockets to help them slide around easily. The first end of the connecting rods is easy to get in place, the other is not as much. you will need to force each side of the connecting rod a little bit apart and push it into place. try not to pull them too far apart, you don’t want to bend the part. Once in place, the connecting rod should stay in place, they could pop out when the robot puts them in tight angles.The Controller and SoftwareThe controller is an Arduino UNO with a CNC sheld. X, Y and Z Stepper motor drivers are used to control the stepper motors. Each arm has 1 stepper motor and 1 limit switch. The limit switch is connected to the corosponding axis pin and ground (if the stepper motor uses the X axis driver, then it will use the X limit switch)The software is below and requires 2 libraries, DeltaKinematics and AccelStepper. DeltaKinematics is used to calculate the forward and inverse kinematics of the delta robot. The AccelStepper is used to control the stepper motors. Both have links below.Arduino Program: https://tinkersprojects.com/stepper-delta-robot/Delta Kinematics library: https://github.com/tinkersprojects/Delta-Kinematics-LibraryAccelStepper library: https://www.arduinolibraries.info/libraries/accel-stepperGcode library: https://github.com/tinkersprojects/G-Code-Arduino-LibraryKeep up to dateNew Parts will be added, Keep up to date by following:Project page -> https://tinkersprojects.com/stepper-delta-robot/YouTube channel -> https://www.youtube.com/channel/UCaKP_tvYR-g-a7-40U1djMgThis Thing -> https://www.thingiverse.com/thing:4294731My Profile -> https://www.thingiverse.com/haybailes/aboutTwitter -> https://twitter.com/TinkersProjectsSee Other ProjectsHave a look at this and other projects that I have done: https://tinkersprojects.com/
Direct link to the original creator's page
More from tinkersprojects
Similar Models
Model Specifications
Frequently Asked Questions
How do I download Stepper Delta Robot?
Click the "View on Thingiverse" button above to visit the original model page on Thingiverse. You can download the STL file directly from the creator's page for free.
What 3D printer can I use for this model?
This model is compatible with most FDM 3D printers (Creality Ender 3, Prusa MK3S+, Bambu Lab, etc.) and resin printers (Elegoo, Anycubic). Check the original page for recommended print settings and materials.
Is this 3D model free to download?
Yes, this model is available as a free download on Thingiverse. Some creators accept tips or donations.
Can I modify this file?
Check the license (see original page) on the original Thingiverse page. Most STL files can be modified using free software like Blender, TinkerCAD, or Meshmixer.